Want to give your photos a fresh new look by changing colors in Photoshop? Whether you’re tweaking the shade of a shirt, swapping out a background color, or completely transforming an object, knowing how to change color in Photoshop opens up endless creative possibilities.
You don’t need to be a pro or spend hours learning complicated steps—this guide will show you simple, effective ways to adjust colors quickly and precisely. Stick with me, and you’ll soon have the skills to make any color change you want, making your images pop exactly the way you envision.
Ready to dive in? Let’s get started!
Credit: www.youtube.com
Basic Color Change Tools
Changing colors in Photoshop starts with basic tools that anyone can use. These tools help adjust colors quickly and easily. They work for photos, graphics, and other images. Understanding these tools makes editing smooth and fun.
Each tool offers different ways to change colors. Some tools adjust all colors, while others target specific areas. Learning these basics helps you gain confidence in color editing.
Hue/saturation Adjustment Layer
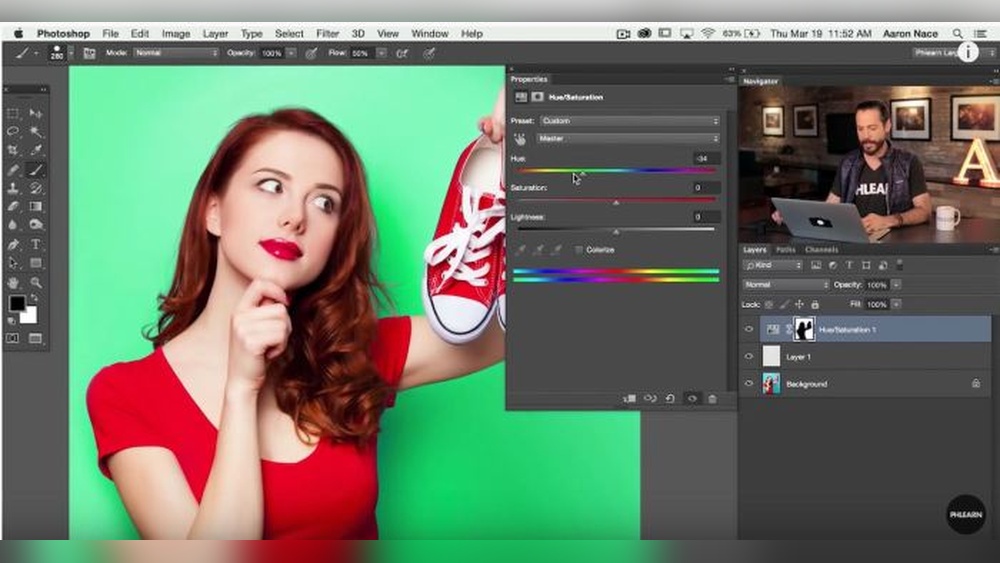
The Hue/Saturation adjustment layer is one of the simplest tools. It changes the color without harming the original image. Open your image in Photoshop, then go to the Layers panel.
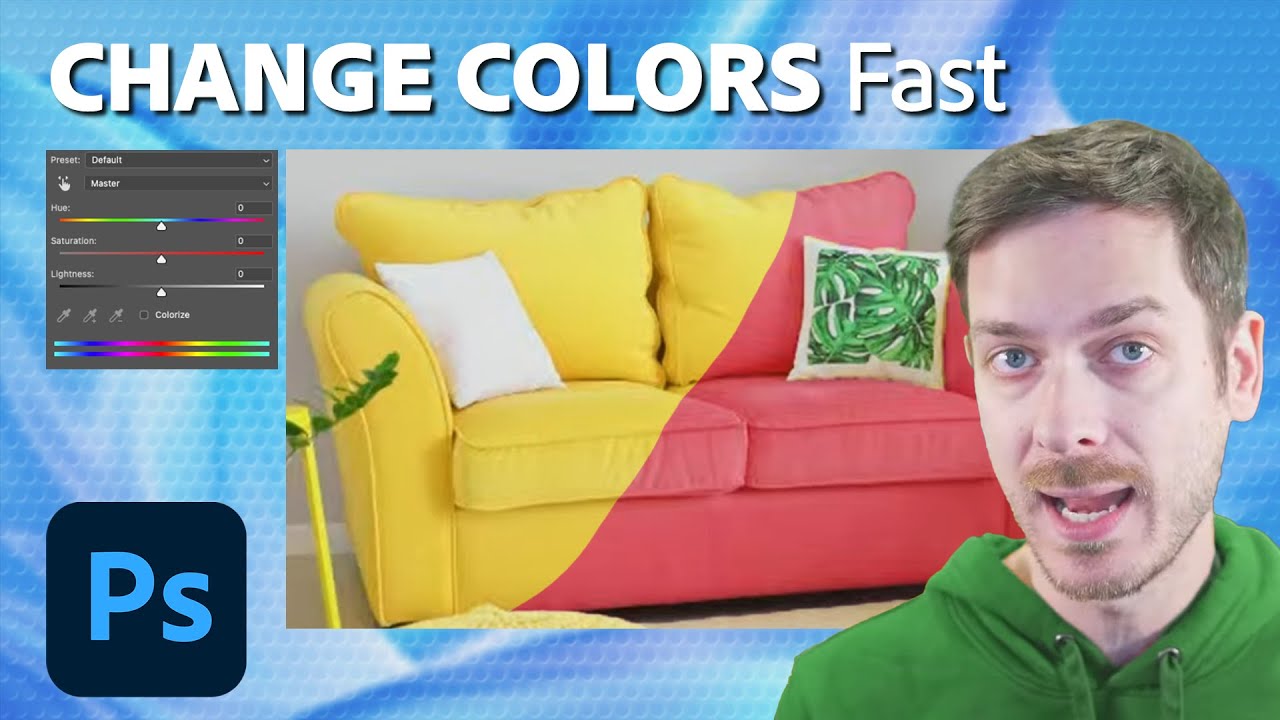
Click the “Create new fill or adjustment layer” icon. Choose “Hue/Saturation” from the list. Use the sliders to change hue, saturation, and lightness. You can also pick a specific color using the hand icon. This tool offers flexible and easy color changes.
Replace Color Tool
The Replace Color tool targets specific colors in an image. Access it by going to Image > Adjustments > Replace Color. Use the eyedropper to select the color you want to change.
Adjust fuzziness to include more or less of the color range. Then, change the hue, saturation, and lightness. This tool works well for precise color swaps in small areas.
Object Selection Tool
The Object Selection tool helps select parts of an image before color change. Find it in the toolbar or press “W”. Click and drag to select the object you want to edit.
After selection, add a Hue/Saturation adjustment layer to change the color. This method keeps color changes limited to the selected object. It gives control and accuracy in editing.
Using Hue/saturation Layers
Using Hue/Saturation layers is a simple way to change colors in Photoshop. This method lets you adjust colors without altering the original image. It keeps your edits flexible and easy to modify later.
Hue/Saturation layers allow you to shift colors, boost saturation, or lighten and darken tones. You can also target specific colors to change, leaving other colors untouched. This makes the process precise and clean.
Creating A Hue/saturation Adjustment Layer
Open your image in Photoshop. Find the Layers panel on the right side. Click the “Create new fill or adjustment layer” icon. It looks like a half-black, half-white circle. Choose “Hue/Saturation” from the menu. A new adjustment layer will appear above your image.
In the Properties panel, use the sliders to change colors. Move the Hue slider to shift all colors in the image. The Saturation slider makes colors stronger or weaker. The Lightness slider brightens or darkens the image. Watch the image as you move the sliders to see changes live.
Click the hand icon with arrows in the Properties panel. Then click the color in your image you want to change. Photoshop will isolate that color range for you. Adjust the sliders to change only that color. This helps keep other colors normal and avoids unwanted shifts.
Using The Mask To Refine Changes
The Hue/Saturation layer comes with a mask by default. Use the Brush tool to paint black on the mask to hide the effect in certain areas. Paint white to reveal the effect. This method helps you limit color changes to specific parts of the image. It keeps your edits clean and controlled.
Applying Replace Color Tool
The Replace Color tool in Photoshop lets you change specific colors easily. It targets colors within an image and swaps them for new hues. This tool works well for simple and quick color edits. It keeps the rest of the image intact. You can find it useful for adjusting clothes, backgrounds, or objects.
Opening The Replace Color Tool
Start by opening your image in Photoshop. Then, go to the top menu and select Image > Adjustments > Replace Color. This opens a small window with options to pick colors and adjust settings. The image preview will show the selected color areas in white and the rest in black.
Selecting The Color To Replace
Click the eyedropper tool inside the Replace Color window. Click on the color you want to change in your image. The white area in the preview shows the selected color range. Use the Fuzziness slider to increase or decrease the selection range. A higher fuzziness includes more similar colors.
Choosing The New Color
Next, click the color swatch labeled Result. This opens the Color Picker. Pick the new color you want to apply. You can adjust the hue, saturation, and brightness here. The image preview updates to show the effect immediately.
Refining The Color Change
Adjust the sliders for Hue, Saturation, and Lightness to fine-tune the new color. Move these sliders slowly to avoid unnatural results. Check the image carefully to ensure the change looks smooth. You can also add or remove colors using the eyedropper tools with plus or minus signs.
Finalizing And Applying Changes
Once satisfied with the new color, click OK to apply the changes. The image updates with the new color applied. You can still undo or adjust this step if needed. Save your work in the desired format to keep the changes.

Credit: phlearn.com
Selecting Objects For Color Edits
Selecting objects is the first step for changing colors in Photoshop. Accurate selection helps to edit colors only where needed. This avoids affecting other parts of the image. Photoshop offers several tools to select objects easily.
Choosing the right selection tool depends on the image complexity and object shape. Simple shapes require less time, while complex images need detailed selection. Good selection improves the quality of color edits and saves time.
Selecting With The Quick Selection Tool
The Quick Selection Tool lets you paint over the area you want. It detects edges automatically. Adjust the brush size for better accuracy. Add or subtract from the selection by holding Shift or Alt keys.
Using The Object Selection Tool
The Object Selection Tool allows you to draw a box or lasso around the object. Photoshop then selects the object inside the area. This tool works well with clear edges and simple backgrounds. Refine the selection using the Select and Mask workspace.
Refining Selections For Better Results
After initial selection, refine edges for smoothness. Use the Select and Mask option to adjust edge smoothness, feather, and contrast. This helps to blend the color change naturally with the rest of the image. Zoom in to check details closely.
Using Color Range For Precise Selection
Color Range selects pixels based on color similarity. Go to Select > Color Range, then click on the color in your image. Adjust the fuzziness slider to include more or fewer shades. This tool is useful for selecting specific colors quickly.
Masking For Precise Edits
Masking is essential for precise color changes in Photoshop. It lets you control exactly where the color adjustment applies. This way, you avoid altering parts of the image you want to keep the same.
Using masks helps create clean and professional edits. Masks work by hiding or revealing parts of a layer. White areas show the effect, while black areas hide it.
Creating A Mask For Color Adjustment
Start by adding a Hue/Saturation adjustment layer. Photoshop automatically adds a white mask to this layer. This mask lets you apply color changes only where needed.
Use the Brush tool to paint on the mask. Painting with black hides the effect, while white reveals it. Adjust brush size and hardness for detailed work.
Refining Edges With Masking
Zoom in on the edges of your subject. Painting carefully helps avoid color spill outside the target area. Use a soft brush for smooth transitions.
The Select and Mask workspace helps refine masks further. Use tools like Feather and Smooth to perfect edges. This step improves the natural look of your color change.
Using Masking With Selection Tools
Make a selection with tools like the Quick Selection or Object Selection. Convert the selection into a mask by clicking the mask icon.
This method applies color changes only inside the selected area. It saves time and improves accuracy for complex shapes.
Targeting Specific Colors
Targeting specific colors in Photoshop allows precise color changes without affecting the entire image. This technique helps enhance photos, fix color issues, or create artistic effects.
Photoshop offers several tools to isolate and adjust certain colors easily. Learning how to target colors saves time and improves your editing accuracy.
Using The Hue/saturation Adjustment Layer
Open your image in Photoshop. Click the “Create new fill or adjustment layer” icon in the Layers panel. Choose “Hue/Saturation” from the list. In the Properties panel, use the hand icon to select the color you want to change in your image. Adjust the Hue slider to shift the color. Use Saturation and Lightness sliders to fine-tune the effect. This method keeps your edits non-destructive and easy to change later.
Replacing Specific Colors With The Replace Color Tool
Go to Image > Adjustments > Replace Color. Use the eyedropper to select the target color in your image. Adjust the Fuzziness slider to control the color range affected. Move the Hue, Saturation, and Lightness sliders to change the selected color. This tool works well for quick swaps but edits destructively on the image layer.
Selecting Colors With The Object Selection Tool
Choose the Object Selection Tool from the toolbar. Drag a rectangle around the area containing the color you want to change. Photoshop automatically selects the object inside the box. Refine the selection with Select > Modify or Select > Select and Mask. Apply a Hue/Saturation adjustment layer to change the color only within the selection. This method works best for complex objects with distinct edges.
Adjusting Hue, Saturation, And Lightness
Adjusting Hue, Saturation, and Lightness in Photoshop is a simple way to change colors. This method lets you alter colors without harming the original image. It gives full control over the color tone, intensity, and brightness. You can target specific colors or change the entire image’s color scheme.
Using these adjustments helps create vivid images or subtle color shifts. It is perfect for beginners and professionals alike. The process is quick and effective for many editing needs.
What Is Hue, Saturation, And Lightness?
Hue changes the color itself. For example, red can become blue or green by adjusting hue. Saturation controls the strength or vividness of the color. Higher saturation makes colors brighter, while lower makes them duller. Lightness adjusts how light or dark the color appears. Increasing lightness makes colors softer, and decreasing it makes them darker.
How To Access The Hue/saturation Tool
Open your image in Photoshop. Go to the Layers panel and click the adjustment layer icon. It looks like a half-black, half-white circle. Select “Hue/Saturation” from the list. This adds a new adjustment layer above your image. The Properties panel will appear with three sliders: Hue, Saturation, and Lightness.
Changing Colors With The Sliders
Move the Hue slider left or right to shift colors across the spectrum. Watch your image change colors instantly. Use the Saturation slider to increase or decrease color intensity. Slide to the right to make colors more vivid. Slide to the left to mute colors. Adjust Lightness to make colors lighter or darker. Small changes can create big effects. Experiment to find the best look.
Click the hand icon with the two arrows in the Properties panel. Then click on the color in the image you want to change. Photoshop isolates that color range. Now, adjusting Hue, Saturation, or Lightness will only affect that color. This helps change one color without touching others. Use the mask to refine the area affected. Paint on the mask with black or white to hide or reveal changes.

Credit: www.youtube.com
Non-destructive Editing Techniques
Non-destructive editing techniques let you change colors without altering the original image. These methods keep your edits flexible and easy to adjust later. You can experiment freely without fear of ruining your work. Photoshop offers several tools to help with this process.
Using Hue/saturation Adjustment Layer
Open your image in Photoshop. Click the “Create new fill or adjustment layer” icon in the Layers panel. Choose “Hue/Saturation” from the menu. Adjust the Hue slider to shift the colors. Use Saturation and Lightness sliders for fine-tuning. Target specific colors by clicking the hand icon, then select the color in your image. This method changes colors while preserving the original photo.
Applying Selective Color Adjustment Layer
Add a Selective Color adjustment layer from the same icon. Choose the color range you want to edit, like Reds or Blues. Slide the Cyan, Magenta, Yellow, and Black controls to adjust the tones. This tool allows precise color correction without affecting other areas. The original image remains untouched.
Working With Layer Masks
Use layer masks to control where your color changes apply. Paint with black on the mask to hide the effect. Paint with white to reveal the effect. This technique lets you limit edits to specific parts. It keeps changes reversible and editable at any time.
Using Smart Objects For Color Changes
Convert your layer into a Smart Object by right-clicking it. Apply color adjustments or filters as Smart Filters. These filters stay editable and can be removed or changed later. Smart Objects protect your original image data during color edits.
Color Replacement Tips
Changing colors in Photoshop can be simple with the right approach. Using the correct tools helps you get clean, natural results. Some tips make color replacement faster and more precise.
Focus on selecting the exact area before changing colors. This avoids color spills on unwanted parts. Adjusting settings carefully also preserves details and texture.
Use The Replace Color Tool
The Replace Color tool targets specific colors in your image. Select it from the Image menu under Adjustments. Click the color you want to change and adjust the fuzziness to include similar shades. Then pick the new color with the Hue, Saturation, and Lightness sliders.
This method works well for simple color swaps and small areas. It keeps the original shadows and highlights intact.
Work With Layer Masks
Layer masks help control where the color changes appear. Apply your color adjustment on a separate layer. Use the mask to paint black over areas you want to protect. White reveals the color change. This technique keeps edits non-destructive and reversible.
Using masks lets you blend colors smoothly into the image. It avoids harsh edges and keeps the photo looking natural.
Adjust Hue/saturation Carefully
Hue/Saturation adjustment layers change color tones without harming the image. Select the target color range using the drop-down menu in the Properties panel. Slide the Hue bar to shift colors. Slight changes often look better than drastic shifts.
Lower the Saturation to soften colors or increase it to make them vibrant. Adjust Lightness to brighten or darken the color. This method works well on photos with clear color separation.
Refine Edges With Selection Tools
Good selections improve color replacement results. Use tools like Quick Selection or Object Selection to outline the area. Refine edges with the Select and Mask workspace. Smooth or feather the selection for a natural border.
Precise selections prevent color bleeding and keep the image sharp. This step is key when changing colors on complex backgrounds.
Selective Color Changes
Selective color changes in Photoshop help you change specific colors without affecting the whole image. This technique is useful for enhancing photos or creating unique designs. It keeps other colors intact and focuses only on the color you want to edit.
Photoshop offers different tools to select and adjust colors precisely. Using these tools, you can control hue, saturation, and brightness for particular colors. It makes color editing clean and professional.
Selecting The Color Range
Start by opening your image in Photoshop. Go to the top menu and choose Select > Color Range. This tool lets you pick the color you want to change. Use the eyedropper to click on the color in your image. Adjust the fuzziness slider to include more or fewer shades of that color.
Once selected, Photoshop creates a mask showing your color choice. This mask helps isolate the color for easy editing.
Using Hue/saturation Adjustment Layer
Create a new Hue/Saturation adjustment layer by clicking the half-black, half-white circle at the Layers panel bottom. Choose Hue/Saturation from the list. In the properties panel, click the dropdown that says “Master” and select the color range you want to edit.
Move the Hue slider left or right to change the color tone. Adjust Saturation to increase or decrease the color’s intensity. Use Lightness to make the color lighter or darker. This method changes only the selected color range.
Refining The Color Mask
Sometimes, the color change affects unwanted areas. Use the layer mask to fix this. Select the mask thumbnail next to your adjustment layer. Paint with a black brush to hide the effect. Paint with white to reveal it again.
Zoom in and carefully brush around edges for clean results. Adjust brush hardness and opacity for smooth transitions.
Frequently Asked Questions
How Do I Change The Color Of An Image In Photoshop?
Open your image in Photoshop. Use a Hue/Saturation adjustment layer to shift colors non-destructively. Adjust Hue, Saturation, and Lightness sliders. For specific colors, use the Replace Color tool or select areas with the Object Selection tool before applying color adjustments.
How Do I Selectively Change Colors In Photoshop?
Open your image in Photoshop. Use the Object Selection tool to select the area. Apply a Hue/Saturation adjustment layer. Adjust Hue, Saturation, and Lightness sliders to change colors selectively. Refine edges using the layer mask and Brush tool for precise color changes.
How Do I Change The Color Of An Object In A Photo?
Open your photo in Photoshop. Use the Object Selection tool to select the object. Add a Hue/Saturation adjustment layer. Adjust the Hue slider to change the color. Refine the mask to limit the color change to the object only. Save your edited photo.
Does Photoshop Have A Recolor Tool?
Yes, Photoshop includes recolor options like the Hue/Saturation adjustment and Replace Color tool. These tools let you change colors easily and precisely.
How Do I Change The Color Of An Image In Photoshop?
Use a Hue/Saturation adjustment layer to shift colors without harming the original image.
What Tool Helps Replace A Specific Color In Photoshop?
The Replace Color tool lets you select and swap a particular color easily.
Can I Change Color Only In One Part Of A Photo?
Yes, use the Object Selection tool to pick the area before adjusting color.
How To Adjust Color Saturation In Photoshop?
Open Hue/Saturation adjustment, then move the Saturation slider to increase or decrease color intensity.
Is It Possible To Change Color Without Damaging The Image?
Yes, adjustment layers let you edit colors non-destructively in Photoshop.
How Do I Select A Color To Change In Photoshop?
Click the hand icon in Hue/Saturation properties, then click the color on your image.
Conclusion
Changing color in Photoshop is simple with the right tools. Use Hue/Saturation for broad adjustments. The Replace Color tool works well for precise changes. Select areas carefully to avoid unwanted edits. Practice these steps to improve your skills. Soon, you will edit colors with confidence and ease.
Keep experimenting to find the best look for your images. Photoshop makes color change quick and flexible for everyone.