Are you ready to take your digital art skills to the next level? The Gray Color Challenge on Krita is a fantastic way to sharpen your understanding of values and shading without getting distracted by colors.
By focusing solely on grayscale, you’ll learn how to create depth, contrast, and mood in your artwork—all essential skills for any artist. In this guide, you’ll discover simple, step-by-step instructions to set up Krita for the challenge, tips to master grayscale painting, and tricks to bring your creations to life.
Stick with me, and by the end, you’ll not only conquer the Gray Color Challenge but also boost your overall painting confidence. Let’s get started!
Setting Up Krita For The Challenge
Setting up Krita correctly is the first step for the Gray Color Challenge. This setup ensures your workspace fits the challenge rules. It helps you focus on grayscale tones without distraction from colors.
Adjusting Krita’s settings allows you to work only in shades of gray. This focus improves your skills in value and contrast. Follow these steps to prepare your canvas and tools.
Creating A New Grayscale Document
Open Krita and click on “File” then “New”. In the new document window, find the “Color Model” option. Select “Grayscale” from the dropdown menu. Set your canvas size and resolution as needed, then click “Create”.
This step sets your document to grayscale mode. Your color palette will now show only gray tones. It limits your colors to shades of black, white, and gray.
Setting Up The Color Selector For Grayscale
Locate the color selector on the right side of the interface. Click on the color wheel to open color options. Since your document is grayscale, the color wheel appears as a gray gradient. You can only pick values from black to white.
Ensure your brush colors stay in gray by double-checking the selector. This helps avoid adding unwanted colors to your artwork.
Adjusting The Brush Settings For Better Control
Click on the brush tool and open the brush editor. Choose brushes that work well with value shading, like soft round brushes. Adjust the opacity and flow to control how the grays blend on your canvas. Experiment with different settings for smooth gradients.
These brush settings help you create smooth transitions between light and dark gray areas.

Credit: krita-artists.org
Creating A New Grayscale Canvas
Creating a new grayscale canvas in Krita is the first step for the Gray Color Challenge. It helps you focus on values and shading without the distraction of color. This method sharpens your understanding of light and dark, essential for strong digital art.
The process is simple and quick. Krita offers built-in settings to start your work in grayscale mode. Follow these steps to set up your canvas correctly and avoid color confusion later.
Create A New Document
Open Krita and click on “File” in the top menu. Select “New” to open the new document window. Here you set the size and resolution of your canvas.
Select Grayscale Color Space
In the new document window, find the “Color Model” dropdown. Choose “Grayscale” instead of RGB or CMYK. This setting limits your palette to shades of gray only.
Adjust Canvas Size And Resolution
Pick the width and height for your canvas. Choose a resolution of at least 300 dpi for clear details. These settings depend on your project needs.
Start Drawing On Grayscale Canvas
Click “Create” to open your new grayscale canvas. Your color selector will now show only gray tones. Begin sketching and shading using values from black to white.
Navigating The Grayscale Color Wheel
The grayscale color wheel in Krita is a simple but powerful tool. It shows shades from black to white, without any color hues. Using it helps artists focus on value and contrast.
Understanding how to move through this wheel is key for the Gray Color Challenge. It allows you to choose the perfect gray tones for your artwork. Let’s explore how to navigate this wheel easily.
Accessing The Grayscale Color Wheel
First, open Krita and create a new image. Choose “Grayscale” as the color space. This sets your color wheel to shades of gray only. The color selector will now show only black, white, and all grays between.
This setting helps keep your colors true to grayscale. It stops accidental color picks that can distract from value study.
Using The Grayscale Slider
The grayscale slider is the main tool for selecting gray tones. Drag it left for darker shades and right for lighter ones. You can see the exact shade preview in the color selector box.
This slider controls value, which is the lightness or darkness of a gray. Value is very important in grayscale art to create depth and form.
Adjusting Brightness And Contrast
Adjust brightness by choosing lighter grays. For more contrast, pick shades far apart on the slider. High contrast makes your image stand out and look dynamic.
Practice selecting grays that balance the image. Use darker grays for shadows and lighter grays for highlights. This creates a realistic look without colors.
Common Issues And Fixes
Sometimes the color wheel stays in color mode by mistake. Check if your image is set to RGB or Grayscale in the menu. Go to Image → Convert Image Colorspace to switch modes.
If stuck in grayscale unintentionally, switch back to RGB mode. This lets you use the full color wheel again.
Adjusting Image Color Space
Adjusting the image color space is a key step in the Gray Color Challenge on Krita. It controls how colors display and behave in your artwork. Choosing the right color space ensures your image looks correct while working in grayscale.
Krita allows easy switching between color spaces. This flexibility helps artists start in grayscale and later add color or keep the monochrome effect.
Understanding Color Spaces In Krita
Color space defines the range of colors your image can use. RGB is common for full color, while Grayscale limits colors to shades of gray. For the Gray Color Challenge, switching to Grayscale is essential.
How To Change The Color Space
Go to the top menu and select Image. Then click on Convert Image Color Space. Choose Grayscale from the list. This converts your image and color selector to gray tones.
Checking The Color Selector
Once the image is in Grayscale mode, the color wheel changes to show only gray shades. This helps you focus on values and contrast without color distractions.
Reverting Back To Rgb
You can switch back to RGB anytime using the same menu. This option helps if you want to add color after completing the grayscale part.
Using Color Filters In Krita
Using color filters in Krita helps you easily create the gray color challenge effect. Filters change how colors appear without altering the original artwork. This feature is perfect for testing tones and values in your drawing.
Color filters let you switch your image view to grayscale. This makes it simpler to focus on shading and light. Krita offers a quick way to apply these filters in just a few clicks.
How To Access Color Filters In Krita
Start by opening your artwork in Krita. Go to the top menu and select Filter. Then choose Adjust and click on Color Filters. A panel will open on the right side of your screen.
Applying The Grayscale Filter
In the color filters panel, find the switch to enable filters. Turn it on to activate the options below. Select Grayscale from the list. Your image will instantly change to shades of gray.
Adjusting The Filter Settings
You can fine-tune the grayscale effect by adjusting sliders in the filter panel. Change brightness or contrast to better see your shading. This helps in improving the overall depth of your artwork.
Turning Off The Color Filter
To return to full color, simply switch off the color filters. Toggle the filter switch back to off. Your original colors will appear again without any changes.

Credit: www.reddit.com
Painting Techniques In Grayscale
Painting in grayscale uses shades of gray to create depth and form. This technique helps artists focus on values without color distractions. It builds a strong foundation for color work later.
Grayscale painting trains your eye to see light and shadow clearly. It improves understanding of contrast and volume. These skills are key for realistic digital art in Krita.
Understanding Value And Contrast
Value means how light or dark a shade is. Contrast is the difference between values. Use high contrast to highlight important areas. Low contrast helps blend shadows smoothly.
Start with a mid-gray base. Add darker shades for shadows and lighter ones for highlights. This creates a balanced and clear image.
Using Brushes For Texture
Krita offers many brush types for different textures. Soft brushes create smooth gradients in shadows. Hard brushes define sharp edges and details.
Experiment with brush opacity and flow to control paint build-up. Layering strokes adds richness to the grayscale painting.
Blending Techniques In Grayscale
Blending smooths transitions between shades. Use the smudge tool or low-opacity brushes for soft edges. Avoid over-blending to keep texture visible.
Work in small areas to maintain control. Blending helps create realistic skin, cloth, and other surfaces.
Building Depth With Layers
Use multiple layers to separate different parts of the painting. Paint shadows on one layer and highlights on another. This method allows easy adjustments without damaging the base.
Layer modes like Multiply and Overlay add depth and contrast. Organize layers clearly for efficient workflow.
Converting Grayscale To Rgb
Converting a grayscale image to RGB in Krita is a key step for adding color to your artwork. Grayscale mode limits your palette to shades of gray, which is perfect for value studies. Switching to RGB unlocks full color options, allowing vibrant painting and effects.
This process is simple and fast. It changes the image’s color model without altering the actual grayscale values. After conversion, you can use Krita’s tools to paint over or adjust colors freely.
How To Convert Grayscale To Rgb In Krita
Open your grayscale image in Krita. Go to the top menu and select Image. Then choose Convert Image Color Space…. In the popup, find and select RGB/Alpha as the new color space. Click OK to apply the change. Your image now supports full color editing.
Why Convert To Rgb For The Gray Color Challenge
The Gray Color Challenge starts in grayscale to focus on values. Converting to RGB lets you add hues while keeping the gray values intact. This step makes blending colors easier and keeps your artwork balanced and realistic.
Tips After Conversion
After converting, use layers to add colors without losing grayscale details. Set layer modes to Color or Overlay to blend colors naturally. Save your file in Krita’s native format (.kra) to keep layers and settings.

Credit: krita-artists.org
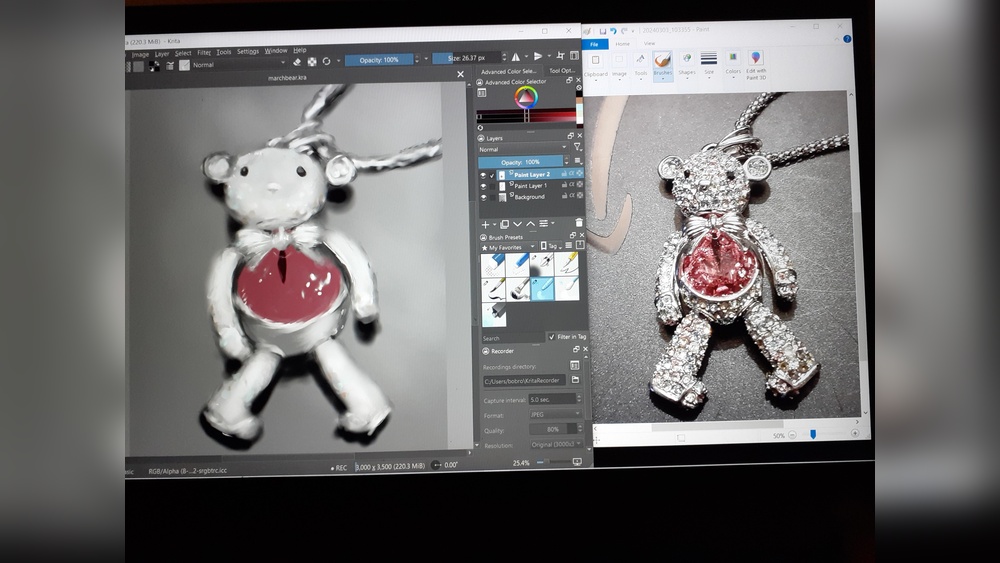
Adding Color With Clipping Groups
Adding color with clipping groups in Krita helps you apply color neatly over grayscale shading. This technique keeps your colors inside the shaded areas. It saves time and keeps your work clean.
Clipping groups create a mask based on the layer below. You paint on the clipped layer, but color only shows where the base layer has pixels. This is perfect for the gray color challenge. You keep the grayscale shadows and highlights visible while adding vibrant colors on top.
Creating A Clipping Group In Krita
First, create a new paint layer above your grayscale shading. Right-click the new layer and select “Group with Layer Below.” This links the paint layer to the shading layer. Now, paint on the upper layer, and color only appears over the shading.
Choosing Colors For The Clipping Group
Select colors that enhance your grayscale work. Use soft brushes to blend colors smoothly. The grayscale shading will show through, giving depth and volume. Keep colors simple to maintain the challenge’s focus.
Adjusting Opacity And Blending Modes
Change the paint layer’s opacity to soften the colors. Try different blending modes like “Overlay” or “Multiply.” These modes mix colors with grayscale tones naturally. Experiment until you find the best look for your artwork.
Cleaning Up Edges Within Clipping Groups
Use an eraser on the clipping layer to fix color outside shapes. Zoom in to clean small areas. This keeps your image sharp and tidy. Clipping groups make this easy, as you only affect the colored layer.
Fine-tuning With Color Balance And Curves
Fine-tuning your artwork after completing the gray color challenge in Krita sharpens its overall look. Using tools like Color Balance and Curves helps adjust tones and contrast. These tools bring subtle shifts that make your image more dynamic and balanced.
Adjusting Shadows, Midtones, And Highlights With Color Balance
Open the Color Balance tool to tweak shadows, midtones, and highlights separately. Move sliders toward cyan, magenta, or yellow to change color tones. This step adds depth and corrects any unwanted color casts in the grayscale image. Small changes can make a big difference in mood and clarity.
Enhancing Contrast Using Curves
Curves let you control brightness and contrast precisely. Drag the curve line up to brighten or down to darken specific areas. Focus on the midtones to keep details sharp and the image lively. Adjusting curves improves the image’s visual impact without losing subtle gray values.
Combining Both Tools For Balanced Results
Use Color Balance first to set the color tone, then refine with Curves. This order keeps your adjustments clean and natural. Test small changes and view the image often to avoid over-editing. Balanced tones and contrast create a pleasing, professional finish to your gray color challenge artwork.
Tips For Mastering The Gray Color Challenge
The Gray Color Challenge on Krita helps improve your understanding of values and shading. It pushes you to focus on light, shadow, and depth without using colors. This practice trains your eyes to see contrasts clearly.
Use these tips to get the best results and grow your skills quickly. They will help you work smarter and create more striking grayscale art.
Understand Value And Contrast
Grayscale art depends on value, not color. Values are different shades of gray from black to white. Pay close attention to where the light hits your subject. Create clear contrasts to show depth and form.
Use Krita’s Grayscale Color Space
Start your project in grayscale mode in Krita. This limits your palette to gray tones only. It helps you focus on value and avoid color distractions. You can convert your image back to RGB later if needed.
Work With Layers And Blending Modes
Use layers to separate different parts of your drawing. Try different blending modes to control shadows and highlights. Layers let you adjust details without ruining your work.
Practice Smooth Gradients
Gradients create smooth transitions between light and dark. Use Krita’s brush settings to blend shades softly. This technique adds realism to your grayscale drawings.
Use Reference Images
Look at black and white photos or artwork for inspiration. Study how light and shadow define shapes. References guide your hand and improve accuracy.
Experiment With Different Brushes
Try various brushes to find what works best for shading. Soft brushes create gentle shadows. Hard brushes add sharp edges and details. Switch brushes to add texture and interest.
Take Breaks And Review Your Work
Step away from your drawing now and then. Fresh eyes spot mistakes and areas to improve. Review your values and adjust contrasts to enhance your piece.
Frequently Asked Questions
How Do I Turn On The Grayscale Color Filter?
Open your device’s settings and find Accessibility or Display options. Locate Color Filters, toggle it on, then select Grayscale.
Why Is My Krita Color Wheel Grey?
Your Krita color wheel appears grey because your image is set to grayscale mode. Change it to RGB via Image > Convert Image Colorspace to restore full color.
Does Krita Have A Color Picker?
Yes, Krita includes a built-in color picker tool for selecting and sampling colors easily from your canvas or palette.
How To Change Color Scheme In Krita?
Open the Palettes docker in Krita. Click the icon at the bottom left to see default palettes. Select one or import a custom palette file to change the color scheme.
What Is The Gray Color Challenge On Krita?
It is a drawing exercise using only gray tones to practice shading and values.
How Do I Start The Gray Color Challenge In Krita?
Create a new image and set the color space to grayscale before drawing.
Why Is My Krita Color Wheel Only Showing Gray?
Your image is set to grayscale; switch the color space to RGB to fix it.
Can I Switch From Grayscale To Color In Krita?
Yes, use Image > Convert Image Colorspace and select RGB to add colors.
How To Turn On The Grayscale Filter In Krita?
Go to the menu, open Color Filters, enable the filter, and choose grayscale.
Does Krita Have A Color Picker For Grayscale?
Yes, the color picker works with grayscale shades when your image is in grayscale mode.
Conclusion
Trying the Gray Color Challenge on Krita helps improve your shading skills. It teaches you to focus on light, shadow, and depth. Using only gray tones sharpens your eye for detail. This challenge is simple but effective for beginners and pros.
Practice often to see steady progress in your digital art. Keep experimenting and enjoy the process of creating grayscale art. Your Krita experience will become more fun and rewarding. Give it a try and watch your skills grow!