Choosing the right colors in Paint.NET can transform your digital artwork from ordinary to eye-catching. But if you’re new to this powerful, free image editing tool, figuring out how to select and apply colors might feel confusing.
Don’t worry—you’re about to discover simple, clear steps that put you in full control of your color choices. Whether you want to match a specific shade, create smooth gradients, or experiment with new palettes, mastering color selection will unlock endless creative possibilities.
Keep reading, and you’ll learn exactly how to pick colors in Paint. NET like a pro—making your projects look polished and vibrant every time.
Color Picker Tool Basics
The Color Picker Tool in Paint.net helps you choose exact colors from your image or canvas. It simplifies the process of selecting and matching colors. Understanding its basics will improve your editing efficiency.
This tool allows you to sample any color visible on your screen. You can then use that color for painting, filling, or other editing tasks. Learning how to use the Color Picker Tool is essential for precise color work.
What Is The Color Picker Tool?
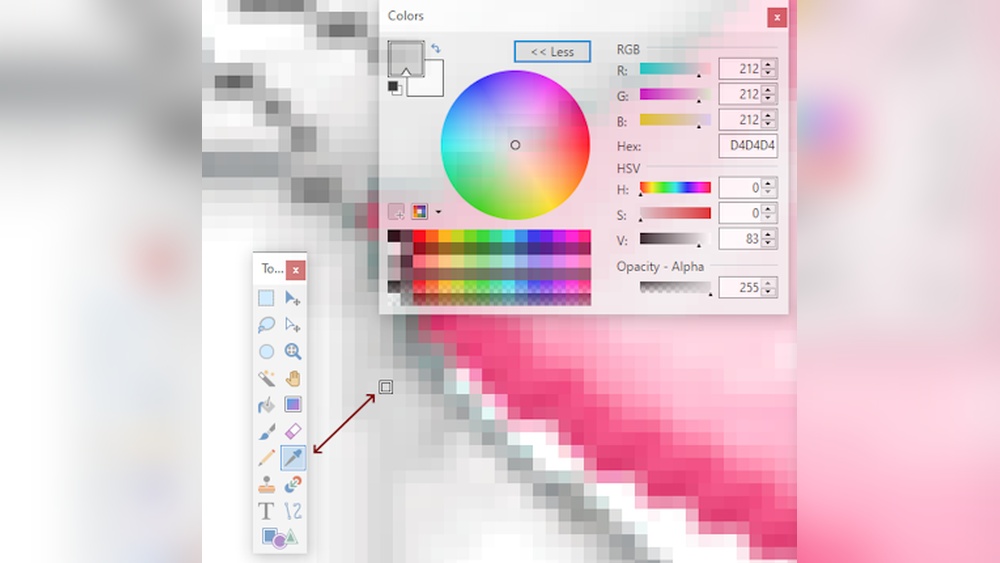
The Color Picker Tool samples colors from your image or workspace. It lets you select a color by clicking on the desired area. The chosen color appears in the primary color box for easy use.
How To Activate The Color Picker Tool
Select the Color Picker Tool from the toolbar on the left side of Paint.net. You can also press the shortcut key “K” to activate it quickly. Using the shortcut saves time during editing.
Using The Color Picker On Layers
You can pick colors from a specific layer or the entire image. Hold the Ctrl key to sample colors only from the active layer. This feature is helpful when working with multiple layers.
Adjusting The Color Sampling Size
Paint.net lets you sample a single pixel or an average of nearby pixels. Choose a larger sample size to get a more balanced color. This option reduces color noise from small details.
Applying The Picked Color
After picking a color, it automatically becomes your primary color. You can use it immediately with brushes, shapes, or fills. This feature ensures you work with the exact color you need.

Credit: effectphoto.blogspot.com
Using Keyboard Shortcuts
Using keyboard shortcuts in Paint.NET speeds up the color selection process. It lets you work faster without switching tools. Shortcuts help you pick and switch colors with ease. This makes editing smoother and more efficient.
Using The Color Picker Shortcut
Press the K key to activate the Color Picker tool. Click anywhere on your image to select that color. This shortcut saves time compared to selecting the tool manually. It instantly sets the primary color to the one you pick.
Switching Between Primary And Secondary Colors
Press X to swap the primary and secondary colors. This shortcut helps when you want to toggle between two colors quickly. It avoids the need to open the color palette each time.
Resetting Colors To Default
Press D to reset colors to default black and white. This is useful when you want to start fresh with basic colors. It saves time from manually picking black and white.
Opening The Colors Window
Press F8 to open or close the Colors window. This shortcut gives quick access to advanced color options. It helps adjust hues, saturation, and brightness fast.
Sampling Colors From Images
Sampling colors from images helps you pick exact shades quickly. It is useful when you want to match colors from photos or artworks. Paint.NET offers a simple way to sample colors directly from your image. This method saves time and ensures color accuracy.
Using the color sampler allows you to copy colors from any part of your image. You can use these colors to paint, fill, or create designs that blend perfectly. This technique is ideal for editing photos or creating graphic art.
How To Use The Color Picker Tool
Select the Color Picker tool from the toolbar or press the shortcut key. Move your cursor over the image to see the color preview. Click on the exact spot to sample the color. The chosen color will appear in the primary color box.
Sampling Colors From Specific Layers
Paint.NET lets you choose colors from active layers only. Hold the Ctrl key while clicking to sample colors from the selected layer. This helps avoid picking colors from hidden or unwanted layers. It gives more control during editing.
Adjusting Sampled Colors
After sampling, you can modify the color in the Colors window. Change brightness, saturation, or hue to fit your needs. This flexibility helps create the perfect shade for your project. Always test colors before applying widely.
Working With Color Palettes
Working with color palettes in Paint.NET helps you keep your colors organized. It makes creating art easier and faster. Palettes store colors you use often. This way, you can quickly pick the right shade without guessing or repeating steps.
Using palettes also helps keep your work consistent. You can match colors across different parts of your design. Paint.NET supports custom palettes, so you can save your favorite color sets. This is helpful for projects with specific color needs.
Creating A Custom Palette
To create a palette, open the Colors window in Paint.NET. Click the palette icon to open the palette panel. Select “Add New Palette” and give it a name. Now, you can add colors by picking them with the color picker tool. Save colors by clicking the “Add to Palette” button. This stores your colors for easy access later.
Using Built-in Palettes
Paint.NET includes several built-in palettes. These cover common color themes like web colors, grayscale, and more. Access them from the palette dropdown menu. Choose a palette that fits your project style. Using built-in palettes saves time and ensures color harmony.
Importing And Exporting Palettes
You can import palettes created by others or export your own. To import, open the palette menu and select “Import Palette.” Choose the palette file from your computer. Export your palette by selecting “Export Palette” in the same menu. Sharing palettes helps collaborate and reuse color schemes.
Organizing Palettes For Efficiency
Keep your palettes organized by naming them clearly. Group similar palettes together. Remove unused colors to reduce clutter. A clean palette panel speeds up your workflow and improves focus. Regularly update your palettes to match your current projects.
Adjusting Colors Manually
Adjusting colors manually in Paint.NET gives you full control over your image’s appearance. You can change the hue, saturation, brightness, and more to fit your exact needs. This process lets you create unique looks and correct colors that don’t look right.
Manual adjustments are simple and effective. You can use sliders and color wheels to see changes in real time. This helps you find the perfect color balance quickly. Let’s explore how to adjust colors manually step by step.
Accessing The Colors Window
Start by opening the Colors window in Paint.NET. Click on the “Window” menu and select “Colors.” This panel shows all the color options. You can pick colors, adjust sliders, or enter values here.
Using The Hue, Saturation, And Lightness Sliders
Hue changes the overall color tone. Moving the slider shifts colors through the spectrum. Saturation controls the intensity. Lower saturation makes colors duller, higher makes them vivid. Lightness adjusts brightness. Slide left for darker, right for lighter colors.
Fine-tuning With The Rgb Sliders
RGB sliders let you adjust red, green, and blue levels separately. This method offers precise color control. Increase or decrease each color to create new shades. It’s useful for matching specific color codes or correcting color casts.
Using The Color Wheel For Quick Selection
The color wheel offers a visual way to pick colors. Click anywhere on the wheel to select a base color. Adjust the brightness slider below the wheel to lighten or darken the shade. This tool helps find colors fast and intuitively.
Saving Custom Colors
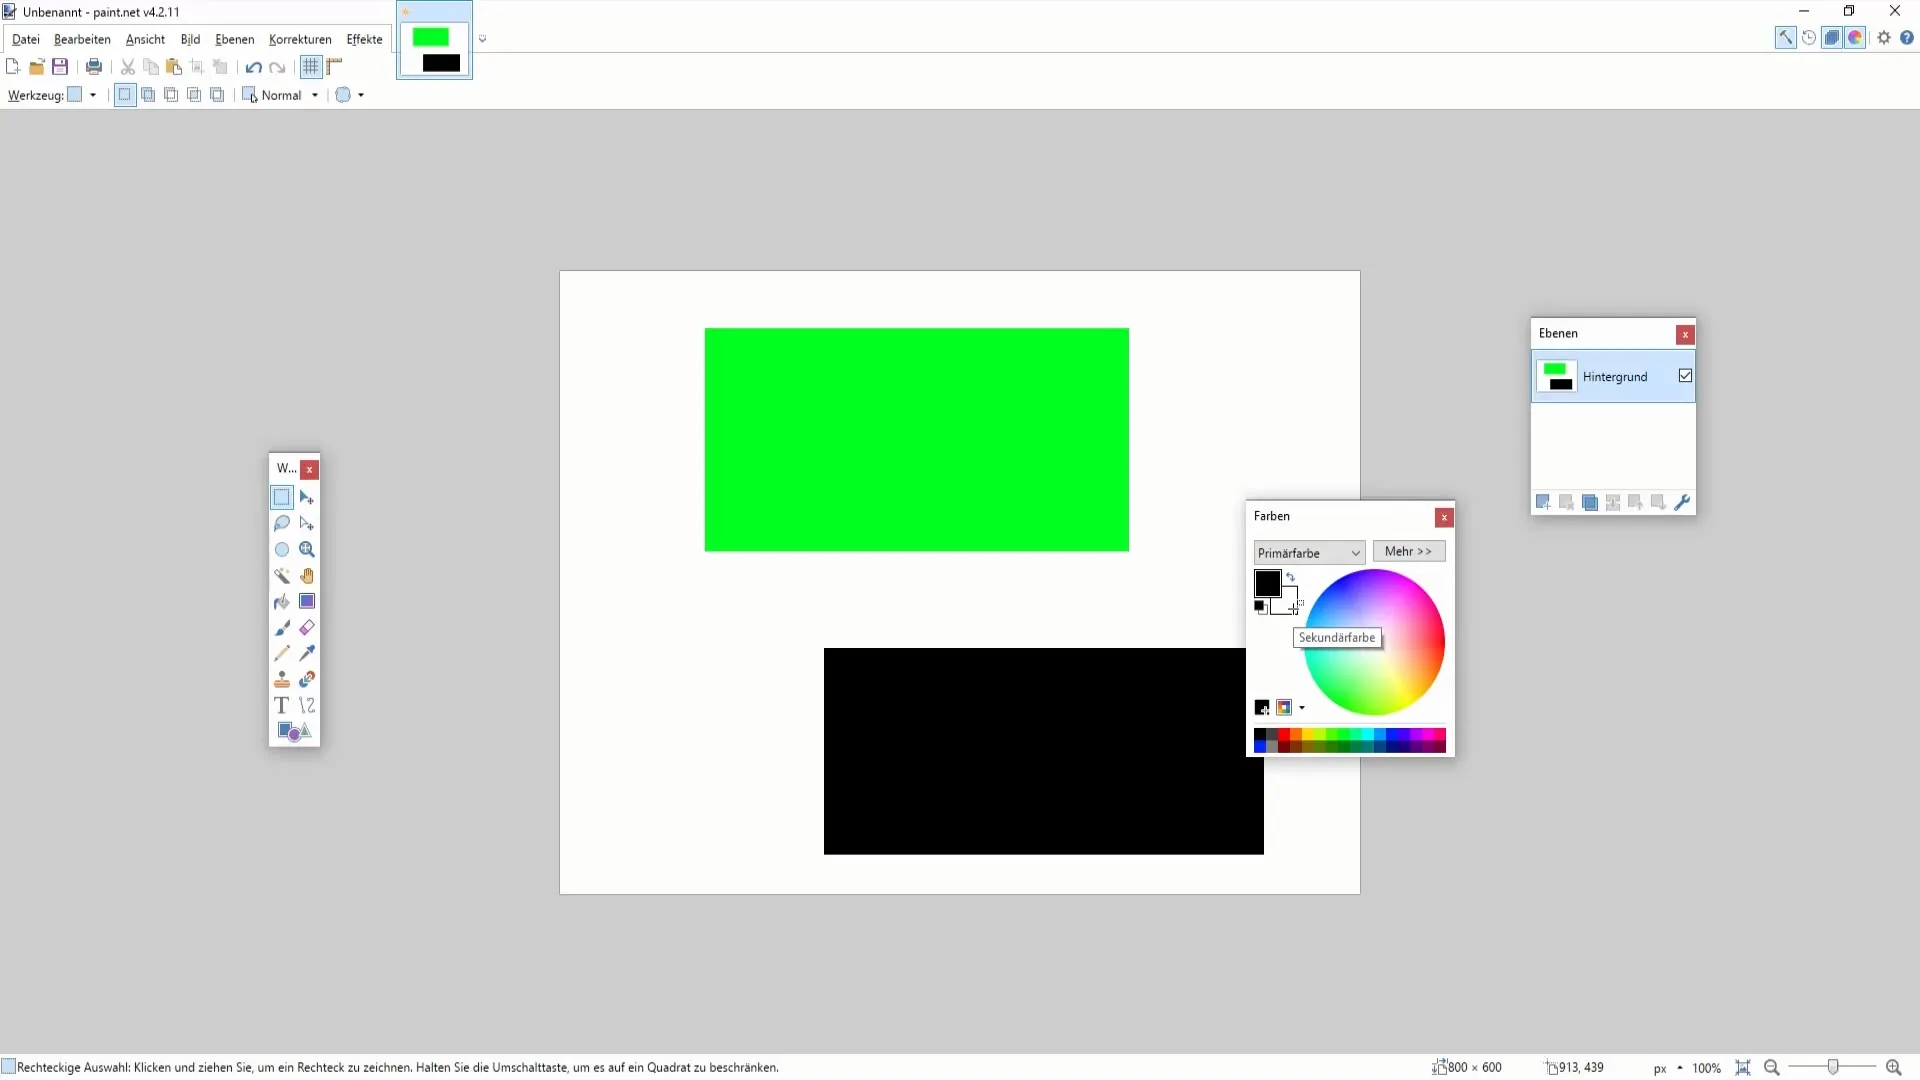
After adjusting, save your custom colors for future use. Click the small squares below the color wheel to store your choice. This saves time when you want to reuse colors in the same project or others.
Credit: www.tutkit.com
Applying Colors To Layers
Selecting colors in Paint. NET starts by opening the Colors window and choosing from the palette or using the eyedropper tool. Applying colors to layers allows precise edits by targeting each layer individually. This method keeps your design organized and easy to adjust.
Applying colors to layers in Paint.NET lets you build detailed images easily. Each layer acts like a separate sheet of transparent paper. You can paint on one layer without changing others.
This method helps keep your work organized. It also makes editing parts of your image simpler. You can add, change, or remove colors on any layer freely.
Choosing The Active Layer
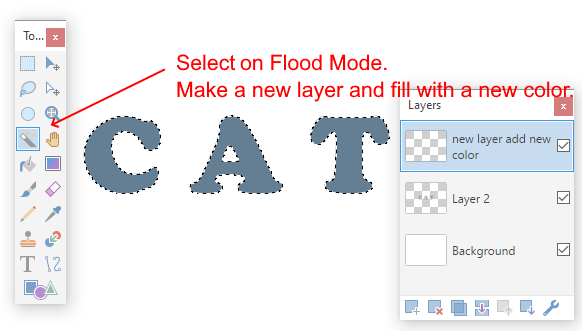
Start by selecting the layer you want to color. Look for the Layers window on the right side of the screen. Click on the layer’s name to activate it. Only the active layer will change when you paint.
Using The Paint Bucket Tool
Pick the Paint Bucket tool from the toolbar. This tool fills an area with the chosen color quickly. Click inside the area you want to fill on the active layer. The color will spread only within that space.
Painting With The Brush Tool
Select the Brush tool to add color manually. Choose a brush size from the toolbar above. Then click and drag on the active layer to paint. This tool works well for detailed coloring and shading.
Adjusting Layer Opacity
Layer opacity controls how transparent your colors look. Find the opacity slider in the Layers window. Move it left to make colors lighter and more see-through. Slide right for solid, strong colors.
Using Layer Blend Modes
Blend modes change how layers mix colors. Click the drop-down menu above the opacity slider. Choose from options like Multiply or Overlay. Each mode blends colors differently to create effects.
Matching Colors Across Projects
Matching colors across projects in Paint.NET helps keep your work consistent and professional. It creates harmony between different images or parts of the same project. This skill is useful for designers, artists, and anyone who works with digital art regularly.
Using the same colors exactly can be tricky without the right tools. Paint.NET offers simple ways to pick, save, and reuse colors. These methods make color matching quick and accurate.
Using The Color Picker Tool
The Color Picker tool grabs colors directly from your image or another project. Click on the tool, then click any color on the canvas. The selected color appears in your color palette. This method ensures you get the exact shade you want.
Saving Colors In The Palette
Save frequently used colors in the palette for easy access. After picking a color, click the small square in the palette to save it. This step helps you reuse colors without searching again. It keeps your color choices organized.
Copying Color Codes
Copy color codes to match colors between projects exactly. In Paint.NET, you can see the HEX or RGB value of a color. Write down or copy these codes and enter them in new projects. This technique guarantees color precision every time.
Tips For Accurate Color Selection
Selecting the right color in Paint.NET is key to creating great designs. Accurate color choice helps your project look clear and professional. Use these tips to pick colors that match your vision perfectly. These methods improve your color precision and save time.
Use The Color Picker Tool Precisely
The Color Picker tool helps you select colors from your image or palette. Click carefully on the area you want to sample. Hold the Ctrl key while clicking to pick colors only from the active layer. This avoids mixing colors from other layers.
Work With Rgb And Hex Codes
Paint.NET allows entering color codes directly. Use RGB sliders or type HEX codes for exact color values. This method is useful for matching brand colors or digital standards exactly. Copy the code from your reference and paste it into Paint.NET.
Adjust Colors Using The Palette Window
The Palette window shows saved colors and presets. Add your favorite colors here for quick access. Adjust brightness and saturation sliders to refine the color. This helps keep your project colors consistent and easy to reuse.
Zoom In For Detailed Color Selection
Zoom in on your image to pick colors from small details. This increases accuracy, especially for complex images. Use the scroll wheel or zoom buttons to get close. The clearer view helps avoid picking wrong shades.
Use Layers To Test Colors Safely
Create a new layer to test color changes. This lets you try different colors without altering the original image. Toggle the layer visibility to compare changes. Use this technique to find the best color fit before finalizing.
Troubleshooting Color Tool Issues
Troubleshooting color tool issues in Paint.NET helps you avoid frustration. Color tools sometimes behave oddly or don’t work as expected. This section guides you through common problems and fixes. It ensures smooth color selection and editing.
Resetting The Color Palette
Sometimes colors don’t display correctly in the palette. Resetting the color palette can fix this. Go to the settings menu and choose to reset or restore default colors. This clears any glitches and refreshes the palette.
Fixing The Color Picker Tool
The color picker might select wrong colors or stop working. Check if you are using the correct shortcut key, usually the “Ctrl” key while clicking. Also, confirm you are picking colors from the correct layer. Selecting from the wrong layer can cause confusion.
Dealing With Missing Color Or Layer Tabs
Sometimes the color or layer tabs disappear from the interface. To restore them, open the “Window” menu and enable the missing tabs. This brings back the color and layer panels for easy access.
Checking For Software Updates
Outdated Paint.NET versions may cause color tool errors. Check for updates regularly and install the latest version. Updates often fix bugs and improve tool performance.
Reinstalling Paint.net
If problems persist, consider reinstalling the software. Uninstall Paint.NET, then download the newest version from the official site. A fresh install can solve deeper software conflicts affecting color tools.
Credit: forums.getpaint.net
Enhancing Workflow With Plugins
Enhancing your workflow in Paint.NET becomes easier with the use of plugins. Plugins add extra tools and features that are not available by default. They help you select and manage colors more efficiently. This makes your painting or editing process smoother and faster.
Many plugins focus on color selection and palette management. They offer options like advanced color pickers, palette saving, and color harmonies. Using these plugins can save time and improve your design quality.
Choosing The Right Color Picker Plugin
Color picker plugins offer more precise control over color selection. They allow you to pick colors from multiple layers or outside the canvas. Some plugins let you zoom in to select a single pixel color easily. This helps in getting the exact shade you want.
Using Palette Management Plugins
Palette management plugins help organize and save your favorite colors. You can create custom palettes for different projects. These plugins allow you to quickly switch between palettes. This reduces the time spent on finding the right color again.
Applying Color Harmonies With Plugins
Color harmony plugins suggest color combinations that look good together. They use rules like complementary or analogous colors. This helps you create balanced and pleasing designs. These plugins guide you in choosing colors that match well.
Frequently Asked Questions
What Is The Shortcut For Color Picker In Paint Net?
The shortcut for the color picker in Paint. NET is holding the Ctrl key and clicking on the desired color in the image. This selects the color for use in your project instantly.
How Do I Select A Color On Paint?
To select a color in Paint, click the color palette or use the Eyedropper tool to pick a color from the image. Adjust the chosen color using the color wheel or sliders for Hue, Saturation, and Brightness.
How To Select Paint Colors?
Select paint colors by drawing inspiration from existing decor and desired mood. Test large samples on walls under different lighting. Match undertones with room elements for cohesion. Choose colors based on room function and size. Start with one room and ensure colors flow between spaces.
Does Paint Have A Color Picker?
Yes, Paint. NET has a color picker tool. Hold the Ctrl key and click on any pixel to select its color instantly.
How Do I Select Colors In Paint.net Easily?
Use the Colors window or the Color Picker tool to pick your desired color quickly.
What Is The Shortcut For The Color Picker In Paint.net?
Hold the Ctrl key and click on the image to pick a color directly from it.
How Can I Save Custom Colors In Paint.net?
Add colors to the palette by clicking the small arrow next to the color box and saving your choice.
How Do I Use The Color Palette In Paint.net?
Open the Colors window and select colors from the predefined palette or create your own.
Can I Pick Colors From Different Layers In Paint.net?
Yes, hold Ctrl and click on the active layer to pick colors only from that layer.
How Do I Adjust Color Shades In Paint.net?
Use the Hue, Saturation, and Lightness sliders in the Colors window to modify the shade.
Conclusion
Choosing colors in Paint. NET becomes easy with simple steps and practice. Use the color picker tool to match exact shades quickly. Experiment with the palette to find the best tones for your project. Keep your color choices balanced for pleasing results.
Remember, testing colors on your canvas helps avoid mistakes. Stay patient and enjoy the creative process. Color selection improves with time and attention. This skill makes your artwork more vibrant and professional. Keep exploring Paint. NET’s tools to enhance your designs.