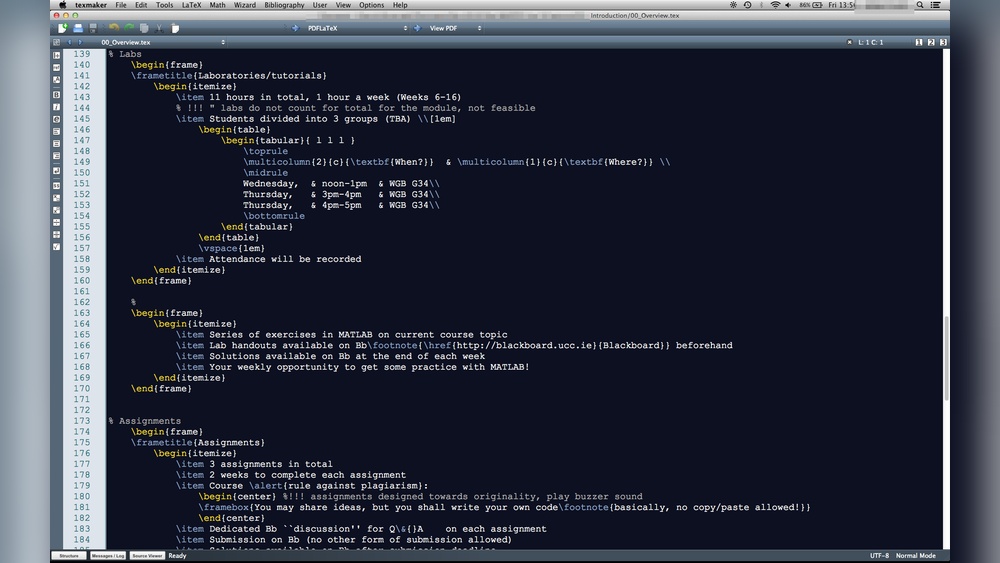
Want to make your text stand out in Textstudio? Changing the color of your text is a simple way to add personality and clarity to your documents.
Whether you’re working on a presentation, report, or creative project, knowing how to change text color can transform your work from plain to eye-catching. In this guide, you’ll discover easy steps to customize your text color quickly. By the end, you’ll be able to highlight key points, organize your content better, and make your writing pop—all in just a few clicks.
Ready to bring your text to life? Let’s dive in!
Textstudio Color Options
TextStudio offers several ways to change the color of your text. These options help customize your documents and make them more visually appealing. Understanding the color settings in TextStudio is key to enhancing your work quickly and easily.
Changing Text Color
To change the text color, first select the text you want to modify. Then, open the color menu usually found in the toolbar. Choose a color from the palette or enter a custom color code. The selected text will update instantly to your new color choice.
Using Predefined Color Themes
TextStudio includes predefined color themes for quick styling. These themes apply consistent colors across your text elements. Pick a theme from the theme menu to give your document a professional look without much effort.
Custom Color Palettes
For more control, create a custom color palette. Add your favorite colors to this palette for easy reuse. This feature saves time and keeps your document colors consistent throughout your project.
Applying Color To Different Text Elements
TextStudio lets you apply colors to various text parts like headings, body, and links. Select the element type and assign a color. This method helps organize information and improves readability by using color to highlight important sections.
Selecting Text To Recolor
Selecting text to recolor in Textstudio is the first step to customizing your document’s look. You can change the color of a single word, a sentence, or a whole paragraph. This section guides you through easy ways to highlight the text you want to recolor.
Precise selection helps you apply color only where you need it. This keeps your document neat and clear. Follow the steps below to select text quickly and accurately.
Selecting A Single Word
To select one word, double-click it with your mouse. The word will become highlighted. This method is fast and works well for small changes.
Selecting A Sentence Or Phrase
Click at the start of the sentence or phrase you want to change. Hold down the left mouse button and drag to the end. Release the button to highlight the text. You can also use the Shift key with arrow keys to adjust the selection.
Selecting An Entire Paragraph
Triple-click anywhere in the paragraph to select it all. This method is useful if you want to recolor large sections quickly.
Selecting Multiple Non-adjacent Texts
Hold the Ctrl key (Cmd on Mac) and click to select different words or phrases. This lets you recolor multiple parts at once without changing everything in between.
Accessing Color Tools
Accessing color tools in Textstudio is simple and quick. These tools let you change your text color with ease. Understanding where to find these options saves time and helps create vibrant documents.
Textstudio offers multiple ways to access color settings. Each method suits different needs, whether you want to change a word, a sentence, or the whole paragraph. Below are clear steps to find these tools.
Using The Toolbar To Find Color Options
The toolbar at the top of Textstudio contains many useful features. Look for the text color icon, usually represented by a letter “A” with a color bar beneath it. Clicking this icon opens a palette with various colors. You can select the color you want and apply it directly to your selected text.
Accessing Color Tools Via The Format Menu
The Format menu provides additional text customization options. Click on “Format” in the menu bar, then select “Text Color” or a similar option. This opens a dialog box where you can pick standard or custom colors. This method works well for precise color adjustments.
Using Keyboard Shortcuts For Quick Color Changes
Textstudio supports keyboard shortcuts to speed up your workflow. For example, pressing certain keys may open the color picker instantly. Check the program’s help guide to learn these shortcuts. Using shortcuts helps you change colors faster without navigating menus.

Credit: www.textstudio.com
Applying Solid Colors
Applying solid colors to text in Textstudio is simple and effective. Solid colors make your text stand out clearly. This method lets you pick one color for your entire text. It works well for headings, highlights, or any text you want to emphasize.
Follow these steps to apply solid colors quickly and easily. The process does not require advanced skills. You can change colors anytime to match your design needs.
Selecting The Text To Color
First, highlight the text you want to change. Click and drag your mouse over the words. Make sure only the text you want is selected. This step ensures the color applies correctly.
Opening The Color Picker
Look for the color icon in the toolbar. It usually looks like a paint bucket or a color square. Click on this icon to open the color picker. This tool lets you choose from many colors.
Choosing Your Solid Color
Use the color picker to find your desired shade. You can click anywhere on the color palette. You can also enter a color code if you know it. The preview shows how your text will look.
Applying The Color To Text
After choosing the color, click “Apply” or simply close the picker. Your selected text changes to the new solid color. If the color does not appear, try selecting the text again and repeat.
Using Gradient Effects
Using gradient effects on text adds depth and style. It makes your words stand out with smooth color transitions. TextStudio offers easy tools to apply these effects. You can create visually appealing titles and highlights quickly.
How To Apply Gradient Effects On Text
First, select the text you want to change. Then, open the color settings in TextStudio. Choose the gradient option instead of a solid color. Pick two or more colors for the gradient. Adjust the angle or direction to fit your design. The gradient will fill your text smoothly.
Customizing Gradient Colors
You can customize the gradient by adding multiple colors. Use the color picker to choose shades that blend well. Adjust each color stop to control where the color changes. This creates a unique and attractive text effect. Save your gradient presets for future use.
Tips For Effective Gradient Use
Keep gradients simple for better readability. Avoid too many colors or sharp contrasts. Use light-to-dark gradients for a natural look. Match gradient colors with your overall design theme. Test your text on different backgrounds to ensure clarity.

Credit: www.textstudio.com
Customizing Color Palettes
Customizing color palettes in Textstudio lets you change text colors easily. You can create a unique look for your documents by adjusting the colors. This makes your work more vibrant and visually appealing. Understanding how to modify color palettes saves time and improves your design skills.
Accessing The Color Palette Settings
Open Textstudio and go to the main menu. Find the option labeled “Color Palette” or “Themes.” Click to open the settings panel where you can see existing colors. This panel lets you add, remove, or edit colors.
Adding New Colors To Your Palette
In the color palette panel, select “Add Color.” Choose the color by using the RGB sliders or entering a hex code. Save the new color to include it in your palette. This allows you to use colors that match your style or brand.
Editing And Removing Colors
Pick a color from the palette to change its shade or brightness. Use the editing tools to adjust the color easily. To remove a color, select it and click “Delete.” Keep your palette clean by removing unused colors.
Saving And Applying Custom Palettes
After customizing, save your palette with a clear name. Apply the palette to your current text or projects by selecting it in the color menu. This keeps your text colors consistent across all your documents.
Keyboard Shortcuts For Colors
Changing text color quickly in Textstudio saves time and improves workflow. Keyboard shortcuts let you switch colors without leaving the keyboard. This method is faster than manually selecting colors from menus.
Using shortcuts keeps your hands on the keyboard and boosts productivity. It is helpful for users who edit many texts and need color changes often. Learning these shortcuts makes color changes smooth and easy.
How To Use Keyboard Shortcuts For Basic Colors
Textstudio assigns default shortcuts for common colors. Pressing these keys changes the selected text color immediately. For example, use Ctrl + 1 for red, Ctrl + 2 for blue, and Ctrl + 3 for green.
These shortcuts work on Windows and macOS versions of Textstudio. You can select text first, then press the shortcut to apply color. This avoids using the mouse and speeds up editing.
Customizing Color Shortcuts In Textstudio
Users can customize shortcuts to fit personal preferences. Open the settings or preferences menu, then find the keyboard shortcuts section. Here, you can assign new keys for different colors.
Custom shortcuts help users remember commands better. It also allows adding shortcuts for colors not in the default list. Save changes and test the new shortcuts for quick access.
Tips For Efficient Use Of Color Shortcuts
Practice using shortcuts regularly to memorize them faster. Combine shortcuts with other commands like copy, paste, or undo. Avoid complex key combinations to reduce mistakes.
Keep a list of your shortcuts nearby for quick reference. Use color shortcuts only when needed to keep the document clean. These habits improve your editing speed and accuracy.

Credit: tex.stackexchange.com
Previewing Color Changes
Preview color changes easily in Textstudio by selecting your text and choosing a new color from the palette. The changes appear instantly, allowing quick adjustments. This helps ensure your text looks just right before finalizing.
Understanding The Preview Feature In Textstudio
Previewing color changes helps you see edits before saving. Textstudio shows your text with new colors instantly. This feature saves time and avoids mistakes.
You can try different colors and find the best one. The preview updates as you select new shades. This way, your text always looks just right.
How To Access Color Preview In Textstudio
Open the color settings panel in Textstudio. Pick the text you want to change. The preview window appears beside your text.
Choose a color from the palette or enter a color code. The text changes color immediately in the preview. No need to close the settings to see results.
Tips For Using Color Preview Effectively
Test colors under different light modes in Textstudio. The preview shows changes in both light and dark themes. This ensures your text is clear and readable.
Try contrasting colors for better visibility. Use the preview to check if the text stands out. Adjust colors until you feel comfortable with the look.
Saving Color Presets
Saving color presets in Textstudio helps keep your favorite text colors ready. It speeds up your workflow and keeps your projects consistent. Instead of choosing colors each time, you can save and reuse them easily.
Let’s explore how to save color presets step-by-step. This will make your text editing more efficient and organized.
How To Save A New Color Preset
First, select the text you want to color. Choose your preferred color from the color picker. Look for the “Save Preset” button or option near the color settings. Click it to add your chosen color to the preset list. Name the preset to find it quickly later.
Managing Your Saved Color Presets
Open the color presets panel in Textstudio. Here, you see all your saved colors. You can rename, delete, or reorder these presets. This helps keep your presets organized for easy access in future projects.
Applying Saved Color Presets To Text
Select the text you want to change. Open the color presets panel and pick a saved preset. The text will instantly change to that color. This method saves time and keeps your design consistent across your document.
Troubleshooting Color Issues
Troubleshooting color issues in Textstudio can save time and improve your editing experience. Color problems may cause confusion or slow down your workflow. This section helps identify common color issues and guides you to fix them quickly.
Many users face problems like colors not changing, wrong color display, or no color options visible. Understanding basic steps to resolve these can help you work smoothly. Follow these tips to fix color issues in Textstudio.
Check Color Settings And Compatibility
First, verify the color settings in Textstudio. Sometimes, default colors override changes. Make sure the text layer is selected before applying color changes. Confirm your file format supports color changes.
Update Textstudio To Latest Version
Using an outdated version can cause bugs and color glitches. Check for updates regularly. Updating Textstudio ensures access to the newest features and bug fixes.
Clear Cache And Restart The Program
Cached files may cause display errors. Clear Textstudio’s cache to remove corrupted data. Restart the program after clearing cache to refresh the system and apply changes.
Verify System Color Profiles
Color profiles on your computer affect how colors appear in Textstudio. Incorrect profiles may cause color mismatches. Check your system’s color settings and adjust profiles for accurate color display.
Check For Conflicting Plugins Or Add-ons
Some plugins interfere with color settings in Textstudio. Disable recently added plugins to see if the problem resolves. Remove or update conflicting add-ons to restore normal color functions.
Reinstall Textstudio If Necessary
If issues persist, uninstall and reinstall Textstudio. This step fixes corrupted files causing color problems. Backup your projects before reinstalling to avoid data loss.
Frequently Asked Questions
How Do I Change My Text Messages Color?
Change text message colors by customizing chat themes in apps like Google Messages. On iPhone, enable iMessage or use third-party apps. Adjust phone settings or accessibility options for broader color changes.
How Do I Change The Color Of Text In Clip Studio?
To change text color in Clip Studio, select the text layer, highlight the text, then pick a new color from the Color Picker tool.
How Do I Change The Color Of Text In Visual Studio?
Open Visual Studio, go to Tools > Options > Environment > Fonts and Colors. Select Text Editor, then choose your desired text color. Click OK to apply changes.
How Do You Change The Text Color?
To change text color, select the text, then choose a new color from the formatting or text color menu.
How Do I Change Text Color In Textstudio?
Select the text, then use the color option from the toolbar to pick a new color.
Can I Customize Text Color For Different Sections?
Yes, highlight each section and apply different colors using the color picker.
Does Textstudio Support Color Codes For Text?
Yes, you can enter hex color codes to set exact text colors.
How To Reset Text Color To Default In Textstudio?
Select the colored text and choose the default or black color from the palette.
Is It Possible To Change Text Color For The Whole Document?
Yes, select all text (Ctrl+A) and then pick a color to apply it everywhere.
Can I Use Gradients To Change Text Color In Textstudio?
Textstudio does not support gradient text colors; only solid colors are available.
Conclusion
Changing text color in Textstudio is quick and simple. Just follow the easy steps shared here. You can customize your documents to look more attractive and clear. Experiment with different colors to find what suits your style best. Keep practicing to improve your skills.
This guide helps you create colorful, readable text every time. Enjoy making your Textstudio files more vibrant and unique.