
Microsoft Paint is a simple yet powerful tool for image editing. Many users find it handy for quick tasks, especially cropping images.
If you need help with cropping images in Microsoft Paint, you’re in the right place. Cropping is essential for focusing on specific parts of a picture or removing unwanted areas. It allows you to create cleaner, more appealing images for various uses, from social media to presentations.
Whether you are a beginner or someone looking to refine your skills, understanding how to crop efficiently can enhance your editing experience. This guide will walk you through the basic steps and tips for cropping images in Paint, making the process easy and straightforward. Get ready to improve your image editing skills!
Getting Started With Paint
Microsoft Paint is a user-friendly tool that makes editing images a breeze. Whether you want to crop a photo or enhance your artwork, Paint provides the essential features to get started. Let’s dive into the basics of launching Paint and importing images.
Launching Paint
To begin, locate Paint on your Windows computer. You can find it by clicking on the Start menu and typing “Paint” in the search bar. Once you see the app, click to open it, and you will be greeted with a blank canvas ready for your creativity.
Have you ever opened Paint, only to feel overwhelmed by its simplicity? Don’t worry. Its straightforward interface is designed for users of all skill levels, making it easy to navigate.
Importing Images
Now that you have Paint open, let’s import an image you want to work on. Click on the “File” menu in the top left corner and select “Open.” Choose the image file from your computer that you wish to edit.
Alternatively, you can drag and drop an image directly into the Paint window. This method is quick and efficient, especially if you have multiple images to work with.
After importing your image, take a moment to familiarize yourself with the tools available. You’ll find options for cropping, resizing, and adding text, among other features. What’s the first thing you plan to edit in your image?
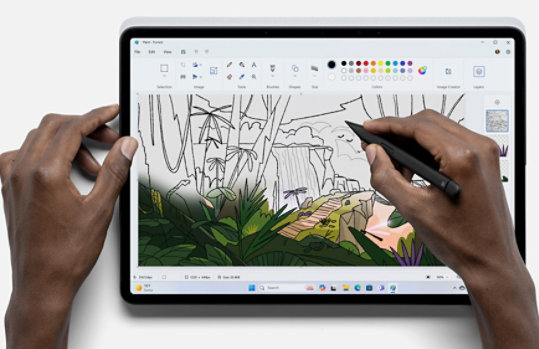
Credit: product.corel.com
Basic Interface Overview
The ‘Basic Interface Overview’ of Microsoft Paint is your starting point for mastering image cropping. Understanding the layout and tools available can significantly enhance your experience. Let’s break down the essentials you need to get started.
Toolbox Essentials
The toolbox in Paint is where the magic begins. You’ll find a variety of tools that help you edit your images. Key tools include:
- Select Tool: Use this to outline the area you want to crop.
- Brush Tool: Perfect for adding artistic touches to your image.
- Text Tool: Add captions or labels directly onto your images.
Getting familiar with these tools can make your editing process smoother. Have you ever struggled to find the right tool when in a hurry? Knowing your toolbox can save precious time during your creative sessions.
Navigating The Menu
The menu in Paint is straightforward but packed with features. The top bar contains important options like File, Edit, and View. Each section allows you to perform different tasks:
- File: Open, save, or print your images.
- Edit: Undo, redo, or copy your selections.
- View: Zoom in or out for detailed editing.
As you work, you might find yourself frequently switching between these menus. What’s your go-to menu option when you need to make quick adjustments? Understanding how to navigate this interface efficiently will enhance your workflow.
Mastering the basic interface of Paint not only boosts your cropping skills but also makes image editing enjoyable. So, dive in and start experimenting!
The Crop Tool
The Crop Tool in Microsoft Paint is a powerful feature that allows you to trim your images with precision. Whether you want to focus on a specific section or remove unnecessary parts, this tool simplifies the process. Let’s break down how to effectively use this tool to enhance your images.
Selecting The Crop Function
First, open your image in Microsoft Paint. Look for the Home tab at the top of the screen. Here, you’ll find the Crop button, represented by a dashed rectangle icon.
Click on this icon, and your cursor will change to a crosshair. This indicates that the crop function is active. Now, you’re ready to select the area you wish to keep.
Adjusting Selection
Click and drag your cursor to form a rectangle around the section of the image you want to retain. Make sure to cover the desired area fully. You can adjust your selection by dragging the edges if you need to refine it.
After you’ve made your selection, simply click on the Crop button again. Your image will be trimmed to fit the selected area. It’s that easy!
Have you ever found yourself trying to capture the perfect moment in a photo but ended up with distractions around the edges? The Crop Tool not only helps to eliminate those distractions but also enhances the overall composition. Try it out and see how much more impactful your images can become!
Cropping Techniques
Cropping images in Microsoft Paint is simple and effective. This tool offers different techniques for precise edits. Two popular methods include free-form cropping and aspect ratio cropping. Each method serves unique purposes and can enhance your images significantly.
Free-form Cropping
Free-form cropping allows you to select any shape. This method is perfect for isolating specific parts of an image. Start by selecting the dashed rectangle tool in the toolbar. Click and drag your mouse to outline the area you want to keep. Once selected, right-click and choose “Copy.” You can then paste it into a new canvas. This technique adds creativity to your editing.
Aspect Ratio Cropping
Aspect ratio cropping helps maintain image proportions. It is ideal for social media posts or professional photos. To use this technique, click on the “Select” tool. Hold the Shift key while dragging to keep the aspect ratio. This ensures that your image does not stretch or distort. After making your selection, right-click and choose “Crop.” Your image will keep its intended look.
Advanced Cropping Tips
Mastering advanced cropping techniques in Microsoft Paint can take your image editing skills to the next level. Whether you’re looking to create a striking social media post or simply tidy up a family photo, these tips will help you crop with confidence. Let’s dive into some advanced cropping tips that will make your editing process smoother and more effective.
Using Shortcuts For Efficiency
Efficiency is key when working in Paint. Learning keyboard shortcuts can drastically speed up your cropping process.
- Ctrl + C: Copy your selection after cropping.
- Ctrl + V: Paste your cropped section into a new document.
- Ctrl + Z: Undo any mistakes instantly.
Using these shortcuts allows you to focus more on creativity rather than clicking through menus. Imagine how much more enjoyable your editing sessions will be when you can crop, copy, and move images with just a few keystrokes!
Precision Cropping With Zoom
Ever found yourself frustrated when trying to crop a tiny detail? Zooming in can give you the precision you need for perfect cropping.
To zoom in, simply use the zoom slider located at the bottom right of the Paint window. You can zoom in up to 800%, allowing you to see details clearly. Once you’re zoomed in, use the selection tool to carefully outline the area you want to crop.
Have you ever tried cropping a photo of a loved one, only to realize you’ve cut off part of their head? Zooming helps avoid such mishaps. It enhances your ability to make exact selections, ensuring that you capture exactly what you want.
Don’t hesitate to experiment with different zoom levels. You may discover new perspectives on your images that you hadn’t noticed before!
Credit: www.microsoft.com
Editing After Cropping
After cropping your images in Windows Paint, editing is the next step. You can enhance your image further. Resizing, adding text, and applying effects are all possible. Each option helps make your image stand out.
Resizing Cropped Images
Resizing is simple in Paint. Click on the “Resize” button in the toolbar. A new window appears. Here, you can change the size by percentage or pixels. Ensure you keep the “Maintain aspect ratio” box checked. This keeps your image from stretching or squishing.
Adjust the width or height as needed. Click “OK” to apply the changes. Your cropped image is now the perfect size for sharing or saving.
Adding Text And Effects
Want to make your image more interesting? Adding text is easy. Select the “Text” tool from the toolbar. Click on your image where you want the text to appear. Type your message. You can change the font, size, and color to match your image.
Effects can add flair. Use the “Brush” tool for painting or drawing. Choose from different brush styles and colors. Experiment to find what looks best. Your creativity can shine through with these simple tools.
Saving And Exporting
Saving and exporting images in Microsoft Paint is a crucial step after you’ve put in the effort to crop and edit your pictures. It’s the moment where you decide how to keep your artwork intact for future use. Understanding the right formats and options can significantly enhance your workflow and ensure your images look their best.
Choosing The Right Format
Choosing the right format for your saved images depends on your needs. Common formats like JPEG, PNG, and BMP each have their strengths. JPEG is great for photographs due to its smaller file size, while PNG is excellent for images needing transparency.
- JPEG: Ideal for photos, compresses well.
- PNG: Best for images with text or transparency.
- BMP: High quality, larger file size, less common for web use.
Think about where you’ll use your image. Will it be online, in print, or for a presentation? This decision will guide you toward the right format.
Saving For Web Vs Print
Saving for web and print requires different considerations. For web use, focus on smaller file sizes without sacrificing quality. This usually means saving as JPEG or PNG.
When preparing for print, higher resolutions are essential. A resolution of at least 300 DPI is recommended for clear images on paper. In this case, BMP or high-quality PNG might be the better choice.
Have you ever saved an image only to realize it looked different when printed? This often happens when web-suitable formats are used for print. Always double-check your settings before hitting save!
Understanding these saving and exporting options will empower you to get the most out of your editing experience in Paint. Your images deserve the best treatment, so choose wisely!
Troubleshooting Common Issues
Cropping images in Microsoft Paint can sometimes lead to problems. Knowing how to fix these issues is essential. This section covers two common problems users face. You will learn how to restore cropped images and fix aspect ratio issues.
Restoring Mistakenly Cropped Images
Accidentally cropping an image can be frustrating. Luckily, you can recover your original image. First, check if you saved the image after cropping. If not, simply reopen the original file.
If you saved it, look for the backup. Windows may have saved a previous version. Right-click on the file and choose “Restore previous versions.” This option can help you recover your work.
Another option is to use the “Undo” feature. Press Ctrl + Z immediately after cropping. This will restore the image to its previous state. Always save a copy of the original image for safety in the future.
Fixing Aspect Ratio Problems
Sometimes, cropping changes the aspect ratio. This can distort your image. To fix this, use the “Resize” option in Paint. Click on the “Home” tab, then select “Resize.” Ensure the “Maintain aspect ratio” box is checked.
Adjust either the width or height to the desired size. Paint will automatically adjust the other dimension. This keeps your image looking natural and undistorted.
For precise adjustments, consider using the “Select” tool first. Draw a box around the area you want to keep. Right-click and select “Crop.” This method helps keep the original aspect ratio intact.
Alternatives To Paint
Exploring alternatives to Paint can simplify your image cropping tasks in Windows. Many tools offer user-friendly interfaces and various features for easy editing. Consider options like GIMP or online editors that can enhance your cropping experience without the complexities of traditional software.
Alternatives to Paint can enhance your image editing experience significantly. While Microsoft Paint is a basic yet functional tool, there are other software options that offer more features and flexibility. You might find that exploring these alternatives not only saves you time but also improves your workflow.
Other Software Options
Consider using GIMP. This free software is often regarded as a powerful alternative to Paint. It offers advanced features like layers, filters, and customizable brushes, making it suitable for more intricate projects.
Another option is Paint.NET. This software is user-friendly and provides more functionality than Paint without overwhelming you with options. It supports plugins, allowing you to enhance its capabilities even further.
If you’re looking for something web-based, Canva is an excellent choice. While primarily a design tool, it includes image editing features that are intuitive and easy to use. You can create stunning graphics with minimal effort, perfect for social media posts or presentations.
Also, Adobe Photoshop Express offers a streamlined version of its more robust counterpart. It’s free and available on mobile devices, making it a convenient option for quick edits on the go.
When To Upgrade To Professional Tools
Assess your needs. If you’re frequently editing images for professional purposes, investing in software like Adobe Photoshop or CorelDRAW can be worthwhile. These tools provide a wealth of features that cater to serious designers and photographers.
Think about the complexity of your projects. Are you often needing advanced features such as 3D editing, detailed retouching, or vector graphics? If so, upgrading could save you time and frustration in the long run.
Don’t overlook your budget. While professional tools can be pricey, many offer subscriptions or one-time purchases that may fit your financial plan. Weigh the cost against the potential benefits to determine if an upgrade is right for you.
What software have you tried? What features do you wish you had? Sharing your experiences can help others make informed decisions about their editing tools.
Final Thoughts
Understanding how to crop images in Microsoft Paint can enhance your editing skills. This simple tool offers great features for quick image adjustments. Whether you need to focus on a specific part of a picture or remove unwanted areas, Paint makes it easy.
Practice is key. The more you use these features, the more comfortable you will become. A few clicks can change an image significantly. Use the available tools wisely to achieve the best results.
Best Practices
Always start with a high-resolution image. This ensures clarity after cropping. Use the dashed box tool to select the area you want. Be precise; a small adjustment can make a big difference.
Don’t forget to save your work. Use “Save As” to keep the original image intact. Experiment with different cropping styles. This helps you find what works best for your needs.
Additional Resources
For further guidance, explore tutorial videos online. They provide step-by-step instructions. Websites like wikiHow offer detailed articles on using Paint effectively.
Join forums or communities focused on digital editing. Engaging with others can provide tips and tricks. Sharing experiences can help you learn faster.

Credit: www.wikihow.tech
Frequently Asked Questions
How Do I Crop Freely In Paint?
To crop freely in Paint, select the dashed rectangle tool. Click and drag to outline your desired area. Once selected, right-click and choose “Crop. ” This will remove everything outside your selection. Save your cropped image for future use.
How Do I Resize In Windows Paint?
To resize an image in Windows Paint, open the image and click the “Resize” button in the Home tab. Choose to adjust by percentage or pixels. Ensure “Maintain aspect ratio” is checked for proportional resizing. Enter your desired dimensions and click “OK” to apply the changes.
How Do I Quickly Crop In Windows?
To quickly crop in Windows, open the image in Paint. Select the dashed box tool, drag to create a selection. Right-click and choose “Crop,” or press Ctrl + X. Finally, save your cropped image. This method is fast and effective for basic image editing.
How Do I Crop And Rotate In Paint?
To crop in Paint, select the area with the dashed box tool. Then, right-click and choose “Crop. ” To rotate, select the image, go to the “Home” tab, click “Rotate,” and choose your desired rotation option. Save your changes once done.
Conclusion
Cropping images in Microsoft Paint is simple and effective. Follow the steps outlined in this guide for best results. Practice makes perfect. With time, you’ll become more comfortable using the tools. Remember, clear images enhance your projects. Don’t hesitate to explore other features in Paint as well.
Each tool can help create the perfect image. Embrace your creativity and have fun with it. Happy cropping!