Are you wondering whether you should add color under the layer in animation? This question might seem simple, but the answer can change how your artwork looks and feels.
Where and how you place color affects the depth, mood, and clarity of your animation. If you want your characters and scenes to pop with life, understanding this technique is key. You’ll discover why adding color under your animation layers can be a game-changer, along with practical tips to get it right every time.
Stick with me, and you’ll learn how to make your animations more vibrant and professional-looking, even if you’re just starting out.
Color Placement In Animation
Color placement is a key part of animation. It affects how viewers see and feel the animation. Proper color use brings characters and scenes to life. It guides attention and creates mood.
Deciding where to place color depends on the style and technique. Some animators add color below the line art layer. Others color on the same layer or above. Each method changes the final look.
Color Under The Line Art Layer
Placing color under the line art keeps outlines clear and sharp. It helps maintain clean shapes and details. This method works well for cel-style animations. It separates color and lines for easy editing.
Color Above Or On The Same Layer
Color on the same layer can blend with the line art. This creates softer edges and more painterly effects. It suits more detailed or textured styles. Animators use this to mix colors and lines freely.
Using Multiple Color Layers
Multiple layers let animators add shading, highlights, and effects. Each layer can hold a different color aspect. This allows control over lighting and depth. It enhances the visual richness of the animation.
Choosing Color Placement For Animation Efficiency
Color placement affects workflow speed and changes. Coloring under the line art speeds up corrections. It also simplifies the animation process. Animators pick methods that fit their tools and style.
Credit: tips.clip-studio.com
Layer Basics For Animation
Layers form the foundation of most animations. They separate different parts of an image or scene. This separation helps animators control and edit each element easily. Understanding layers is key to efficient workflow and clear animation structure.
Each layer can hold different content like sketches, colors, or effects. Layers stack on top of each other, creating a final composite image. The order of layers affects how the animation looks on screen.
What Are Layers In Animation?
Layers are like transparent sheets stacked together. Each sheet holds a part of the artwork or animation. You can draw, erase, or move objects on each layer independently. This allows for flexible editing and changes.
How Layers Affect Animation
Layers control how elements overlap and interact. Moving a layer up or down changes what appears in front. This helps in creating depth and focus in scenes. Animators often use layers to separate characters from backgrounds.
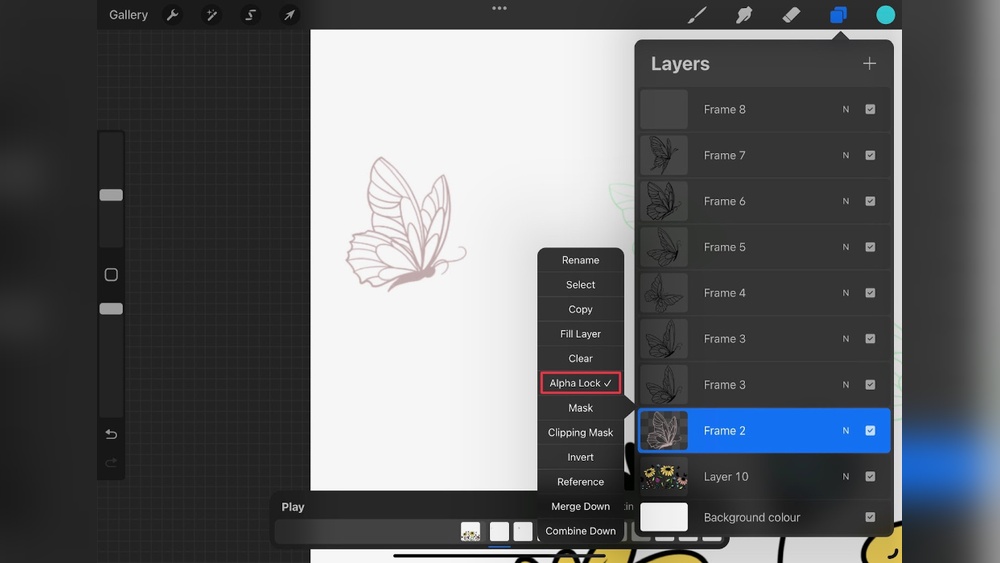
Adding Color Under The Layer
Color usually goes on layers below the line art. This method keeps outlines clear and sharp. It also makes changing colors easier without disturbing the lines. Using separate layers for color helps keep the animation neat.
Layer Management Tips
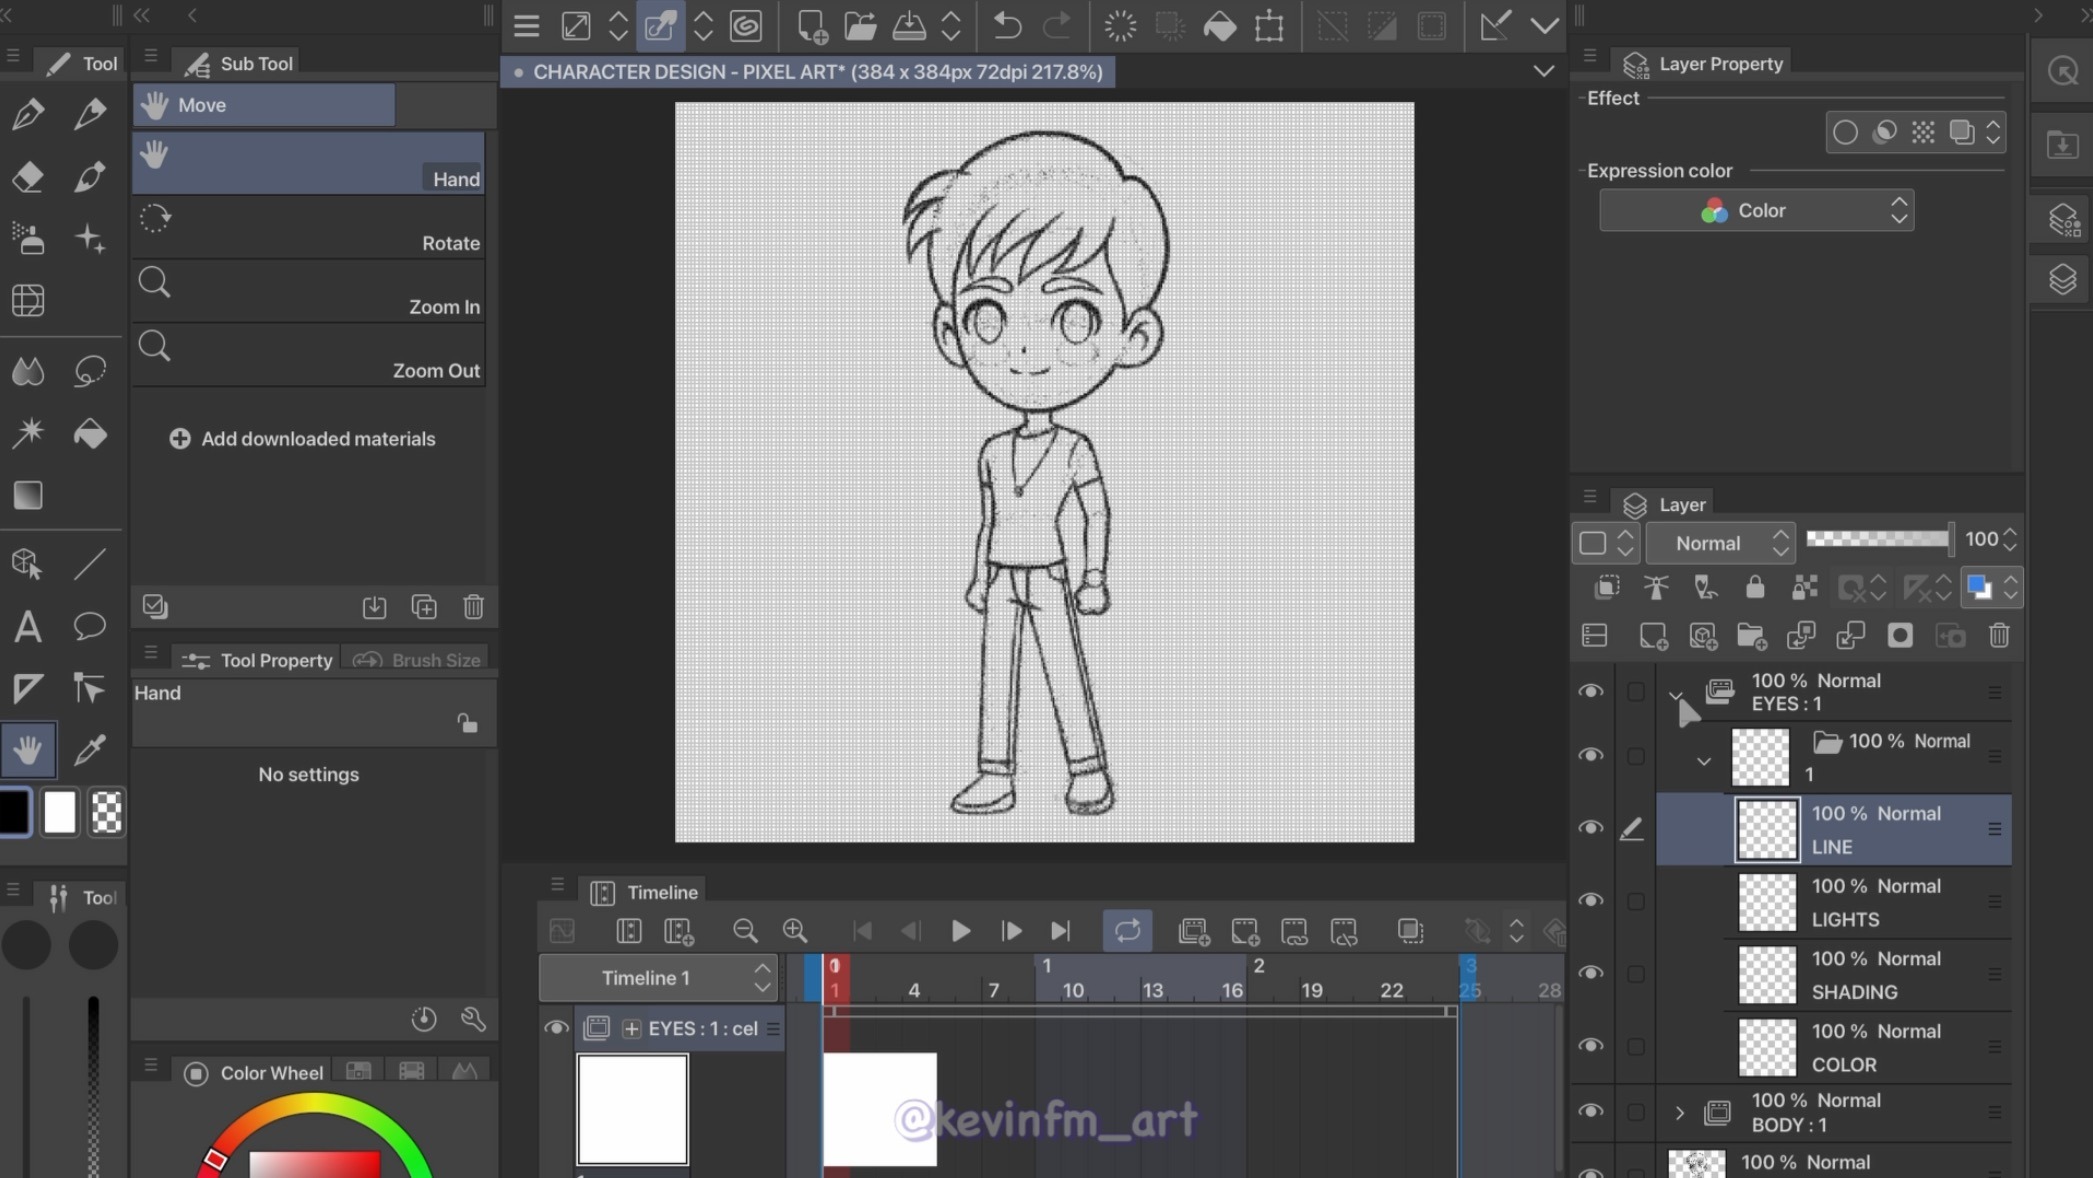
Name your layers clearly to avoid confusion. Group related layers to keep the workspace tidy. Lock finished layers to prevent accidental changes. Regularly check layer order to ensure the correct look.
Why Color Under The Layer Matters
Color beneath animation layers changes how the final image looks. It affects clarity and mood. Proper use of color helps viewers understand the scene better. It also supports the story by highlighting key parts.
Choosing to add color under the layer gives the animation depth. It separates different elements, making the animation easier to follow. This method also saves time by letting animators work on details without disturbing line art.
Enhances Visual Clarity
Color under the layer keeps the lines clear and sharp. The artwork does not get messy or blurry. This clarity helps viewers focus on the characters and actions. It makes the animation look cleaner and more professional.
Speeds Up The Workflow
Working with color beneath layers speeds up the coloring process. Animators can quickly fill large areas without affecting outlines. It reduces mistakes and the need for constant corrections. This saves time and effort in the animation process.
Improves Color Consistency
Adding color under the layer ensures uniform color application. It is easier to maintain the same color tone across frames. This consistency is important for smooth and natural animation. It keeps the style uniform and pleasing to the eye.
Allows Flexible Editing
Color under the layer allows easy changes later. Animators can adjust colors without touching the line art. This flexibility makes it simple to test different looks. It helps improve the final animation’s quality with less hassle.
Techniques For Adding Color
Adding color to animation layers enhances visual appeal and clarity. Various techniques help animators apply colors effectively under or over layers. Choosing the right method depends on the software and style used. Below are some common, easy-to-use techniques for adding color in animation.
Using Paint Or Fill Tools
Paint and fill tools quickly add solid colors to animation frames. Artists select areas within a layer and fill them with chosen colors. This method works best for flat, consistent colors. It saves time and maintains clean edges in the animation.
Applying Color On Separate Layers
Placing color on layers below the line art keeps outlines sharp. Animators create a new layer under the drawing and add color there. This technique allows easy edits without affecting the main sketch. It also helps keep colors organized and adjustable.
Using Masking Techniques
Masks control where color appears without changing the base layer. Animators create a mask that matches the drawing’s shape. Color layers then apply only within the mask area. This method prevents colors from spilling outside the artwork boundaries.
Blending Modes For Color Effects
Blending modes change how colors mix with layers below. They create shadows, highlights, and lighting effects. Common modes include Multiply for shadows and Overlay for light. Using these modes adds depth and realism to animation colors.
Gradient And Texture Application
Gradients add smooth color transitions inside shapes. Textures bring variety and detail to flat colors. Animators use gradient fills or textured brushes on color layers. These techniques make the animation look richer and more dynamic.
Using Clipping Masks
Using clipping masks is a common technique in animation to manage colors efficiently. It helps keep your colors neat and within the boundaries of your drawing.
Clipping masks allow you to place color on a layer that only shows where the shape below exists. This means you can add colors without worrying about going outside the lines.
How Clipping Masks Work In Animation
A clipping mask uses one layer to control the visibility of another. The layer on top will only show where the bottom layer has pixels. This keeps colors confined to the shapes you want to color.
Benefits Of Using Clipping Masks
Clipping masks save time by avoiding extra erasing or corrections. They help keep your workspace organized. You can quickly change colors without affecting the original line art.
Steps To Create A Clipping Mask
First, draw your line art on one layer. Then, add a new layer above it for coloring. Set this new layer as a clipping mask. Now, paint on the color layer and it will stay within the lines.
Tips For Effective Use
Keep your line art layer locked to avoid changes. Use multiple clipping masks for shading and highlights. This adds depth while keeping colors tidy and separated.

Credit: www.youtube.com
Solid Color Fill Layers
Solid color fill layers are key in animation workflows. They serve as base colors beneath line art or details. These layers create clean, even colors without texture or shading.
Artists use solid fills to separate colors easily. This helps during editing or adding effects later. Solid fills keep the animation simple and neat.
What Are Solid Color Fill Layers?
Solid color fill layers contain only one flat color. They do not have gradients or patterns. These layers often sit under line art layers to add basic colors.
They help keep the animation organized. Each color sits on its own layer. This makes it easy to adjust colors without affecting other parts.
Why Use Solid Color Fill Layers?
Solid fills speed up the coloring process. They provide a clear area to work on details later. Animators can quickly change colors without redrawing lines.
This method also reduces mistakes. It prevents colors from spilling over lines. Solid fills make the final animation look sharp and clean.
How To Add Solid Color Fill Layers In Animation
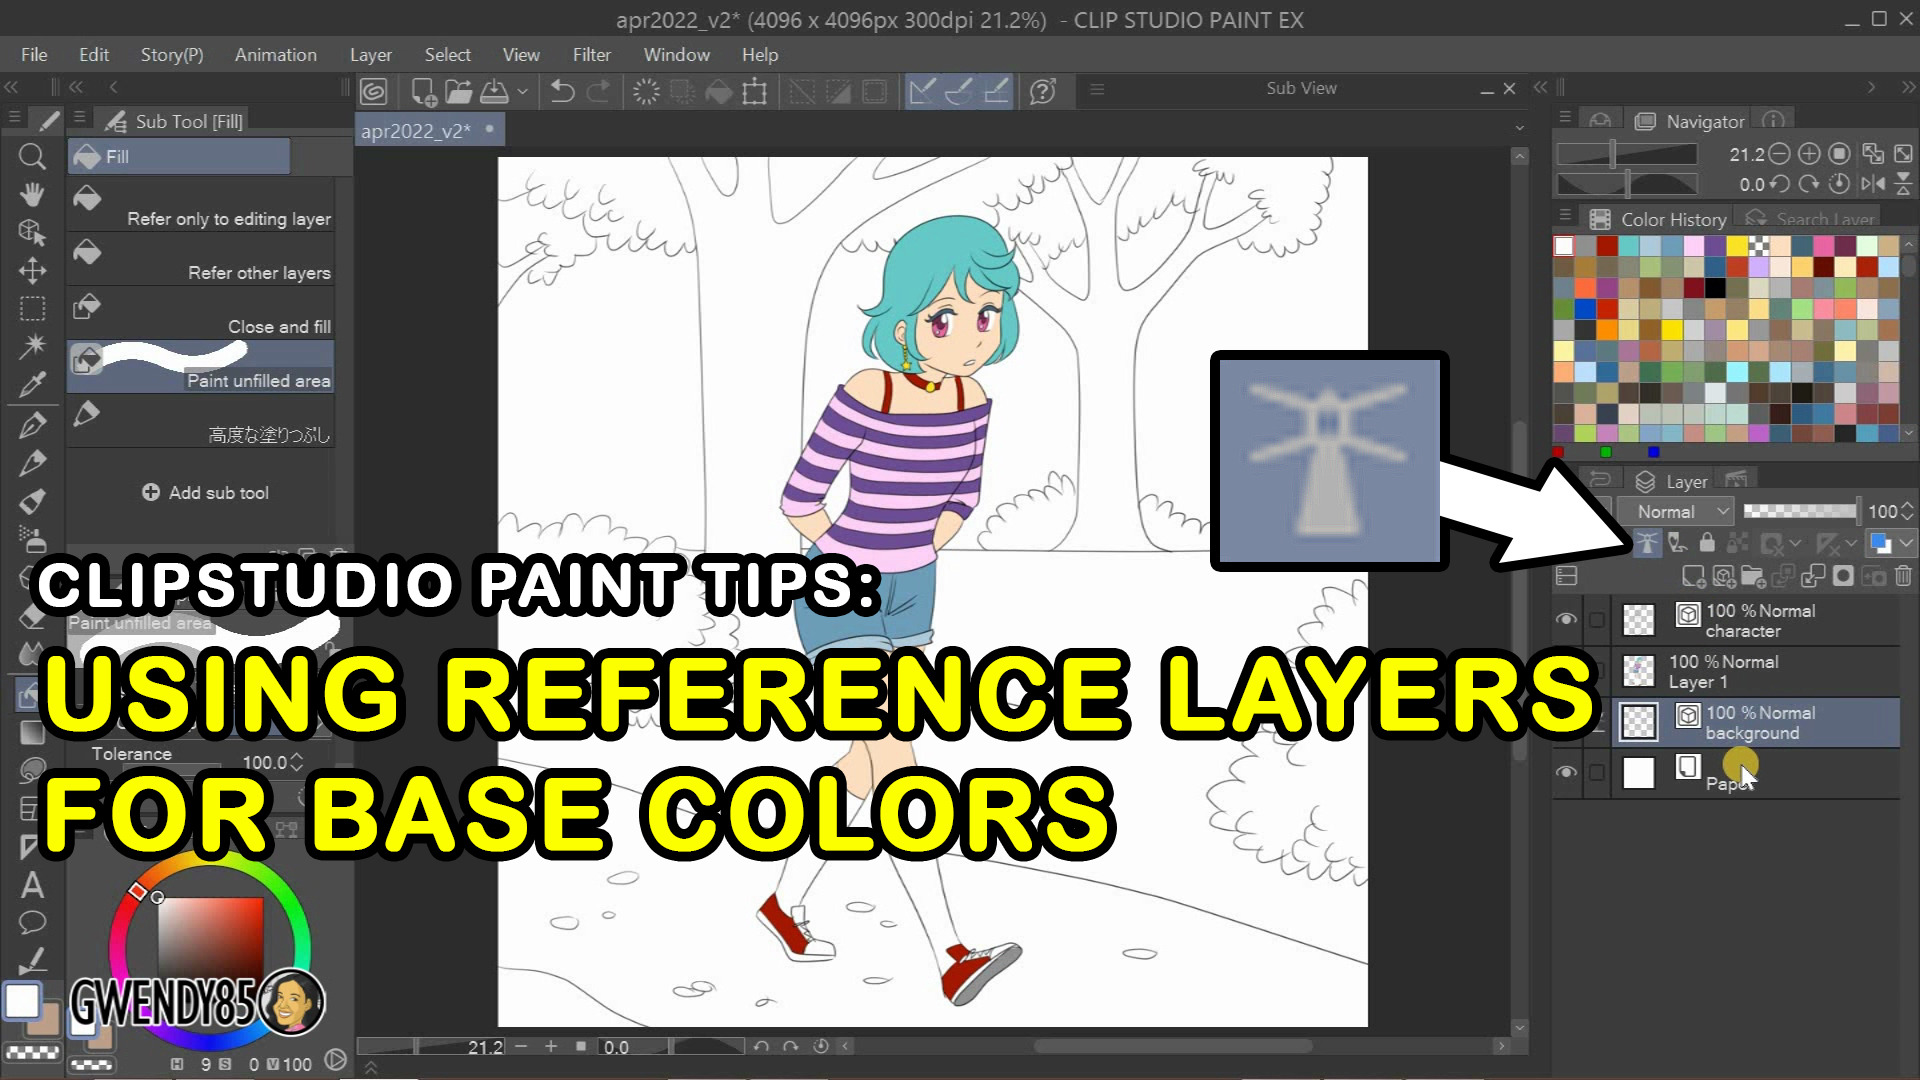
Create a new layer below the line art. Select a flat color using the paint bucket or brush tool. Fill the entire shape with this color.
Lock the layer to avoid accidental changes. Label the layer to keep your project organized. Repeat for every major color in your character or scene.
Paint Bucket Tool Tips
The Paint Bucket Tool is essential in animation coloring. It fills areas quickly with solid color. Knowing how to use it well saves time and improves results.
This tool works best with closed shapes. Gaps or open edges can cause color to spill outside lines. Fixing these gaps is key before filling.
How To Close Gaps For The Paint Bucket Tool
Check your drawing for small breaks in the outline. Use a brush or pencil tool to close gaps. Even tiny openings can cause trouble. Close all gaps for clean fills.
Adjusting Paint Bucket Tolerance
Tolerance controls how much area the tool fills. Low tolerance fills only similar colors. High tolerance fills a wider range. Adjust tolerance to avoid overfilling or underfilling.
Using Paint Bucket With Layers
Paint Bucket works best on the correct layer. Lock your line art layer to prevent changes. Fill color on a layer below the line art. This keeps lines visible and clean.
Fixing Spill And Overfill Issues
Spill happens when color leaks outside the shape. Use the eraser tool to clean edges. Lower tolerance to reduce spills. Zoom in to fix small mistakes precisely.
Credit: tips.clip-studio.com
Layer Blending Modes
Layer blending modes play a key role in animation coloring. They control how colors and layers interact visually. Using blending modes, animators can create depth and effects without extra drawing. This technique saves time and adds richness to the artwork.
Blending modes change how a color layer mixes with the layers below it. This lets you add shadows, highlights, or textures smoothly. They help keep the animation lively and dynamic.
What Are Layer Blending Modes?
Layer blending modes are settings that define how one layer blends with another. They change the way colors combine. For example, “Multiply” darkens the colors below, while “Screen” lightens them. Each mode gives a different visual effect.
Common Blending Modes Used In Animation
Some blending modes are popular in animation workflows. “Multiply” is great for shadows and shading. “Overlay” adds contrast and vibrance. “Screen” works well for highlights and glows. Animators pick modes based on the mood and style needed.
How Blending Modes Affect Color Layers
Blending modes change how color layers sit under line art or other elements. Instead of painting solid colors, you can let the mode control the mix. This creates natural transitions and soft edges. It also keeps the animation clean and easy to edit.
Using Blending Modes To Add Depth
Depth in animation comes from light, shadow, and color variation. Blending modes help add these without extra drawing. By layering colors with different modes, you can simulate light effects and textures. This approach enhances the visual storytelling.
Fixing Gaps And Overlaps
Fixing gaps and overlaps is a key step in animation coloring. Gaps appear as unwanted white spaces between lines. Overlaps happen when colors spill outside the intended areas. Both issues distract from the smooth look of the animation. Fixing them improves the final appearance and professionalism.
Careful checking of each frame helps spot these problems. Using the right tools and techniques makes the correction easier. Small fixes prevent bigger problems later in the workflow. Clean and consistent colors keep viewers focused on the story and characters.
Identifying Gaps In Your Animation Layers
Gaps often occur between line art and color layers. They show as thin white lines or empty spots. Zooming in helps find even tiny gaps. They can happen from imperfect drawing or shifting layers. Identifying gaps early saves time in the coloring stage.
Techniques To Close Gaps Effectively
Use a brush or paint bucket tool to fill gaps. Adjust brush size to match the gap width. Expanding the color fill slightly beyond the lines prevents gaps. Some software offers a “close gaps” option in fill tools. Manual touch-ups ensure no white spaces remain.
Handling Overlaps Without Losing Detail
Overlaps happen when color spills outside the lines. They make the animation look messy. Use erasers or masking tools to remove excess color. Work carefully near edges to keep line details intact. Layer blending modes can help control color spread.
Best Practices For Clean Color Application
Keep your line art on a separate layer above colors. Lock the line layer to avoid accidental edits. Use a “paint behind” mode to color neatly under the lines. Regularly zoom out to check overall color consistency. Consistency keeps the animation visually clear and appealing.
Common Coloring Mistakes
Coloring animation layers can be tricky. Many beginners make simple mistakes that affect the final look. Avoiding these errors helps keep your animation clean and vibrant. Understanding common coloring mistakes improves your workflow and results.
Using Color On The Wrong Layer
Applying color directly on the line art layer is a frequent error. This can cause lines to lose sharpness or merge with colors. Always use a separate layer beneath the line art for coloring. This keeps lines crisp and colors neat.
Ignoring Layer Order
Colors that appear above the line art ruin the drawing’s clarity. Placing color layers above lines hides details. Make sure color layers are under the line art layer. This order shows outlines clearly and colors correctly.
Skipping Base Colors
Some skip the base color and add shading directly. This causes uneven tones and confusion in shading. Start with flat base colors on a layer below. Then add shadows and highlights above the base layer for better control.
Not Closing Gaps In Line Art
Leaving small gaps in line art causes color to spill outside the lines. This creates messy and unprofessional animation frames. Close all gaps before coloring. Use tools like the paint bucket carefully to avoid spills.
Using Too Many Color Layers
Many layers slow down the software and complicate editing. Overusing layers makes the project harder to manage. Combine colors logically and keep layer count minimal. This improves performance and keeps the project organized.
Frequently Asked Questions
How Is Color Used In Animation?
Color in animation sets mood, highlights emotions, defines characters, and enhances storytelling through visual cues and effects.
How Do Layers Work In Animation?
Layers in animation separate elements for easier editing and control. Each layer holds different parts or effects. Layers stack and blend to create the final animated scene. Animators adjust timing and movement per layer to build complex animations efficiently.
How Do I Add Color To A Layer?
Add color to a layer by using the paint bucket tool or creating a solid color fill layer. Apply a clipping mask to limit color to the layer below. Alternatively, use a Color Overlay effect or adjust Hue/Saturation in layer styles or adjustment layers.
How To Use Layers In Animate?
Use layers in Animate by creating multiple stacked layers for different elements. Draw or import artwork on each layer. Organize, lock, or hide layers to manage your animation. Animate objects on individual layers for better control and smoother workflow.
Do You Add Color Under The Layer In Animation?
Color is usually added under the line art layer to keep outlines visible and clean.
Why Add Color Beneath The Line Art Layer In Animation?
It helps keep the lines sharp and the colors neat without overlapping edges.
Can You Add Color On Top Of The Line Art Layer?
Adding color on top may hide outlines, making the animation look messy.
What Layer Mode Is Best For Coloring In Animation?
Normal mode works well for flat colors; multiply mode helps add shadows.
How Does Layering Affect Animation Coloring?
Proper layers allow easy edits and keep colors and lines separate and organized.
Should Coloring Be Done On A Separate Layer In Animation?
Yes, separate layers make fixing colors easier without damaging the line art.
Conclusion
Adding color under the layer in animation helps keep artwork clean and organized. It allows easy changes without affecting outlines or details. This method improves workflow and saves time during edits. Colors set the mood and bring characters to life effectively.
Using layers wisely enhances your animation’s quality and clarity. Experiment with layering colors to find what works best. Remember, simple steps create better animated stories. Keep practicing to improve your skills steadily.