Are you ready to give your baking an eye-catching twist? Making black food coloring at home can transform your cakes, cookies, and frostings into striking masterpieces that grab everyone’s attention.
But getting that perfect, deep black shade isn’t always easy. You might have tried adding just a drop or two of black dye and ended up with a dull gray or muddy color instead. Don’t worry—this guide will show you simple, effective ways to create rich black food coloring using ingredients you probably already have.
By following these tips, you’ll learn how to achieve a bold, true black that makes your treats stand out. Keep reading to unlock the secrets and take your decorating skills to the next level!
Basic Color Mixing
Basic color mixing is the key to making black food coloring at home. Knowing how colors combine helps you create the perfect dark shade. Using simple color theory, you can mix common food dyes to get black without buying it.
Mixing colors is easy once you understand the basics. Two main methods work well: combining primary colors and using complementary colors. Both give deep, rich black tones for your baking needs.
Combining Primary Colors
Primary colors are red, blue, and yellow. Mixing these in equal parts creates a dark brown or black shade. Start with small amounts of each color. Adjust slowly by adding more red or blue for a deeper black.
Use gel or liquid food coloring for best results. Stir well to blend colors evenly. Testing a small drop helps to see if the color looks black enough. If not, add more color bit by bit.
Using Complementary Colors
Complementary colors sit opposite on the color wheel. Examples include red and green or blue and orange. Mixing these cancels out brightness and creates dark, muted tones.
Try mixing red and green food coloring for black. Add a little yellow or blue to deepen the shade. Mix slowly and test frequently. This method can create rich black without artificial dyes.

Credit: blog.wilton.com
Red And Green Combo
Creating black food coloring using a red and green combo offers a simple, natural way to achieve a deep, rich color. These two colors are complementary, meaning they cancel each other out when mixed properly. The result is a dark, near-black shade ideal for cakes, frostings, and other edible decorations.
Mixing red and green food coloring requires patience and precision. Starting with equal amounts gives a dark brown base. Adjusting the ratio helps deepen the color closer to black. This method avoids artificial dyes and keeps your creations vibrant yet natural.
Balancing The Shades
Begin by mixing equal parts of red and green food coloring in a small bowl. Stir gently to combine the colors thoroughly. The mixture will appear dark but may have a reddish or greenish tint.
Slowly add more red drops to warm the tone or green drops to cool it. Test the color by applying a small amount on a white surface. Adjust until the tint fades and you reach a balanced dark shade. Avoid adding too much of one color to prevent overpowering the mix.
Adding Yellow For Depth
Introduce a tiny drop of yellow food coloring to enhance the black’s depth. Yellow brightens the mix and reduces any muddy or dull appearance. Use this sparingly; too much yellow can turn the color brown or olive.
Mix well and test again on a white surface. The yellow will enrich the black, giving it a more natural, inky look. This step helps achieve a true black tone without harsh artificial colors.
Red And Blue Mix
Using red and blue to create black food coloring is a classic approach. These two colors mix to form deep, dark shades. The right balance of red and blue can produce a rich black tone suitable for various recipes. Adjusting the mix allows control over how warm or cool the black appears.
Creating Dark Tones
Start with equal parts of red and blue food coloring. Mix them thoroughly to see the base color. This blend often results in a dark purple or navy shade. To deepen the color, add more blue slowly. Test the color after each drop to avoid making it too blue. Keep mixing until the shade looks almost black.
Enhancing With Yellow
Add a tiny amount of yellow food coloring to the mix. Yellow helps balance the red and blue, reducing purple tones. Use yellow sparingly to prevent a muddy color. Stir well and check the shade after adding yellow. This step brings a more natural black color to your mix. Adjust small amounts until you achieve the perfect black.
Using Cocoa Powder
Using cocoa powder is a simple way to create natural black food coloring. It provides a deep, dark base that works well with various recipes. Cocoa powder adds rich color without artificial dyes. It also gives a subtle chocolate flavor that enhances baked goods.
Natural Dark Base
Start with unsweetened cocoa powder for the best color. Choose a fine, dark variety for a richer shade. Mix cocoa powder with a small amount of water or liquid from your recipe. Stir well until smooth and thick. This mixture forms the natural dark base for your food coloring.
The color may look more brown than black at first. Add more cocoa powder to deepen the color. Use this base in icings, doughs, or batters for a natural black tint.
Mixing With Food Coloring
Combine the cocoa base with black gel or liquid food coloring for a stronger black. The cocoa helps create a richer, less artificial look. Start by adding a few drops of black food coloring to the cocoa mixture. Stir well to blend the colors evenly.
Adjust the amount of food coloring until you reach your desired shade. This method reduces the amount of artificial dye needed. It also improves the texture and flavor of your recipe. Use this mix for frosting, fondant, or any item needing black color.
Gel And Paste Colorings
Gel and paste colorings are popular choices for making black food coloring. They come in a thick, concentrated form. This allows you to add rich color without using much liquid. Gel and paste colors mix easily into frostings and doughs. They provide strong, vibrant black shades that last through baking and decorating.
Benefits Over Liquid Colors
Gel and paste colorings offer deeper color than liquid ones. They do not thin out your recipe as much. This helps maintain the right texture in icings and batters. They also blend smoothly without streaks. A small amount goes a long way, making them economical. Gel and paste colorings are less likely to fade or change color during cooking.
Choosing The Right Type
Pick gel or paste colorings based on your project. Gel colors work well for lighter frostings and batters. Paste colors suit thick frostings and fondants. Check the label for food-safe and dye-free options if needed. Consider the color intensity you want. Some brands offer ultra-concentrated pastes for very dark black. Testing a small batch helps find the perfect color strength.
Adjusting Color Intensity
Adjusting the color intensity is key to perfect black food coloring. Small changes in color amounts can make a big difference in the final shade. Balancing colors ensures a deep, rich black without unwanted tones. Careful adjustments help avoid dull or muddy results. This section explains how to control and refine your black food coloring for the best effect.
Adding Colors In Small Amounts
Start by adding colors little by little. Use a dropper or small spoon for accuracy. Adding too much at once can make the color too dark or uneven. Gradually build up the color intensity for better control. This approach helps achieve the perfect black shade without waste.
Testing And Tweaking Hue
Test your mixture on a small white surface. Look at the color in natural light for true results. If the color seems too blue, add a drop of red or yellow. If it looks too brown, add a bit of blue or green. Keep adjusting until the black is deep and balanced. Testing frequently prevents mistakes and saves time.
Neutralizing Unwanted Tones
Neutralizing unwanted tones is key when making black food coloring. Some mixtures may show hints of brown, red, or even green. These colors reduce the true black shade you want. Fixing these tones helps produce a deep, rich black that looks natural on food. Small changes in color balance can make a big difference.
Adjusting the colors carefully avoids dull or muddy results. Understanding how to counteract unwanted hues improves your final product. This section explains simple ways to balance your black food coloring.
Using Blue To Offset Orange
Orange tones often appear as unwanted warmth in black mixtures. Blue is the opposite of orange on the color wheel. Adding a small amount of blue dye cancels out orange tones. Start with tiny drops of blue to avoid making the mix too cool. Mix well and test the color after each addition. This method keeps the black vibrant and true.
Creating Balanced Black Shades
Balanced black shades come from mixing colors that neutralize each other. Combine equal parts of red, blue, and green food coloring for a solid base. If the black looks too warm or muddy, adjust by adding blue or green to cool it. For a softer black, add a tiny bit of red. Always mix slowly and test in small batches. This careful approach ensures a smooth, deep black every time.

Credit: www.lilaloa.com
Starting With Base Colors
Starting black food coloring with the right base colors helps achieve a rich, deep black. Mixing colors carefully can avoid dull or muddy results. Choose strong base shades to build upon. This method saves time and ingredients.
Using Green Or Purple As Base
Green and purple are excellent bases for black food coloring. They contain a mix of primary colors that blend well. Start with a dark green or deep purple dye. These colors cancel out brightness when mixed. Use equal parts of green or purple with small amounts of other colors like red or blue. This mix creates a darker, more natural black tone. Avoid using too much green or purple alone. Balance is key to avoid strange hues.
Layering To Achieve Black
Layering colors helps deepen the black shade gradually. Add small drops of different colors one by one. Mix well after each addition. Start with your green or purple base. Then add red, blue, or yellow in tiny amounts. Each layer darkens the color and removes brightness. Test the color on a white surface. Stop adding colors when the black looks rich and even. This process creates food coloring that looks natural and vibrant.
Diy Black Icing Tips
Making your own black icing can be fun and rewarding. It saves money and lets you control the color intensity. These tips help you get a smooth, rich black icing every time. Follow them to avoid common problems and improve your decorating skills.
Preventing Color Bleed
Color bleed happens when black icing mixes with lighter colors on your cake. To stop this, let your black icing dry fully before adding other colors. Use a thick black icing to create a barrier that stops colors from blending. Avoid water or thin liquids in your black icing, as they cause bleeding. Use gel or paste food coloring for deeper, stable black tones.
Maintaining Consistency
Consistent icing spreads and pipes better. Start with a thick base like buttercream or royal icing. Add black food coloring little by little to keep the texture smooth. Mix well to avoid streaks and uneven color. If the icing is too thick, add small drops of milk or water carefully. If it is too thin, add powdered sugar to thicken it. Proper consistency makes decorating easier and results look cleaner.
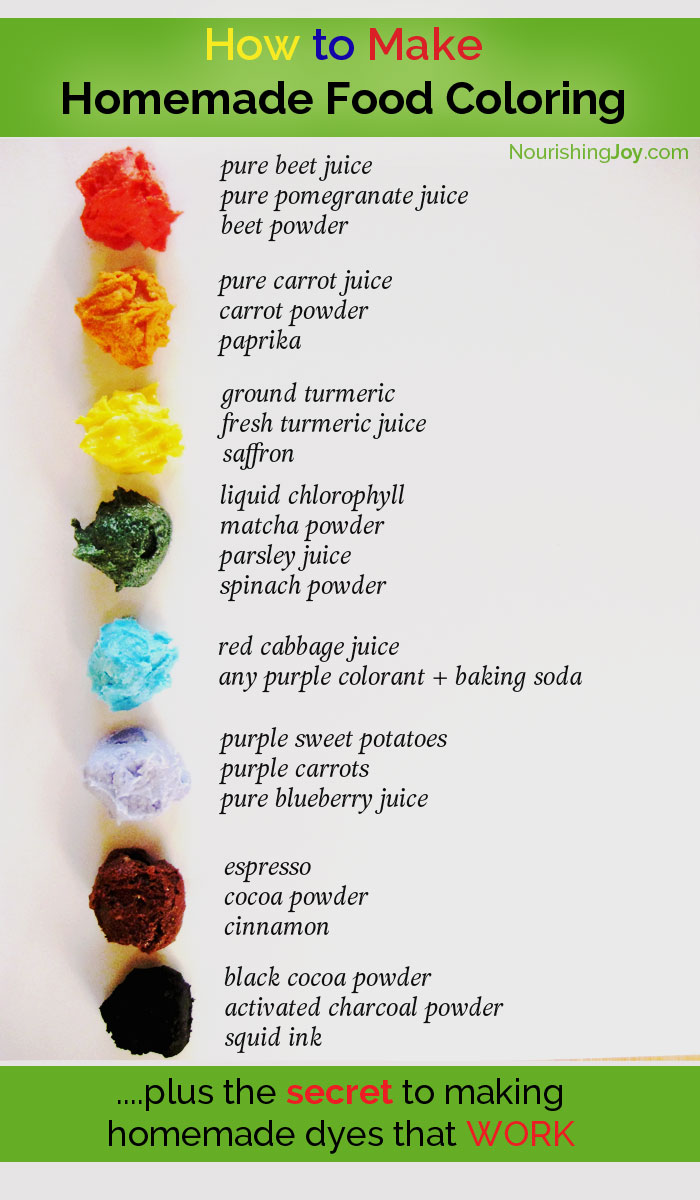
Credit: nourishingjoy.com
Common Mistakes To Avoid
Creating black food coloring at home can be tricky. Avoiding common mistakes helps you get the perfect deep black shade. Small errors can lead to dull or uneven color. Focus on the key points to improve your results and save time.
Overusing Liquid Coloring
Adding too much liquid food coloring can make the mixture runny. This affects the texture of your frosting or batter. It may also weaken the flavor and cause uneven color spots. Use gel or paste coloring for better control. Add small amounts gradually and mix well before adding more.
Ignoring Color Testing
Not testing your color can lead to surprises after decorating. The color may look different when dry or after baking. Always test a small amount first on a piece of paper or a small part of your frosting. Check the color in different lights. Adjust the mixture based on your test results for the best outcome.
Frequently Asked Questions
How Do You Make Black Food Coloring?
Mix equal parts of red, green, and blue food coloring. Add more red and green for a deeper black shade. Cocoa powder can enhance the color naturally.
What Two Food Colors Make Black?
Mix red and green food coloring to create black. Adjust the amounts with more green and a bit of yellow for deeper black. Alternatively, combine red and blue with yellow for darker shades.
What Two Colors Make Black?
Mixing red and green food colors creates black by canceling out hues. Alternatively, red and blue combined with yellow also produce black.
Can You Get Black Food Coloring?
Yes, you can get black food coloring. Mix red, green, and blue dyes or use black gel food coloring. Natural options include cocoa powder combined with food coloring for a rich black shade.
How Do You Make Black Food Coloring At Home?
Mix equal parts of red, blue, and green food coloring. Adjust with more red and green.
Which Colors Combine To Create Black Food Coloring?
Red, blue, and green mixed together create black. Adjust for a deeper black tone.
Can Natural Ingredients Make Black Food Coloring?
Yes, ingredients like activated charcoal or black cocoa powder can create natural black dye.
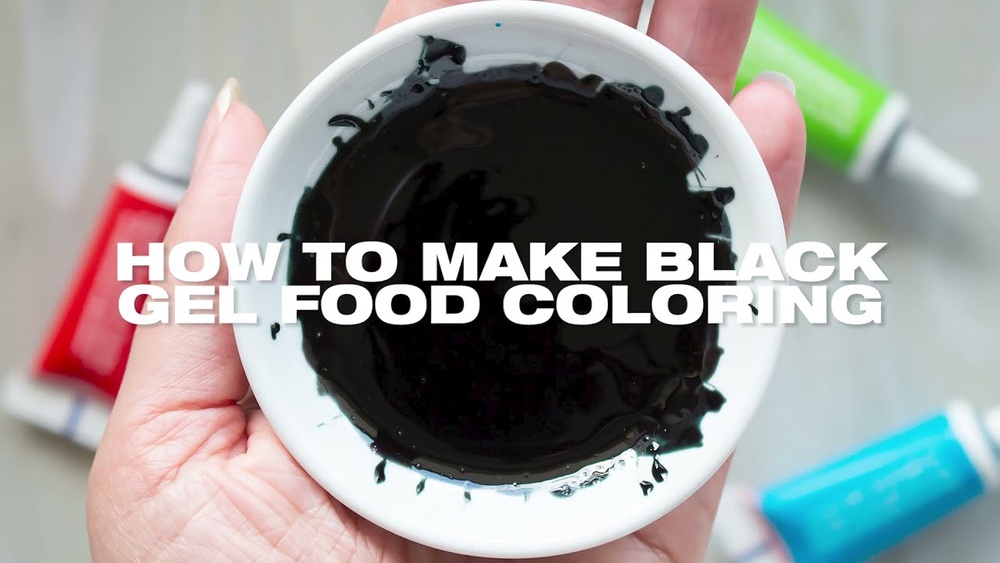
How To Make Black Gel Food Coloring?
Mix liquid food colors until black, then add a thickener like corn syrup to gel.
Is Black Food Coloring Safe To Eat?
Yes, commercial black food coloring is safe when used as directed in recipes.
How Much Food Coloring Is Needed For Black Frosting?
Start with small drops; add more until the desired black shade is reached.
Conclusion
Making black food coloring at home is simple and affordable. Mix red, green, and blue dyes carefully for the best shade. Adjust the amounts slowly to avoid a dull color. Using natural ingredients like cocoa powder can add depth and richness.
Homemade black food coloring works great for cakes, frostings, and more. Experiment to find the perfect black for your recipes. This method saves money and lets you control ingredients. Try it today and enjoy creative, colorful baking!