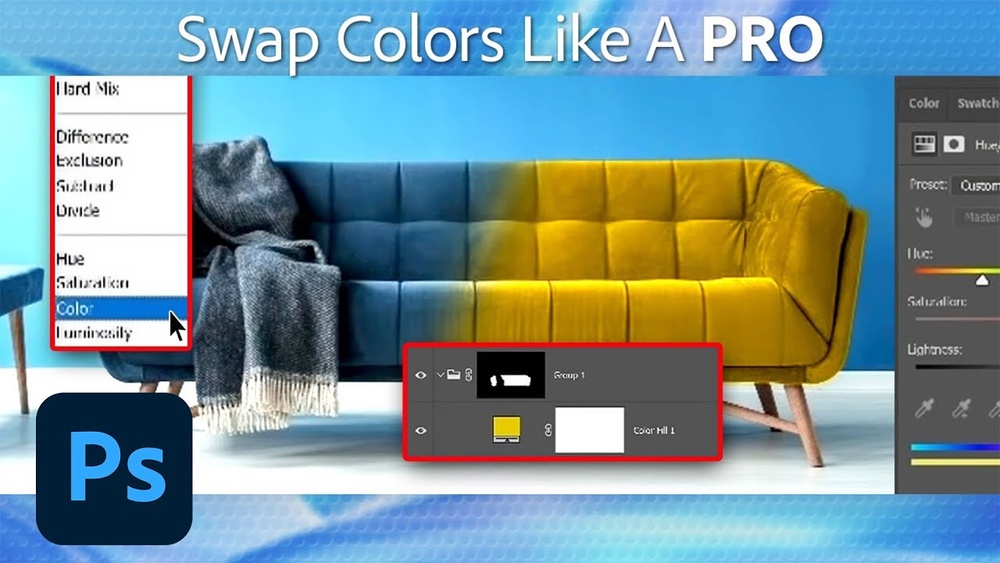
Want to change the color of an object in your photo but don’t know where to start? You’re in the right place.
Whether you want to make a shirt pop with a bold new shade or turn a dull background into something vibrant, Photoshop gives you powerful tools to make it happen quickly and easily. In this guide, you’ll learn simple, step-by-step methods to select any object and change its color without affecting the rest of your image.
By the end, you’ll have the skills to transform your photos and bring your creative vision to life. Ready to see how? Let’s dive in!
Select The Object
Selecting the object is the first step to change its color in Photoshop. You need a clean and precise selection to get the best result. Photoshop offers several tools to help you select objects quickly and accurately. Choosing the right tool depends on the object’s shape and background.
Take your time to select the object carefully. A good selection makes the color change look natural and professional.
Using Object Selection Tool
The Object Selection Tool lets you select an object by drawing a simple rectangle or lasso around it. Photoshop detects the edges and selects the object inside the area.
This tool works well with clear and distinct objects. Click and drag around the object to start the selection. Photoshop will automatically find the edges.
Using Quick Selection Tool
The Quick Selection Tool allows you to paint over the object to select it. It samples the colors and textures to grow the selection as you drag.
This tool is ideal for objects with complex shapes or uneven edges. Simply brush over the parts you want to include in the selection.
Adding And Subtracting From Selection
Sometimes, the initial selection is not perfect. You can add or remove areas to refine it.
Hold the Shift key to add to the selection and paint over the missing parts. Hold the Alt (Option on Mac) key to subtract and paint over unwanted areas.
Keep adjusting until the selection covers the object accurately. This step ensures the color change only affects your chosen area.
Credit: www.youtube.com
Create Adjustment Layer
Creating an adjustment layer is a key step in changing the color of an object in Photoshop. It allows you to edit colors without altering the original image. Adjustment layers are flexible and easy to modify anytime during your editing process.
This method keeps your edits non-destructive. You can always tweak or remove the color changes without losing any original detail. Let’s explore how to create and use an adjustment layer for color changes.
Locate Adjustment Layer Icon
Look at the bottom of the Layers panel. Find the circle icon that is half black and half white. This icon opens a menu with different adjustment layer options. It is easy to spot and click.
Choose Hue/saturation Layer
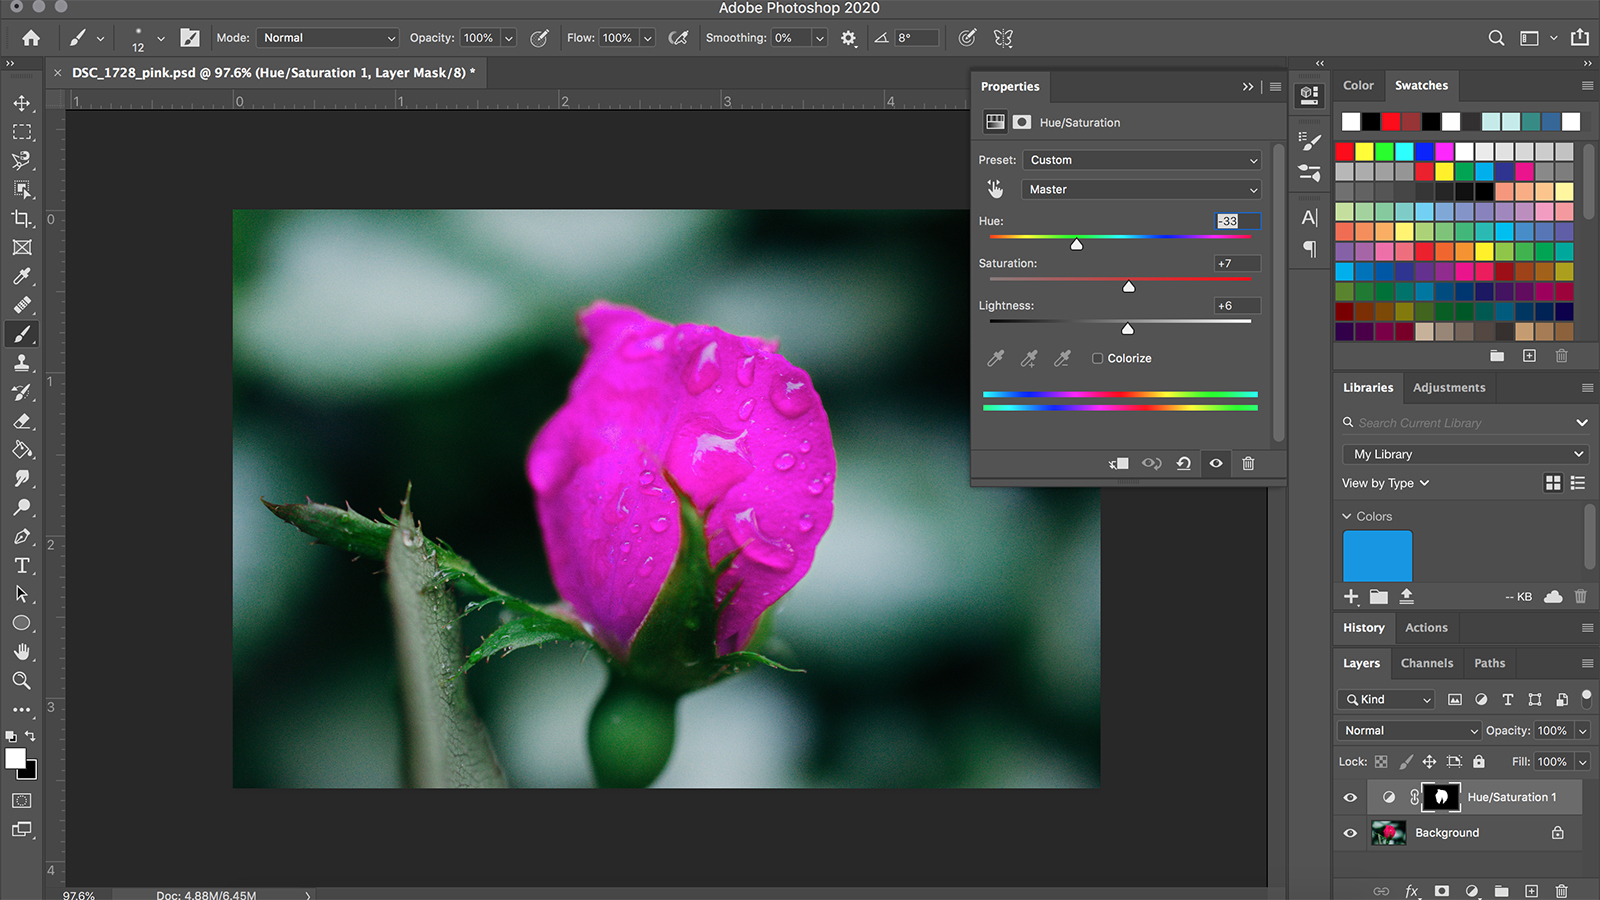
From the adjustment layer menu, select “Hue/Saturation.” This layer helps to change colors by shifting hue, saturation, and lightness. Once chosen, a new adjustment layer appears above your image layer.
The Hue/Saturation layer adds a control panel. You can slide bars to change colors smoothly. This tool works well for changing the color of a specific object.
Layer Mask Application
When you create the Hue/Saturation layer after selecting an object, Photoshop adds a layer mask automatically. The mask limits the color changes to the selected area only. It hides the changes from other parts of the image.
If needed, you can edit the mask with a brush. Paint with black to hide or white to reveal color changes. This gives you control over where the new color appears.
Adjust Hue Settings
Adjusting hue settings in Photoshop offers a simple way to change an object’s color. This method allows you to shift colors smoothly without affecting other parts of your image. You can customize the color to match your design needs quickly and precisely.
Using hue adjustments is non-destructive, meaning your original image stays safe. You can always fine-tune or revert changes without losing quality. It works best with well-selected objects or areas with clear color boundaries.
Change Object Color
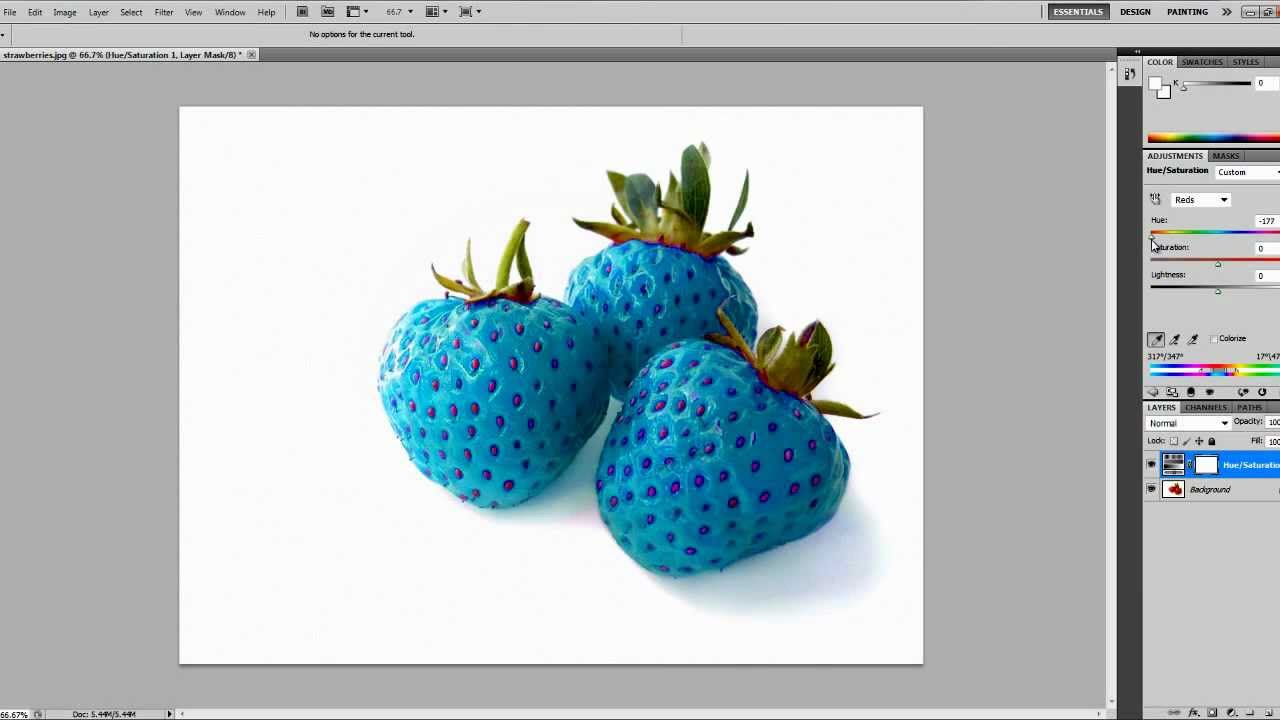
Start by selecting the object with the Object Selection Tool or Quick Selection Tool. Next, add a Hue/Saturation adjustment layer. This layer creates a mask that limits color changes to your chosen object.
Move the Hue slider left or right to shift the color. Adjust Saturation to make the color more or less intense. Lightness changes the brightness of the color. These sliders help you find the exact shade you want.
Target Specific Color Range
Use the dropdown menu in the Hue/Saturation panel to pick a specific color range. For example, select Reds, Blues, or Greens depending on your object’s color. This targets only those colors, leaving others untouched.
Fine-tune the color range by adjusting the sliders below the dropdown. This narrows or widens the selection. It ensures the hue shift only affects the desired parts. This precision keeps the image natural and clean.
Modify Saturation
Modifying the saturation of an object in Photoshop changes the strength of its color. Saturation controls how vivid or dull the color appears. Adjusting saturation helps make colors pop or soften them for a subtle look. This step is important after selecting the object and before finalizing your color change.
Increase Color Intensity
To increase color intensity, open the Hue/Saturation panel. Move the Saturation slider to the right. This action makes the colors brighter and more vibrant. Use this when you want the object to stand out with rich colors. Avoid pushing saturation too far, as colors can look unnatural.
Decrease Color Intensity
To decrease color intensity, drag the Saturation slider to the left. This reduces the color’s strength, making it softer or more muted. Lower saturation works well for a vintage or faded effect. Keep adjusting until the color fits the style you want for your design.
Control Lightness
Controlling lightness is key when changing an object’s color in Photoshop. It helps maintain the natural look and depth of the object. Adjusting lightness can make the object look brighter or darker, matching the new color better.
Brighten The Object
To brighten the object, select the Hue/Saturation adjustment layer. Find the Lightness slider in the Properties panel. Move the slider to the right to increase brightness. This makes the colors appear lighter and more vivid. Brightening can highlight details and create a fresh look.
Darken The Object
To darken the object, use the same Hue/Saturation adjustment layer. Slide the Lightness control to the left. This reduces brightness and deepens colors. Darkening adds contrast and can create a moodier effect. Adjust slowly to avoid losing details in shadows.
Refine Layer Mask
Refining the layer mask is a key step in changing an object’s color in Photoshop. It helps make the color change look natural and clean. A well-refined mask ensures that only the object changes color, not the background or other parts of the image.
This process involves adjusting the edges of the mask. It removes rough or jagged borders and adds smoothness. Photoshop offers simple tools to refine these edges precisely and quickly.
Use Brush Tool For Precision
The Brush Tool allows you to paint directly on the layer mask. Use a soft brush to add or remove areas from the mask. Painting with black hides parts of the color change. Painting with white reveals them again.
Zoom in for detailed work around edges. Adjust brush size to fit the object’s shape. This method gives you control over which parts get colored.
Smooth Edges
Smooth edges make the color change blend better with the background. Use the “Feather” option in the Properties panel to soften mask edges. This reduces harsh lines and creates a natural transition.
Also, use the “Refine Edge” tool for more control. It helps improve tricky areas like hair or fur. Smooth edges prevent the color change from looking cut out or fake.
Use Color Replacement Tool
The Color Replacement Tool in Photoshop lets you change an object’s color quickly. It works by painting over the original color with a new one. This tool keeps the texture and shading intact, so the object looks natural. It is perfect for small areas or complex shapes where other methods might be harder to use.
Using this tool is simple and effective. You can choose the new color, adjust brush size, and start painting directly on the object. Photoshop replaces only the colors you want, making your edits precise and clean.
Select Tool Options
Start by selecting the Color Replacement Tool from the toolbar. It hides under the Brush Tool, so click and hold to find it. Next, pick the color you want to apply. Use the color picker at the bottom of the toolbar or the foreground color box.
Set the brush size and hardness to match the object edges. Adjust the Limits option to control how far the color change spreads. Choose Sampling Once for a steady color or Continuous to sample colors as you paint. Also, set the Tolerance level to decide how similar the color must be to change.
Paint Over Object
Move the brush over the object and click or drag to paint. The tool replaces the original color with your chosen color. Be careful near edges to keep the color inside the object. Use a smaller brush size for details and corners.
If the color goes outside the area, undo and lower the Tolerance. You can change colors multiple times by picking new foreground colors. This method works well on photos and digital art for fast color changes.
Try Selective Color Adjustment
Selective Color Adjustment in Photoshop offers precise control over object colors. It changes specific color ranges without affecting the whole image. This method works well for subtle and natural color shifts. It helps you adjust colors with great accuracy.
By targeting color channels, you can fine-tune tones to match your vision. Selective Color Adjustment lets you work on reds, blues, yellows, and more. This control is useful for correcting or enhancing colors in an object.
Adjust Individual Color Channels
Open the Selective Color Adjustment layer from the Adjustments panel. Choose the color channel you want to edit, such as Reds or Greens. Use the sliders to increase or decrease Cyan, Magenta, Yellow, and Black values. This changes the color tone within that channel only. Adjust each channel carefully to keep colors natural. Small changes can make a big difference in the final look.
Enhance Color Accuracy
Use Selective Color to fix color casts or improve color balance. Work on specific colors that look off or dull. Adjusting the Black slider can add depth or lighten colors. Keep checking your image as you adjust to avoid unnatural colors. This method helps maintain color harmony while changing the object’s color. It is perfect for detailed color work that needs precision.
Apply Gradient Map For Effects
Applying a Gradient Map in Photoshop offers a creative way to change an object’s color with smooth transitions. This method overlays colors based on the brightness of the original image. It creates unique color effects that can enhance your design. Gradient Maps are perfect for adding depth or a stylish look to any object.
Create Gradient Map Layer
Start by selecting your object or the entire image layer. Go to the Layers panel and click on the “Create new fill or adjustment layer” icon. Choose “Gradient Map” from the list. This adds a new Gradient Map layer above your image.
The Gradient Map panel shows a gradient bar. Click it to open the Gradient Editor. Here, you can pick preset gradients or create your own by adjusting color stops. Each color corresponds to a tone in the image, from shadows to highlights.
Blend With Original Colors
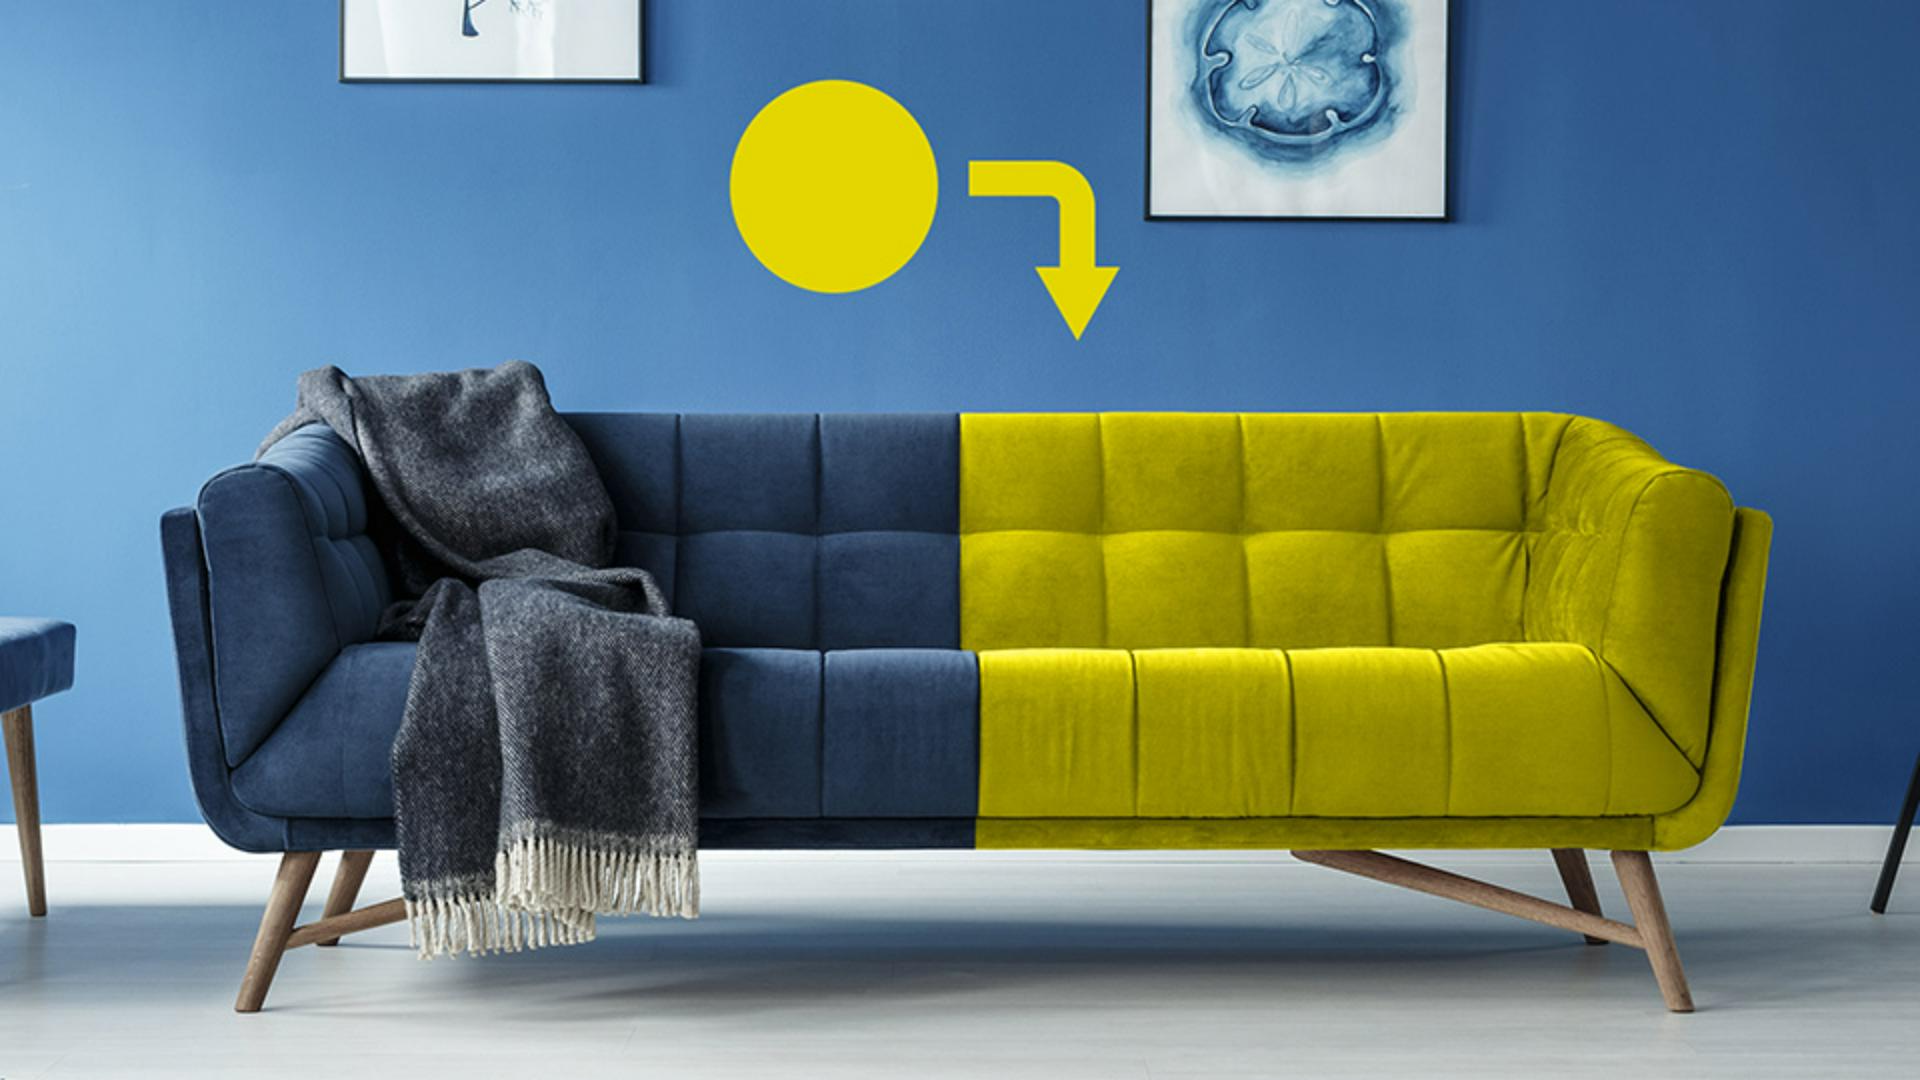
After setting your gradient, change the Gradient Map layer’s blend mode to mix it with the original colors. Try modes like “Color,” “Overlay,” or “Soft Light.” Each mode changes how the gradient interacts with the base image.
Adjust the layer’s opacity to control the effect’s intensity. Lower opacity softens the color change. Higher opacity gives a stronger, more vivid look. Use this to find the perfect balance for your design.
Credit: www.adobe.com
Save And Export
After changing the color of your object in Photoshop, saving and exporting your work is the next important step. This ensures your edited image stays intact and looks great on any device or platform. Proper saving and exporting help keep the color quality and file size balanced. Follow simple steps to keep your work safe and ready to use.
Choose File Formats
Select the right file format based on your project needs. Use PSD to save your work with layers. This format lets you edit later without losing quality. For sharing or web use, save as JPEG or PNG. JPEG works well for photos but may reduce quality slightly. PNG keeps high quality and supports transparency. Pick the format that suits your final use.
Maintain Color Quality
Keep the color true and sharp by choosing the right export settings. Use a high resolution like 300 dpi for print projects. For web images, 72 dpi is enough to save file size. Avoid compressing the file too much to prevent color loss. Check color profiles like sRGB to keep colors consistent across devices. This preserves the look of your color changes perfectly.
Credit: www.digitaltrends.com
Frequently Asked Questions
How Do I Change The Color Of A Specific Object In Photoshop?
Select the object using the Object Selection or Quick Selection Tool. Add a Hue/Saturation adjustment layer. Adjust Hue, Saturation, and Lightness sliders to change the object’s color.
How Do I Change The Color Of Any Object In A Photo?
Select the object using the Object Selection or Quick Selection Tool. Add a Hue/Saturation adjustment layer. Adjust Hue, Saturation, and Lightness sliders to change the color precisely.
How To Recolor An Image In Photoshop?
Select the object using the Object or Quick Selection Tool. Add a Hue/Saturation adjustment layer. Adjust Hue, Saturation, and Lightness to recolor the image.
How Do You Change The Color Of A Shape In Photoshop?
Select the shape using the Object or Quick Selection Tool. Click the Hue/Saturation adjustment layer icon. Adjust Hue, Saturation, and Lightness sliders to change the shape’s color.
How Do I Select An Object To Change Its Color In Photoshop?
Use the Object Selection Tool or Quick Selection Tool to highlight the object you want to recolor.
What Is The Easiest Way To Change An Object’s Color In Photoshop?
Apply a Hue/Saturation adjustment layer and move sliders to adjust the color easily.
Can I Change Color Only On Part Of An Object In Photoshop?
Yes, use layer masks to limit color changes to specific parts of your selection.
How Do I Keep The Object’s Texture While Changing Its Color?
Adjust Hue/Saturation without altering brightness to preserve the original texture details.
What Photoshop Tool Helps Isolate Color Changes Precisely?
The layer mask automatically created with adjustment layers helps isolate color changes precisely.
How Do I Revert Color Changes If I Make A Mistake?
Simply hide or delete the adjustment layer to undo or adjust your color changes.
Conclusion
Changing an object’s color in Photoshop is simple and effective. Use the selection tools to isolate your subject quickly. Then adjust the Hue/Saturation sliders for the perfect shade. Practice these steps to build confidence and speed. With time, color changes will feel natural and fun.
Keep experimenting to see what looks best. Photoshop gives you great control over your edits. This skill helps improve your images and creativity. Try it out and enjoy making vibrant designs today.