Want to give your photos a fresh new look by changing their background color? Whether you’re working on a portrait, product shot, or creative design, knowing how to change the background color in Photoshop can make your images pop and grab attention.
You don’t need to be a pro or spend hours learning complicated steps—this guide will walk you through simple, clear methods that anyone can follow. By the end, you’ll have the skills to quickly switch up backgrounds and make your pictures stand out exactly the way you want.
Ready to transform your images effortlessly? Let’s dive in!
Set Background Color For New Document
Setting the background color for a new document in Photoshop is simple and quick. This step helps create a workspace that fits your project’s needs from the start. Choosing the right background color saves time and improves your workflow.
Photoshop offers easy options to pick a background color when creating a new file. You can select a solid color or leave the background transparent. This choice depends on what you want to design.
Open The New Document Window
Start by opening Photoshop. Click on File in the top menu. Then choose New from the dropdown. A new window will appear for document settings.
Choose Background Contents
In the new document window, find the Background Contents section. It offers three options: White, Background Color, and Transparent. Pick the one that suits your project.
Set A Custom Background Color
To set a custom background color, first select Background Color. Then, click the color swatch next to it. A color picker will open. Choose your desired color and press OK.
Create Your Document
After setting the background color, adjust other settings if needed. Click Create to open your new document. The background will show the color you picked, ready for your work.

Credit: www.lightroompresets.com
Open Existing Project In Photoshop
Opening an existing project in Photoshop is the first step to changing a background color. It allows you to access your saved work quickly and continue editing without starting over. Photoshop supports many file types, including PSD, JPEG, PNG, and TIFF. Each format keeps your images ready for easy updates.
Before changing the background, you need to open the project correctly. This ensures all layers and effects remain intact. The process is simple and fits into any workflow, whether you work on simple photos or complex designs.
Launch Photoshop And Access The Start Screen
Begin by opening Photoshop on your computer. The Start Screen shows recent files and options. You can pick a recent project or open a new one from here. This screen helps save time by listing your last work.
Use The File Menu To Open Your Project
Click on “File” in the top menu bar. Then select “Open” from the dropdown list. A file browser window appears, letting you find your saved project. Navigate to the folder where your file is stored.
Select Your Project File
Find the project file you want to edit. Click on the filename once to highlight it. Make sure the file type matches your project, like PSD for layered files. After selecting, click the “Open” button to load the project.
Check Your Layers And Image
After opening, look at the Layers panel. Confirm all layers are visible and unlocked. This helps when you change the background color later. If the Layers panel is missing, go to “Window” and select “Layers” to show it.
Save A Backup Before Editing
It is good to save a copy of your project before changes. Use “File” > “Save As” to create a backup. This way, your original work stays safe. You can always return to it if needed.
Access Layers Panel
Start by opening the Layers panel to see all your layers. Select the background layer or add a new Solid Color fill layer. This lets you easily change the background color in Photoshop with just a few clicks.
Opening The Layers Panel
The Layers Panel is essential for editing images in Photoshop. It shows all layers in your project. To open it, go to the top menu and click Window. Then select Layers from the dropdown. The panel will appear on the right side of the screen. This panel lets you see and manage each layer separately.
Understanding Layers Panel Layout
The Layers Panel displays each layer as a separate row. Each row has a thumbnail showing the layer’s content. To the right, you see the layer’s name and visibility icon (an eye). You can click the eye to hide or show a layer. This helps you focus on specific parts of your image while editing.
Using Layers For Background Color Change
Changing the background color requires selecting the right layer. Usually, the background is the bottom layer named “Background”. You can unlock it by clicking the lock icon. Then, add a new Solid Color fill layer above it. This method keeps your edits non-destructive and easy to adjust later.
Add Solid Color Fill Layer
Adding a Solid Color Fill Layer is a simple way to change the background color in Photoshop. This method lets you apply a smooth, even color behind your subject. It works well for photos, graphics, or any design needing a fresh background.
This technique keeps the background editable. You can change the color anytime without affecting the original image. It also helps keep your project organized by using layers.
Add A New Solid Color Fill Layer
Open your Photoshop file and look at the Layers panel. Click the “Create new fill or adjustment layer” button. Choose “Solid Color” from the menu. A Color Picker window appears.
Choose Your Background Color
Pick the color you want for your new background. You can use the sliders or enter a hex code. Click “OK” to apply the color. Photoshop adds the color as a new fill layer above your current layers.
Move The Fill Layer Below Your Subject
Drag the Solid Color Fill Layer below the layer with your subject. This places the color behind the main image. Your subject stays visible on top of the new background color.
Edit The Background Color Later
Double-click the color thumbnail in the Layers panel. This opens the Color Picker again. Change the color and click “OK.” The background updates immediately, making it easy to try different colors.
Choose New Background Color
Changing the background color in Photoshop starts with picking the right color. This step sets the tone for your entire image.
Photoshop offers many ways to select a new background color. You can choose simple colors or create custom shades to match your design.
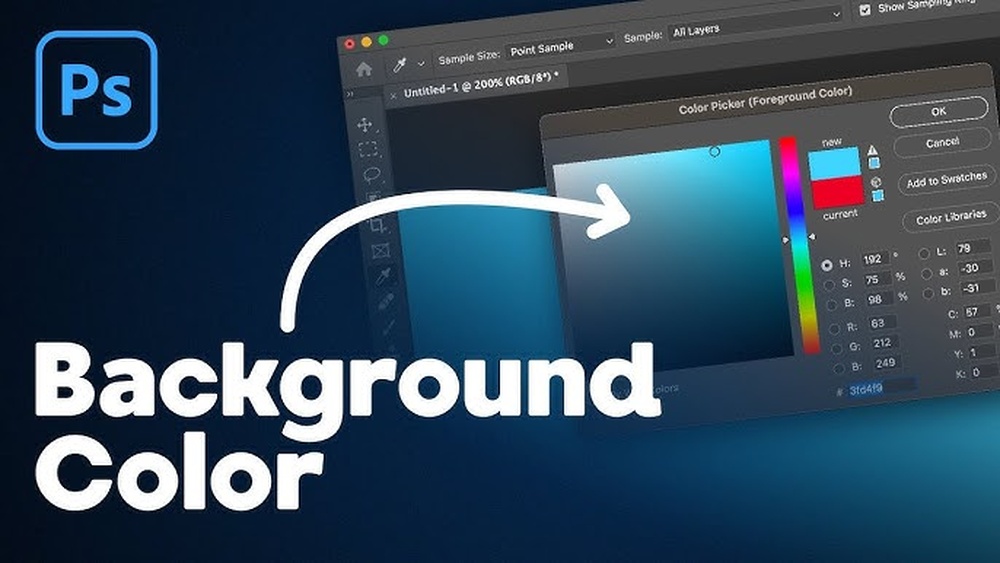
Using The Color Picker Tool
The Color Picker lets you select any color you want. Click the foreground or background color box on the toolbar. A window will open with a color spectrum. Move the sliders or enter color codes to find your perfect shade. Click “OK” to apply your choice.
Applying A Solid Color Fill Layer
Adding a Solid Color Fill layer changes the background quickly. Go to Layer > New Fill Layer > Solid Color. Pick your color in the window that appears. This method is non-destructive, so you can change the color anytime without losing your work.
Setting Background Color When Creating A New Document
You can choose a background color before starting your project. Click File > New. In the New Document window, find the “Background Contents” option. Select “Custom” and pick your color. This sets the background color from the start.
Position Fill Layer At Bottom
After creating a Solid Color fill layer for your background, placing it correctly in the layers panel is key. The fill layer must sit at the bottom. This placement ensures the color fills the entire background behind your main image or subject.
Placing the fill layer at the bottom prevents it from covering important parts of your design. It acts as the backdrop, letting all other layers appear on top. This simple step keeps your project organized and your background visible.
Locate The Fill Layer In Layers Panel
Find the Solid Color fill layer you just created. It usually appears at the top of your layer stack. You need to move it down to the very bottom.
Drag And Drop The Fill Layer
Click on the fill layer and hold your mouse button. Drag the layer down below all other layers. Release the mouse when it reaches the bottom of the list.
Confirm The Fill Layer Is At The Bottom
Check that the fill layer is the last one in the Layers panel. It should be below your image and any adjustment layers. This confirms your background color shows behind everything.
Use Shortcut To Move Layer
Alternatively, select the fill layer and press Ctrl+[ (Cmd+[ on Mac). This shortcut moves the layer down one step. Press repeatedly until the fill layer is at the bottom.
Make Selection Around Subject
Making a selection around your subject is the first key step in changing the background color in Photoshop. This process isolates the subject from the rest of the image. It helps ensure the new background color does not affect the subject itself.
Photoshop offers several tools to make this selection easy and precise. Choosing the right tool depends on your image’s complexity and your comfort with Photoshop.
Use The Quick Selection Tool
The Quick Selection Tool lets you paint over your subject to select it. It detects edges automatically, speeding up the process. Adjust the brush size for better control. Zoom in for detailed areas. Add to the selection by dragging over more parts. Remove from the selection by holding the Alt key and dragging.
Try The Select Subject Feature
This feature uses artificial intelligence to find and select the main subject quickly. It works best on clear, well-defined subjects. Access it from the Select menu by choosing “Subject.” Photoshop will create a rough selection instantly. Use this as a starting point for refinement.
Refine Your Selection With Select And Mask
After the initial selection, use Select and Mask to improve edges. This tool smooths, feather edges, and removes unwanted areas. It offers different views to see your selection against various backgrounds. Use the Refine Edge Brush for hair or fur details. Adjust sliders to perfect the selection before applying it.
Refine Edges With Quick Mask
The Quick Mask mode in Photoshop helps refine edges of a selection easily. It lets you paint areas that need adjustment with a brush. This method improves the accuracy of your selection before changing the background color.
Using Quick Mask reveals details that normal selection tools might miss. It allows smooth, clean edges around objects. This step is important for professional-looking image edits.
Entering Quick Mask Mode
Press the Q key or click the Quick Mask icon in the toolbar. The selected area shows in normal colors. The masked area appears with a red overlay. This overlay represents unselected parts of your image.
Refining The Selection With Brush Tool
Select the Brush tool and choose a soft brush. Paint with black to add to the mask and hide areas. Paint with white to remove from the mask and reveal areas. Adjust brush size to work on small details or broad areas.
Exiting Quick Mask And Applying Changes
Press Q again to exit Quick Mask mode. The painted area turns into a refined selection. Use this selection to delete, mask, or change the background color. This ensures smooth edges without unwanted gaps or halos.
Use Layer Mask To Remove Old Background
Using a layer mask to remove the old background in Photoshop is a smart way to keep your image clean. This method hides the background instead of deleting it. You can fix mistakes easily and change the background color without losing details.
Layer masks work by using black, white, and gray colors. Black hides parts of the layer, white shows parts, and gray gives partial transparency. This gives you full control over what parts of the background stay visible or invisible.
Open Your Image And Add A Layer Mask
Start by opening your image in Photoshop. Click on the layer with your photo. Then, click the “Add Layer Mask” button at the bottom of the Layers panel. This adds a white mask, showing the whole image.
Use The Brush Tool To Paint On The Mask
Select the Brush tool from the toolbar. Set the color to black to hide the old background. Carefully paint over the areas you want to remove. Change the brush size for better control around edges.
Refine The Mask For Clean Edges
Zoom in to see the edges clearly. Switch between black and white brush colors to hide or reveal parts. Use a soft brush for smooth transitions. This helps create a natural look around hair or detailed areas.
Add A New Background Color Layer
Create a new layer below your masked image layer. Fill it with the color you want as your new background. The masked photo will now appear with this new background color showing through.

Credit: www.youtube.com
Save And Export Your Image
Saving and exporting your image correctly ensures your work stays safe and ready for use.
Photoshop offers multiple file formats and options to keep your edited image sharp and clear.
Save Your Project As A Psd File
Save your image as a PSD file to keep all layers intact.
This format allows you to edit the background color later without losing quality.
Go to File > Save As, choose PSD, and click Save.
Exporting For Web Or Social Media
Export your image as JPEG or PNG for easy sharing online.
JPEG is good for photos with many colors but no transparency.
PNG works best for images with transparent backgrounds or sharp edges.
Use File > Export > Export As to select your preferred format and settings.
Adjust Export Settings For Quality
Set the image size and quality to balance file size and clarity.
Higher quality means a bigger file size, lower quality reduces details.
For most uses, 72 dpi resolution and quality around 80% works well.
Preview the image before exporting to ensure it looks right.

Credit: photoshoptrainingchannel.com
Frequently Asked Questions
How Do You Change The Background Color In Photoshop?
Open File > New and select a background color in “Background Contents. ” For existing files, add a Solid Color fill layer and pick your color. Place this layer at the bottom to change the background color easily.
How To Fill In A Background In Photoshop?
Open your Photoshop file and select the Background layer. Use the Paint Bucket tool or add a Solid Color fill layer. Choose your desired color and apply it to fill the background quickly and easily.
How Do I Change The Color Of The Background Layer?
Open the Layers panel and add a Solid Color fill layer. Choose your desired color and drag this layer below others. Alternatively, set the background color when creating a new document via File > New and select the color under Background Contents.
How Do I Change The Background Color Of Workspace In Photoshop?
Open Photoshop, go to File > New, click the Background Contents color swatch, select your color, then click Create. For existing files, add a Solid Color fill layer from the Layers panel, pick your color, and place it below all layers to change the workspace background color.
How Do You Change The Background Color In Photoshop?
Use the Solid Color adjustment layer or create a new document with a chosen background color.
Can I Change Background Color Without Losing Image Quality?
Yes, using adjustment layers or masks keeps the image quality intact.
What Tools Help Select The Background For Color Change?
Use Quick Selection, Magic Wand, or Pen Tool for accurate background selection.
How To Remove The Background Before Changing Its Color?
Select the background and press Delete, or use Layer Mask to hide it.
Is It Possible To Change Background Color In Photoshop Quickly?
Yes, using Solid Color fill and selection tools speeds up the process.
Can I Change Background Color For Only Part Of An Image?
Yes, select the desired area and apply color changes only to that section.
Conclusion
Changing the background color in Photoshop is simple and quick. Use the selection tools to isolate the subject. Then add a Solid Color fill layer for a new background. Adjust the color until it looks just right. Practice helps you become more comfortable with each step.
Try different colors to see what fits best. Soon, changing backgrounds will feel natural and easy. Keep experimenting and enjoy your creative edits!