
Using an airless paint sprayer can transform your painting projects. This tool offers a fast and efficient way to cover large surfaces with paint.
Airless paint sprayers work by using high pressure to push paint through a small tip. This method atomizes the paint, creating a fine mist that covers surfaces evenly. Whether you are painting walls, fences, or furniture, mastering this tool can save you time and effort.
Learning how to use an airless paint sprayer can also help you achieve a professional finish. Understanding the basics of setup, technique, and safety will make your projects easier and more enjoyable. Dive into this guide to discover how to use an airless paint sprayer effectively and confidently.
Introduction To Airless Paint Sprayers
Airless paint sprayers are a game-changer for anyone looking to tackle painting projects efficiently and effectively. They operate by using high pressure to atomize paint, allowing for a smooth, even finish on a variety of surfaces. If you’ve ever struggled with traditional brushes or rollers, you’ll appreciate the speed and precision that airless sprayers bring to the table.
Benefits Of Using Airless Sprayers
One of the biggest advantages of airless sprayers is speed. You can cover large areas in a fraction of the time it takes with a brush or roller. This is especially helpful for big jobs like painting a house or a large fence.
Another benefit is the quality of the finish. Airless sprayers produce a fine mist that adheres well to surfaces, minimizing the appearance of brush strokes. You’ll achieve a professional look with less effort.
Cost-effectiveness is also a key point. While the initial investment may be higher than traditional tools, the time saved and reduced labor costs make airless sprayers a smart choice. Have you thought about how much time you could save on your next project?
Key Components Of An Airless Paint Sprayer
Understanding the key components of an airless paint sprayer can enhance your experience. The main parts include the pump, spray gun, and spray tip. Each plays a crucial role in delivering paint efficiently.
- Pump: This is the heart of the sprayer. It draws paint from the container and pushes it through the system at high pressure.
- Spray Gun: The spray gun is where you control the flow and pattern of the paint. It’s essential for achieving the finish you desire.
- Spray Tip: The spray tip determines the width and texture of the paint stream. Choosing the right one for your project is key.
Familiarizing yourself with these components can make a significant difference in your results. Do you know which spray tip suits your project best? It might be worth experimenting to see how different options impact your finish.
Safety First
Using an airless paint sprayer can be efficient. Safety is essential during this process. Proper precautions can prevent accidents and injuries. Always prioritize safety to protect yourself and others.
Personal Protective Equipment
Wearing the right personal protective equipment (PPE) is crucial. Start with a good respirator. It protects your lungs from harmful paint fumes. Use gloves to keep your hands safe from chemicals. Choose gloves that are resistant to solvents.
Eye protection is also important. Safety goggles can shield your eyes from paint splatters. Wear long sleeves and pants to protect your skin. Consider using a cap or hat to keep paint from your hair.
Understanding High Pressure Risks
Airless paint sprayers operate under high pressure. This pressure can cause paint to spray unpredictably. Always keep a safe distance from the spray tip. Never point the sprayer at yourself or others.
Be aware of the potential for injury. A paint sprayer can cause serious harm if misused. Always read the manufacturer’s instructions before use. Understand the machine’s features to work safely.
Preparing Your Paint
Preparing your paint is vital for a smooth application. Proper preparation ensures your airless paint sprayer works effectively. It also helps achieve a flawless finish. Follow these steps to get your paint ready.
Selecting The Right Paint
Choosing the right paint is crucial. Look for paint labeled for sprayers. Latex and acrylic paints are good options. They work well with airless sprayers. Check the manufacturer’s instructions. Some paints may require thinning.
Consider the project type. Interior and exterior paints have different properties. For outdoor projects, use weather-resistant paint. For indoor projects, choose low-VOC paint for safety.
To Thin Or Not To Thin
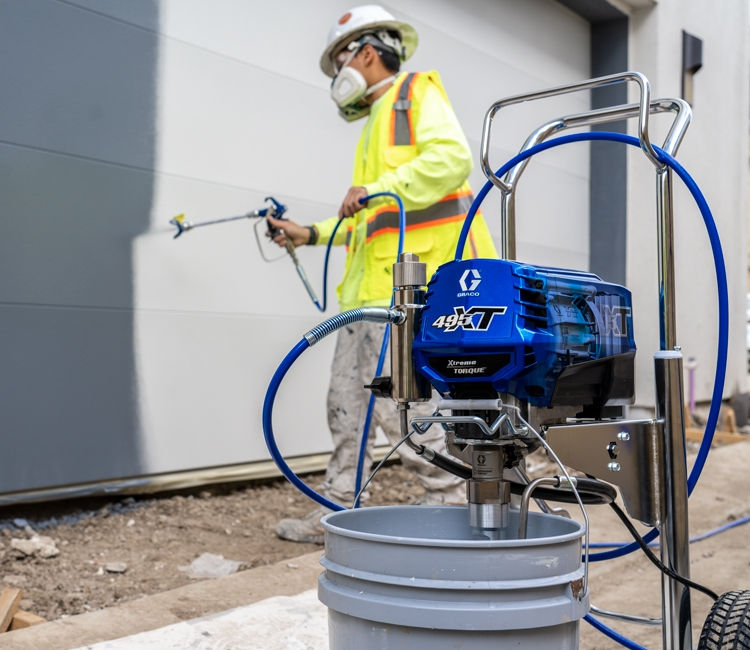
Thinning paint helps it flow better through the sprayer. Check the paint can for thinning instructions. Most latex paints need a small amount of water. Use a paint strainer to remove lumps. This prevents clogs in your sprayer.
Some paints may not need thinning. Always test the paint on a small area first. If the spray pattern is uneven, consider thinning. Remember, proper consistency is key for a smooth finish.
Credit: www.graco.com
Setting Up The Sprayer
Setting up an airless paint sprayer requires careful attention. Proper setup ensures smooth operation. Follow these steps to prepare your sprayer for use.
Assembling The Equipment
Start by gathering all necessary parts. Check the sprayer manual for the equipment list. Lay out the sprayer, hose, and spray gun. Ensure all parts are clean and undamaged.
Begin assembling the sprayer. Attach the spray gun to the hose tightly. Make sure there are no leaks at the connections. Then, connect the hose to the sprayer unit. Verify that all parts fit snugly together.
Priming The Pump
Priming the pump is crucial for smooth paint flow. Start by filling the paint bucket with your chosen paint. Ensure it is suitable for airless sprayers.
Next, turn on the sprayer and set it to prime. This will allow the pump to draw paint from the bucket. Watch for the paint to flow through the hose. This indicates that the pump is primed and ready.
Attaching And Filling The Hose
Attach the hose to the sprayer’s intake. Make sure it is secure to prevent leaks. Then, fill the hose with paint. This ensures the sprayer is ready for an even coat.
To fill the hose, pull the trigger on the spray gun. This will push out any air and fill the hose with paint. Keep pulling the trigger until you see a steady flow of paint.
Mastering Spray Techniques
Using an airless paint sprayer requires skill and practice. Understanding spray techniques is key. This knowledge helps achieve smooth, even coats. Let’s explore essential techniques for effective spraying.
Testing The Pattern
Before painting, always test your spray pattern. Use a piece of cardboard or scrap material. Hold the sprayer about 12 inches away. Start spraying and observe the pattern.
A proper spray should look even. Adjust the distance if needed. If the pattern is uneven, check the tip. A clogged or damaged tip may cause issues.
Adjusting Pressure Settings
Next, adjust the pressure settings on your sprayer. Higher pressure can create a finer mist. Lower pressure reduces overspray. Find the right balance for your project.
Start with a lower setting. Gradually increase it until you achieve the desired effect. Always consult your sprayer’s manual for recommended settings.
Effective Spraying Motions
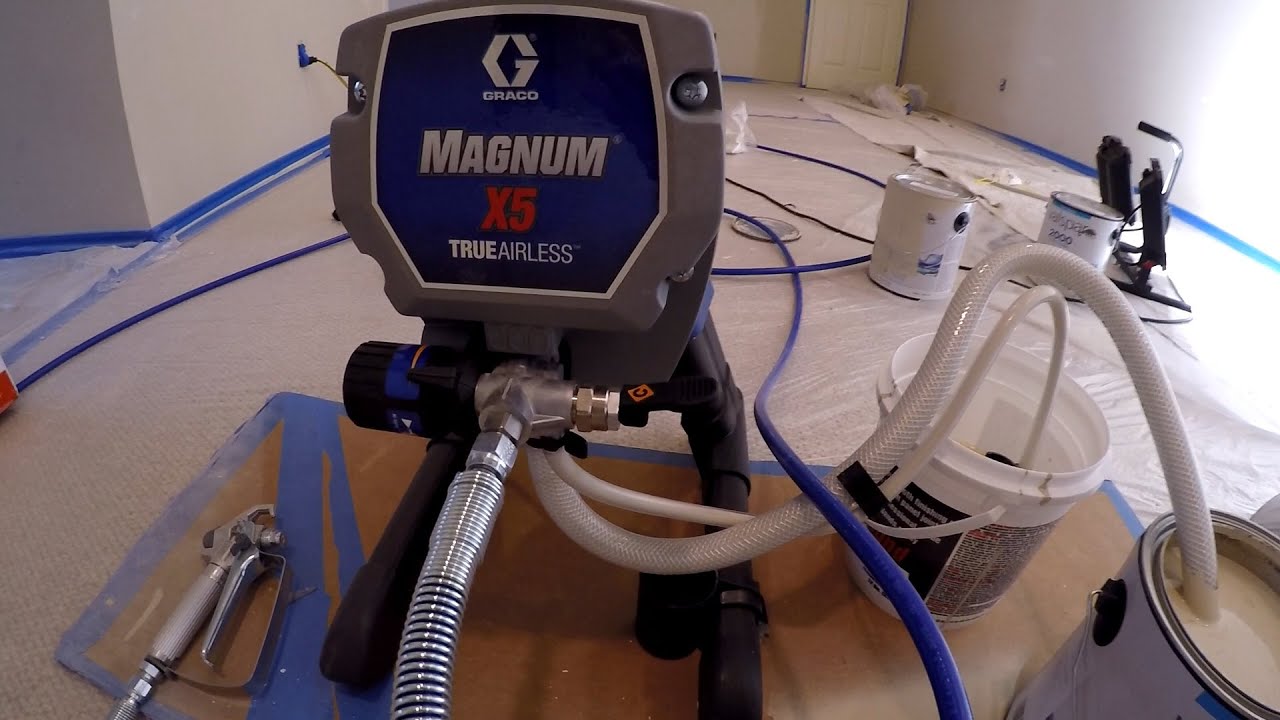
Developing effective spraying motions is crucial. Keep a consistent speed while moving. Spray in long, even strokes. Overlap each pass by about 30 percent.
Avoid stopping while spraying. This prevents uneven paint thickness. Practice on scrap material to gain confidence. Master your motion for better results.
Credit: www.youtube.com
Masking And Protecting Areas
Masking and protecting areas is vital for a clean paint job. Proper preparation prevents unwanted paint on surfaces. Follow these steps for effective masking.
Covering Non-paint Surfaces
First, identify surfaces that should not be painted. These include windows, trim, and floors. Use plastic sheets or drop cloths to cover these areas. Secure the edges with tape to prevent slipping.
For furniture, move it out of the way. If moving is not possible, cover it thoroughly. Use old sheets or tarps to protect surfaces. This will save you time during cleanup.
Using Shields And Tapes
Use painter’s tape for sharp lines. Apply the tape along edges you want to protect. Press down firmly to avoid paint bleed. A putty knife can help press the tape into corners.
Consider using a spray shield for large areas. This tool blocks overspray effectively. Hold it at an angle while spraying. This technique ensures a clean finish on your desired surfaces.
Always check your masking before you start. Make adjustments as needed. This ensures the best results for your project.
Maintaining Your Equipment
Taking care of your airless paint sprayer ensures it works well. Regular maintenance prevents problems and extends its life. Cleaning, unclogging, and proper storage are key steps. Follow these tips for a better painting experience.
Cleaning The Sprayer
Cleaning your airless paint sprayer is essential after each use. Start by draining leftover paint from the sprayer. Use the cleaning solution recommended by the manufacturer. Run the solution through the sprayer for a few minutes. This process removes paint residue and prevents clogs.
Next, disassemble the sprayer parts. Clean the spray gun, filters, and hoses. Use a soft brush to scrub any stubborn paint. Rinse everything with clean water. Make sure all components dry completely before reassembling.
Unclogging Tips And Filters
Clogs can happen, even with regular cleaning. If the sprayer stops spraying, check for blockages. Start with the spray tip. Remove it and clean it thoroughly. Use a needle or a small brush to clear any paint buildup.
Check the filters next. These can trap paint particles and cause issues. Remove them and rinse under warm water. Replace any damaged filters to ensure smooth operation. Regular checks can save you time and hassle.
Proper Storage
Storing your airless paint sprayer correctly is important. After cleaning, ensure all parts are dry. Store the sprayer in a cool, dry place. Avoid areas with extreme temperatures or humidity.
Keep the sprayer in its original case or a protective cover. This prevents dust and debris from accumulating. Regular maintenance and proper storage will keep your sprayer ready for the next project.

Credit: www.airblasteurospraydirect.com
Troubleshooting Common Issues
Using an airless paint sprayer can sometimes lead to common issues. Problems like clogging or uneven spray patterns are frequent. Troubleshooting these issues involves checking the paint thickness, cleaning the sprayer, and adjusting the pressure settings for a smoother finish.
Troubleshooting common issues with your airless paint sprayer can save you time and frustration. Encountering problems is a part of the painting process, but knowing how to address them can make a significant difference. Below are some common issues you might face and practical solutions to help you get back to painting smoothly.Dealing With Clogs
Clogs can be a major headache when using an airless paint sprayer. They often occur due to dried paint or debris in the sprayer.To fix this, first, turn off the sprayer and relieve the pressure. Then, remove the spray tip and clean it with water or a solvent specific to your paint type.If the clog persists, check the intake filter and clean or replace it as needed. Regular maintenance, such as straining your paint before use, can prevent future clogs.Fixing Leaks
Leaks can lead to messy situations and wasted paint. Common culprits include loose fittings or worn-out seals.Start by inspecting all connections and tightening any loose parts. If you notice a worn-out seal, replace it to ensure a tight fit.It’s wise to keep a spare set of seals on hand for quick fixes.Have you ever faced a situation where a simple adjustment saved you from a bigger mess?Spray Pattern Inconsistencies
An uneven spray pattern can ruin your project, leaving streaks or uneven coverage. This issue often arises from incorrect pressure settings or a dirty spray tip.Adjust the pressure to find the sweet spot for your specific paint. If the problem continues, clean the spray tip thoroughly.Sometimes, switching to a different spray tip can also improve the pattern.Have you ever noticed how a small change in pressure can make a world of difference in your finish?By staying vigilant and addressing these common issues, you can enjoy a smoother painting experience with your airless sprayer. Happy painting!Advanced Airless Sprayer Tips
Using an airless paint sprayer can simplify your painting projects. Start by preparing your surface and choosing the right paint. Adjust the pressure and practice on a scrap piece to ensure a smooth finish before tackling your main area. Remember to clean the sprayer thoroughly after use.
When using an airless paint sprayer, mastering the basics is just the beginning. To truly elevate your spraying game, advanced techniques can make all the difference. Whether you’re tackling a large project or applying multiple colors, these tips will help you achieve professional results with ease.Using Extensions For Hard-to-reach Areas
Don’t let tight corners and high ceilings intimidate you.Using extension poles can significantly improve your reach.Attach a spray gun to an extension pole to spray high walls or ceilings without the need for a ladder.This method not only saves time but also reduces the risk of accidents.One time, I used an extension for a two-story living room. The results were seamless, and I completed the job in half the time!Think about the areas in your home that need attention. How could an extension pole change your approach?Multi-color Applications
Spraying multiple colors can be tricky but rewarding.Prepare your sprayer by cleaning it thoroughly between color changes.You can use separate spray tips for each color to ensure clean application.If you plan to work with stencils or patterns, practice on cardboard first.I once tackled a project where I combined three colors for an accent wall.Using a stencil allowed me to create sharp lines without overspray.What colors would you choose to bring your vision to life?Speeding Up Large Projects
For extensive projects, efficiency is key.Start by dividing your workspace into manageable sections.Spray one section at a time, ensuring you maintain a consistent speed and distance from the surface.Using a larger tip size can also help cover more area quickly.In a recent project, I was painting my fence. Switching to a larger tip cut my time in half!What strategies could you implement to speed up your next painting task?Embracing these advanced tips will not only enhance your skills but also transform your painting experience. Get ready to enjoy the process and achieve stunning results!Final Thoughts
Using an airless paint sprayer can be a rewarding experience. It offers speed and a smooth finish. With practice, you can achieve professional-looking results. Understanding the basics is key to success. Let’s explore two important points: practice and knowing when to call for help.
Practice Makes Perfect
Like any skill, using a paint sprayer takes practice. Start on smaller projects. This helps you get comfortable with the tool. Always test your spray pattern first. Use a piece of cardboard or scrap wood.
Adjust the pressure settings to find what works best. Keep a steady hand while spraying. Move the sprayer in smooth, even strokes. Over time, your technique will improve. Your confidence will grow with each project.
When To Call A Professional
Sometimes, a project may be too big or complicated. If you feel unsure, it’s okay to ask for help. Professionals have experience and can handle tough jobs. They know how to deal with difficult surfaces and large areas.
Hiring a professional can save you time and stress. If the task requires special skills, consider calling an expert. It’s better to get it done right the first time.
Frequently Asked Questions
What Is The Number One Rule When Using A Airless Spray Gun?
The number one rule for using an airless spray gun is to always wear proper personal protective equipment (PPE). This includes a respirator, gloves, and eye protection to safeguard against harmful materials during spraying. Prioritizing safety ensures a secure and effective painting experience.
How To Paint Using An Airless Sprayer?
To paint using an airless sprayer, start by preparing your surface and masking off areas. Fill the sprayer with paint and adjust the pressure. Hold the sprayer 12 inches from the surface, moving in smooth, even strokes. Overlap each stroke slightly for even coverage.
Clean the sprayer thoroughly afterward.
Do I Need To Dilute Paint For An Airless Sprayer?
Yes, you need to dilute paint for an airless sprayer. Thinning the paint ensures even application and reduces the risk of clogging. Use water or the manufacturer’s recommended thinner for best results. Always check the paint’s specifications for proper dilution ratios.
How Do You Use A Paint Sprayer For Beginners?
To use a paint sprayer as a beginner, start by preparing your workspace. Fill the sprayer with thinned paint. Adjust the pressure settings based on your project. Test the spray pattern on a scrap surface. Finally, hold the sprayer at a consistent distance and move in smooth, even strokes.
Conclusion
Using an airless paint sprayer can simplify your painting tasks. With the right techniques, you can achieve smooth and even finishes. Remember to follow safety guidelines and practice proper maintenance. Start with small projects to build your confidence. Soon, you will feel comfortable tackling larger jobs.
Enjoy the process and the results of your hard work. Happy painting!