Spray painting metal can breathe new life into tired objects. It offers a simple way to enhance your home decor or restore outdoor furniture.
Whether you want to refresh a garden chair or upcycle a metal fixture, mastering the art of spray painting is essential. Proper preparation is key to achieving a smooth, durable finish. Start by cleaning the metal, removing rust, and applying a suitable primer.
After that, the magic happens with the spray paint. This method allows for even coverage and a professional look, making it ideal for both beginners and seasoned DIYers. In this guide, you will learn step-by-step instructions on how to spray paint metal effectively. Let’s get started on transforming your metal items!
Choosing The Right Materials
Choosing the right materials is essential for successful spray painting on metal. Use a quality primer to enhance adhesion and protect against rust. Selecting the appropriate type of spray paint for metal will ensure a smooth, durable finish. Always prepare the surface well for the best results.
Choosing the right materials is essential for achieving a professional finish when spray painting metal. The right spray paint and understanding the type of metal you’re working with can significantly affect the durability and appearance of your project. Let’s break down what you need to consider to get the best results.Selecting The Best Spray Paint
Not all spray paints are created equal. You should look for paint specifically formulated for metal surfaces.Consider the following points:– Type of Finish: Choose between matte, satin, or glossy finishes based on your desired look. A glossy finish can enhance colors but may show imperfections more easily. – Durability: Select paint that is resistant to chipping, fading, and corrosion. Brands like Rust-Oleum and Krylon offer options that stand the test of time. – Drying Time: Fast-drying sprays allow for quicker project completion, which is especially helpful if you’re working on multiple items.When I painted my old metal patio furniture, I opted for a satin finish. The result was a beautiful sheen that brought new life to the set. You want that same satisfaction from your project.Understanding Metal Types And Paint Compatibility
Different metals require different approaches. Knowing the type of metal you’re working with helps in choosing compatible paint.Here’s a quick guide:– Steel: Generally, it needs a primer for best adhesion. Look for paints labeled “direct to metal” (DTM) for a smoother application. – Aluminum: Use a special primer designed for aluminum surfaces. Regular spray paint may not adhere well without it. – Iron: Rusty iron surfaces need thorough cleaning and a rust-inhibiting primer.Have you ever wondered why your paint didn’t stick? It could be due to the metal type and the paint’s compatibility. Understanding these factors can save you from future headaches.Choosing the right materials sets the foundation for a successful spray painting project. By selecting the best spray paint and understanding the type of metal you’re working with, you can ensure a durable and attractive finish. Ready to get started?Prepping The Metal Surface
Preparing the metal surface is vital for a successful spray paint job. Start by removing any rust and old paint using a wire brush or sandpaper. Clean the surface thoroughly to ensure the paint adheres well, then apply a primer for added protection and better results.
Prepping the metal surface is a critical step in achieving a flawless spray paint finish. Proper preparation ensures that the paint adheres well and lasts longer. Skipping this step can lead to peeling and chipping, ruining your hard work. Let’s dive into the essential tasks involved in prepping metal for spray painting.Cleaning Basics
Start by cleaning the metal surface thoroughly. Dirt, grease, and grime can prevent the paint from sticking properly. Use a mixture of warm water and mild soap to scrub the surface.Rinse it well and let it dry completely. This simple step can make a significant difference. You’ll be surprised how much better the paint adheres to a clean surface.Consider using a degreaser for tougher stains. It ensures you eliminate any residues that may disrupt the paint’s bond.Removing Rust And Old Paint
If your metal has rust or old paint, you need to address that before painting. Rust not only affects the appearance but also the durability of your project.Use a wire brush or sandpaper to remove the rust. For larger areas, an angle grinder can be very effective.If the old paint is flaking, scrape it off as well. A clean, bare metal surface promotes better adhesion.After you remove rust and old paint, wipe down the area with a damp cloth to get rid of any dust.Sanding For Smoothness
Sanding is essential for achieving a smooth finish. It helps create a rough texture that allows the paint to adhere better.Use medium-grit sandpaper (around 120-220 grit) to sand the surface. Pay attention to any sharp edges or imperfections.Once you’re done, wipe the surface again with a damp cloth. This will remove any dust created during sanding.A smooth and well-prepped surface not only looks better but also ensures a longer-lasting finish. Are you ready to take the next steps in your spray painting project?Priming For Perfection
Priming is a crucial step in achieving a flawless spray paint finish on metal. It prepares the surface, ensuring that the paint adheres properly and enhances durability. Skipping this step can lead to peeling or chipping, leaving your project looking unfinished.
Benefits Of Primer
Using primer offers numerous advantages that significantly improve your spray painting results.
- Enhanced Adhesion: Primer creates a rough surface that helps the paint stick better.
- Rust Protection: A good primer acts as a barrier, shielding metal from moisture and rust.
- Improved Finish: It evens out the surface, ensuring a smooth application of paint.
When I first started spray painting metal, I neglected to use primer on a garden chair. The paint peeled off after a few weeks. That experience taught me the importance of primer, and now I never skip it.
Application Techniques
Applying primer correctly sets the stage for a successful paint job.
- Clean the Surface: Remove any dirt, rust, or old paint.
- Choose the Right Primer: Select a primer specifically designed for metal surfaces.
- Use Even Strokes: Apply the primer with long, even strokes. Keep a consistent distance from the surface.
- Allow Proper Drying Time: Follow the manufacturer’s instructions for drying time before applying paint.
Have you ever noticed how a well-primed surface makes a world of difference? Your final paint job will look more professional and last much longer.
Remember, investing time in priming can save you from future headaches. With the right techniques, you’ll achieve a stunning finish that you can be proud of.
Credit: www.krylon.com
Setting Up Your Workspace
Creating a suitable workspace is essential for spray painting metal effectively. Begin by ensuring good ventilation and laying down protective coverings. Gather necessary supplies like primer, spray paint, and cleaning tools to prepare the metal surface for a smooth finish.
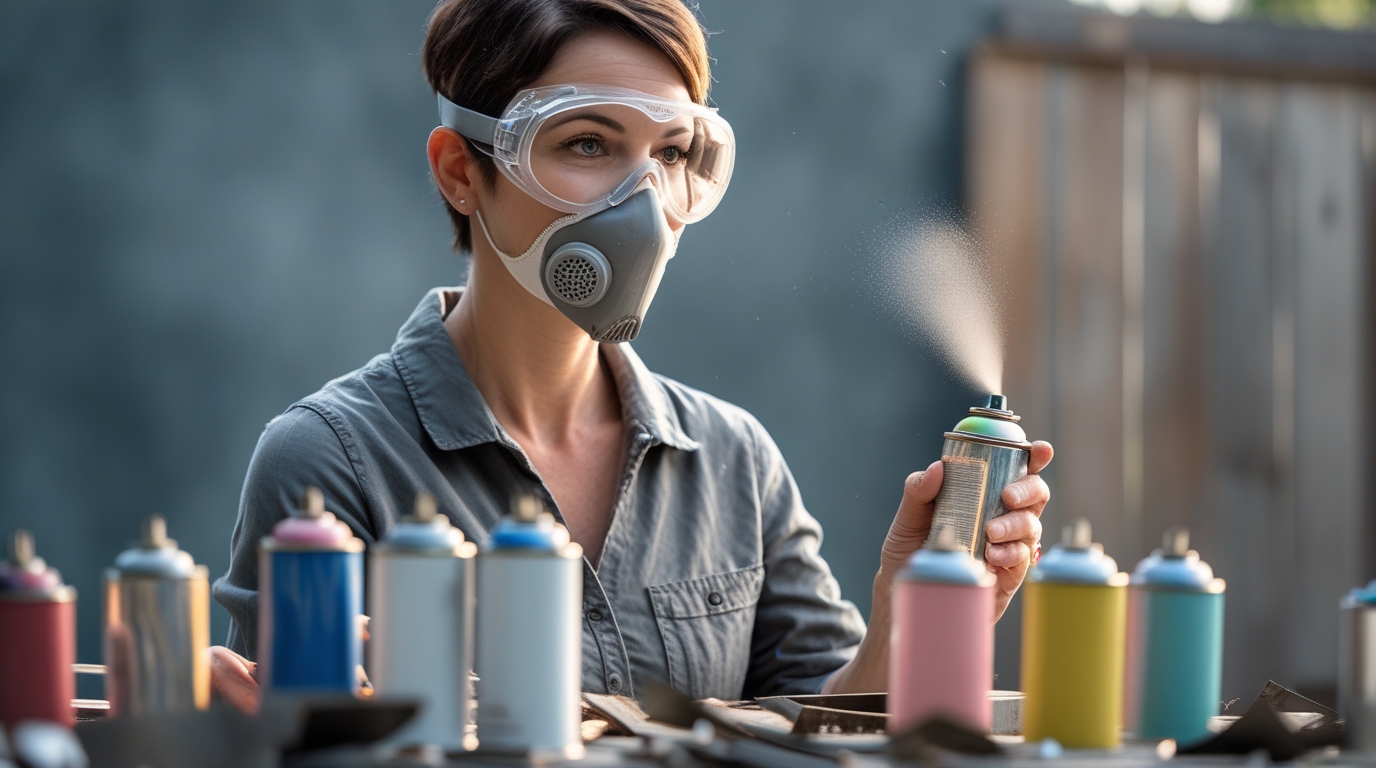
Setting up your workspace is a crucial step before diving into the spray painting process. A well-prepared area ensures not only a smooth painting experience but also your safety and the quality of your work. Let’s break down the essentials for creating an effective spray painting environment.Ventilation And Safety
Good ventilation is a must when spray painting metal. Spray paint releases fumes that can be harmful if inhaled.Open windows and doors to allow fresh air to circulate. If you’re working indoors, consider using a fan to help move air out of the space.Wearing a mask is essential. A mask designed for paint fumes will protect you from inhaling harmful particles.Also, wear goggles to shield your eyes from overspray. Safety should always be your top priority.Protecting Surrounding Areas
Before you start painting, take a moment to protect your surrounding areas. Lay down a drop cloth or old newspapers to catch any drips or overspray.Use painter’s tape to cover areas you don’t want painted, such as edges or hardware.Consider the height and location of your project. Position it on a stable surface to avoid accidental spills.I once painted a metal chair in my garage without covering the floor. The aftermath was a colorful disaster, with paint splatters everywhere!By taking these simple steps, you can keep your workspace clean and focused on your project.Are you ready to create a masterpiece?Spray Painting Techniques
Spray painting metal requires careful preparation for a smooth finish. Start by cleaning and sanding the surface to remove rust and old paint. Apply primer first, then use thin coats of spray paint, allowing each layer to dry completely for best results.
Spray painting metal can transform your projects, but mastering the right techniques is crucial for a flawless finish. Whether you’re refreshing old furniture or tackling a DIY decor project, understanding spray painting techniques will help you achieve professional-looking results. Let’s dive into some essential methods that will elevate your spray painting game.Achieving Even Coats
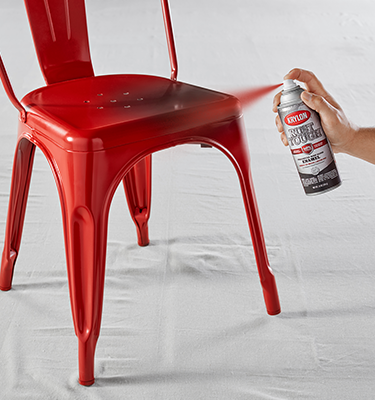
To ensure your paint job looks smooth and professional, achieving even coats is essential. Start by shaking the spray can well before use. This mixes the paint and creates a consistent color.Apply the paint in light, sweeping motions. Overlap each pass slightly, and keep the can moving to prevent buildup in one area.Think about your previous experiences. Have you ever noticed uneven spots? That’s often due to staying too long in one place. By maintaining a steady movement, you’ll create a more uniform finish.Spraying At The Right Distance
The distance between the spray can and the metal surface matters greatly. Ideally, hold the can about 6 to 12 inches away from the surface.This distance allows the paint to atomize properly, ensuring an even distribution. If you’re too close, you risk a heavy application, leading to drips and runs.Experiment with your distance on scrap metal first. It’s a simple way to discover what works best for you without ruining your project.Avoiding Drips And Runs
Drips and runs can ruin an otherwise perfect paint job. To avoid this, apply several thin coats instead of one thick one. Thin layers dry faster and adhere better, reducing the chance of drips.Another tip is to keep your spray can vertical. Tilting the can can cause excess paint to pool, leading to those frustrating drips.After your first coat, step back and evaluate. Is there any pooling? Adjust your technique accordingly for the next layer.With these techniques, your spray painting results will impress. What project will you tackle next?
Credit: www.youtube.com
Layering And Drying
Layering and drying are key steps in spray painting metal. Proper layering ensures a smooth and even finish. Drying time affects how well the paint adheres. Understanding timing between coats will help achieve great results.
Timing Between Coats
Timing is crucial for layering paint. Wait for the first coat to dry. This usually takes about 15 to 30 minutes. Check the paint’s instructions for specific times. Touch the surface lightly to test if it’s dry. If it feels tacky, wait longer.
Applying the next coat too soon can cause runs. It can also create a rough texture. Always be patient. Good results come from careful timing. Proper drying allows each coat to bond well.
How Many Coats Are Enough
The number of coats depends on the color and type of paint. Generally, two to three coats work well for most projects. Light coats are better than heavy ones. Thin layers dry faster and look smoother.
Always assess the coverage after each coat. You might need more if the color looks uneven. Remember, it’s easier to add coats than to fix mistakes. Trust your eyes and feel for the best results.
Finishing Touches
After applying the spray paint, focus on the finishing touches. These steps will enhance the overall look and durability of your project. Proper finishing makes your metal piece stand out. It also helps ensure the paint lasts longer.
Sanding Between Coats
Sanding between coats is essential. It creates a smooth surface for the next layer. Use fine-grit sandpaper for this process. Lightly sand the painted surface after each coat dries.
Wipe away any dust with a clean cloth. This step prevents imperfections in the final finish. Aim for a uniform texture before applying the next coat. Repeat this until you achieve the desired coverage.
When To Apply A Clear Coat
Applying a clear coat can protect your paint. Wait until the final coat is completely dry. A clear coat adds a glossy finish, enhancing the color. It also guards against scratches and fading.
Choose a clear coat suitable for metal surfaces. Spray it evenly for the best results. Follow the manufacturer’s instructions for drying time. This extra layer will make your project look polished and professional.
:max_bytes(150000):strip_icc()/how-to-paint-metal-4846919_hero_01-f52e1c0023b443ecb52cf4007a1398f8.jpg)
Credit: www.thespruce.com
Maintenance And Care
Spray painting metal requires careful preparation for the best results. Start by cleaning the surface, removing rust and old paint. Applying a primer helps the paint stick better and protects against rust. Use thin coats of spray paint, allowing each to dry completely for a smooth finish.
When you invest time and effort into spray painting metal, maintaining that fresh look is essential. Proper maintenance and care can prolong the life of your painted surfaces, keeping them vibrant and protected. This section focuses on the crucial aspects of upkeep, ensuring your projects not only shine but also withstand the test of time.Cleaning Painted Metal Surfaces
Regular cleaning is vital to preserve the appearance of your painted metal. Use a soft cloth or sponge and a mild detergent mixed with water.– Avoid abrasive cleaners that can scratch or damage the paint.– Rinse thoroughly with water to remove any soap residue.– For stubborn stains or dirt, gently scrub with a non-abrasive pad.You can protect your painted surfaces further by applying a coat of wax every six months. This simple step creates a barrier against dirt and moisture.Have you ever noticed how dirt can dull the shine of a freshly painted metal surface? Keeping it clean can make a significant difference.Touch-up Strategies
Even with careful maintenance, touch-ups may be necessary over time. Small chips or scratches can occur, but addressing them promptly is key.– Choose a spray paint that matches the original color for seamless repairs.– Clean the affected area first, ensuring it’s free from dust and grease.– Lightly sand the area around the chip to create a smooth surface for the paint.When applying touch-up paint, use light, even coats. This helps avoid drips and ensures a more uniform finish.If you’ve ever tried to fix a chip on your painted metal and ended up with a noticeable patch, you know how important it is to blend in the touch-up. Patience is essential here—taking your time will yield better results.With these maintenance and care tips, you can ensure your spray-painted metal surfaces remain stunning and durable. How will you take care of your next project?Troubleshooting Common Issues
Spray painting metal can lead to common challenges. Issues like paint not adhering or uneven coverage often arise. Proper preparation, including cleaning and priming, helps resolve these problems for a smooth finish. Following these steps ensures a successful spray painting project.
Troubleshooting common issues when spray painting metal can save you from frustration and wasted materials. Whether you’re a seasoned DIYer or just starting out, understanding how to tackle problems can help ensure your project looks professional. Here, we’ll discuss two frequent problems: paint bubbles and peeling paint. Let’s dive into these issues and find practical solutions.Fixing Paint Bubbles
Paint bubbles can be a common nuisance when spray painting metal. They usually occur due to applying paint too thickly or painting in humid conditions.To fix this, start by letting the bubbles dry completely. Once dry, gently sand the area with fine-grit sandpaper until smooth.Next, clean the surface to remove any dust or debris. After preparing the area, apply a thin coat of spray paint, ensuring you maintain a consistent distance from the surface while spraying.Have you ever had to redo a section because of bubbles? It’s frustrating, but taking your time with the application can make all the difference.Dealing With Paint Peeling
Paint peeling can leave your metal looking worse than before. This issue often arises from poor surface preparation or applying paint over old, flaking layers.To address peeling, start by removing the peeling paint using a scraper or sandpaper. Ensure you get down to the bare metal for the best adhesion.After cleaning the surface, apply a high-quality primer designed for metal. Once the primer dries, follow up with your chosen spray paint in thin layers.Have you noticed that a little extra preparation work upfront can lead to better results? It’s a small investment of time that pays off big in the end.By being aware of these common issues and knowing how to troubleshoot them, you can achieve a smooth and durable finish on your metal projects.Spray Painting Safety Tips
Spray painting metal requires careful preparation for the best results. Start by cleaning the surface, removing any rust or old paint. Apply a primer for better adhesion, then use light, even coats of spray paint, allowing each coat to dry properly before adding the next.
Spray painting metal can be a rewarding and creative process, but it’s essential to prioritize safety. Taking the right precautions ensures that you not only achieve a great finish but also protect yourself from potential hazards. Here are some safety tips that can enhance your spray painting experience, making it both enjoyable and secure.Personal Protective Equipment
Wearing the correct personal protective equipment (PPE) is crucial for your safety. Start with a mask or respirator to protect your lungs from harmful fumes and particles. A mask rated for paint spray will filter out toxic substances effectively.Don’t forget about eye protection. Safety goggles will shield your eyes from overspray and harmful chemicals.Lastly, consider wearing gloves to protect your hands from paint and solvents. Disposable nitrile gloves are a great choice, as they resist chemicals and won’t tear easily.When I first started spray painting, I skipped the mask, thinking it wouldn’t be a big deal. After a few minutes, I felt lightheaded and realized how important it is to wear proper equipment. Protecting yourself is not just smart; it’s essential.Disposing Of Spray Paint Cans
Proper disposal of spray paint cans is vital for environmental safety. Never throw empty cans in the regular trash. Instead, check local regulations for hazardous waste disposal.Many communities have designated drop-off locations for such items. Some even offer special collection days where you can safely dispose of old paints and solvents.Make it a habit to store leftover spray paint properly. Keep them in a cool, dry place away from heat sources. This not only prolongs the life of the paint but also reduces the risk of accidental combustion.Have you ever thought about how your disposal methods affect the environment? Being responsible with your waste can contribute to a cleaner planet.By following these safety tips, you can enjoy spray painting while ensuring your well-being and the environment’s health.Frequently Asked Questions
Can You Spray Paint Directly On Metal?
Yes, you can spray paint directly on metal. Ensure the surface is clean and free of rust or old paint. Using a primer improves adhesion and protects the metal. Apply multiple thin coats for the best finish and allow proper drying time between each coat.
How Do You Get Spray Paint To Stay On Metal?
To ensure spray paint adheres to metal, start by cleaning the surface thoroughly. Remove rust and old paint, then sand the metal lightly. Apply a primer designed for metal, and use multiple thin coats of spray paint, allowing each layer to dry completely.
This promotes better adhesion and durability.
Can You Spray Paint Painted Metal Without Sanding?
Yes, you can spray paint painted metal without sanding. Clean the surface thoroughly and use a direct-to-metal (DTM) paint for best adhesion. Ensure the paint is suitable for the existing finish to achieve a lasting result.
How To Get A Smooth Finish With Spray Paint On Metal?
To achieve a smooth finish with spray paint on metal, start by thoroughly cleaning and removing any rust. Use a quality metal primer for better adhesion. Apply multiple thin coats of spray paint, allowing each coat to dry completely. Sand between coats for an ultra-smooth surface.
Conclusion
Spray painting metal can refresh and protect your items. Following the right steps ensures a smooth finish. Always prepare the surface well. Use primer for better adhesion. Apply thin, even coats for the best results. Allow each coat to dry completely.
This process will make your project last longer. Enjoy your newly painted metal pieces. With practice, you can achieve professional-looking results. Remember, patience is key for a great finish. Happy painting!