
Painting a room can be a daunting task, especially when deciding on the right tools. An airless sprayer offers a fast and efficient way to achieve a smooth finish.
In this guide, we will explore how to paint a room with an airless sprayer. This method saves time and ensures an even coat, making it a popular choice for both DIY enthusiasts and professionals. Airless sprayers work by forcing paint through a small nozzle at high pressure.
This creates a fine mist that covers surfaces quickly. Understanding the proper technique and preparation can lead to impressive results. Whether you’re refreshing a single room or tackling a larger project, learning to use an airless sprayer can transform your painting experience. Let’s dive into the steps for a successful paint job.
Preparation: Setting The Stage For Success
Preparing your room for painting is crucial. Proper preparation ensures a smooth painting process. It helps you achieve a professional finish. Follow these steps to set the stage for success.
Room And Surface Prep
Start by removing furniture from the room. If possible, move everything out. If not, cover items with drop cloths. Protect your floors with plastic sheeting or old newspapers.
Next, clean the walls thoroughly. Dust and dirt can ruin your paint job. Use soap and water for stubborn stains. Allow the walls to dry completely.
Check for any holes or cracks. Fill them with spackle or wall filler. Sand the surface smooth once it dries. This will create an even base for your paint.
Don’t forget to tape off edges. Use painter’s tape around windows, doors, and trim. This prevents paint from getting on surfaces you don’t want to paint.
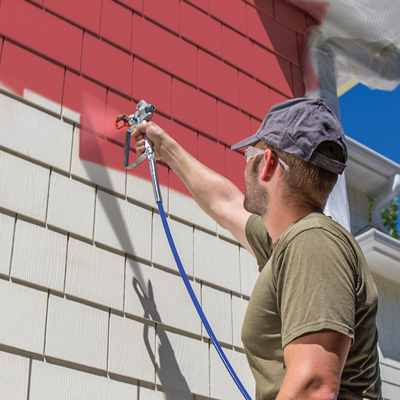
Safety First: Personal Protective Equipment
Safety is a top priority during painting. Wear a mask to protect your lungs from fumes. A respirator is best for airless sprayers.
Protect your eyes with safety goggles. This keeps paint splatters out of your eyes. Wear gloves to protect your hands from paint and chemicals.
Dress in old clothes. Paint can be messy, and you don’t want to ruin your favorite outfit. Consider wearing a hat to keep paint out of your hair.
Ensure good ventilation in the room. Open windows and doors for fresh air. A fan can help circulate the air, making it safer to paint.
Choosing The Right Paint For Your Airless Sprayer
Choosing the right paint for your airless sprayer can make a huge difference in the final look and ease of your project. Not all paints are created equal, and using the wrong type can lead to frustrating results. Understanding what works best for spraying will save you time and ensure a smooth application.
Types Of Paint Suitable For Spraying
When it comes to spraying, not all paints will perform well. Here are some types that are ideal for airless sprayers:
- Acrylic Paint: This is the most common choice for interior walls. It dries quickly and offers excellent coverage.
- Latex Paint: Great for easy cleanup and low odor. It’s perfect for residential spaces.
- Enamel Paint: Ideal for trim and cabinets, providing a durable finish.
Consider the sheen you want as well. Flat paints may not spray as smoothly, while gloss paints often require more thinning. Always check the manufacturer’s recommendations for the best results.
To Thin Or Not To Thin
Thinning your paint can be necessary to achieve the right consistency for spraying. If the paint is too thick, it can clog the sprayer and lead to uneven coverage.
Check the paint can for thinning instructions. Usually, adding water (for latex) or a specific solvent (for oil-based) can help. A good rule of thumb is to thin until the paint flows smoothly off a stir stick.
Do you have experience with thinning paint? It can be a trial-and-error process, but with practice, you’ll find the right balance that works for your sprayer.
By choosing the right paint and knowing when to thin, you’re setting yourself up for a successful painting project. Don’t underestimate the impact of these decisions on your overall results!
Understanding Your Airless Paint Sprayer
Using an airless paint sprayer can make painting a room easier. Understanding its components and settings is key. This knowledge helps you achieve a smooth, even finish.
Familiarity with your sprayer enhances your efficiency. It also saves time and reduces paint waste. Let’s explore the key components and how to adjust the settings for optimal performance.
Key Components And Functions
An airless paint sprayer has several important parts. The pump draws paint from the container. It uses high pressure to push paint through the spray tip.
The spray gun allows you to control the paint flow. It also helps direct the spray pattern. The hose connects the pump to the spray gun, ensuring a steady flow of paint.
Understanding these components is essential. Each part plays a role in how effectively you can paint.
Adjusting Settings For Optimal Performance
Setting up your airless sprayer correctly is crucial. Start by adjusting the pressure settings. Higher pressure gives a finer spray, while lower pressure reduces overspray.
Next, choose the right spray tip. Different tips create different spray patterns. Selecting the correct size ensures efficient coverage.
Test your settings on a scrap piece of material. This practice helps you find the perfect combination for your project.
Credit: www.graco.com
The Spraying Sequence
Painting a room with an airless sprayer requires a specific sequence for best results. Start by spraying the walls, followed by the ceiling, and then the trim. This order helps create a clean, professional finish while minimizing overspray and the need for touch-ups.
The spraying sequence is crucial for achieving a professional finish when painting a room with an airless sprayer. Following the right order not only saves you time but also enhances the overall appearance of your painted surfaces. Let’s break down the sequence into two main parts: painting the ceiling first and then moving on to the walls.Ceiling First: Technique And Tips
Start with the ceiling. This prevents any overspray from landing on freshly painted walls.Use a wide spray pattern and hold the sprayer about 12 inches from the surface.Technique tips:– Overlap each stroke by about 30% to ensure even coverage. – Move in a steady motion. Avoid stopping or starting in the middle of a stroke. – Work in sections, and keep an eye on the edges to prevent drips.If you’ve never sprayed a ceiling before, practice on a cardboard piece first. This helps you get a feel for the sprayer and the coverage it provides.Walls Next: Ensuring Even Coverage
Once the ceiling is dry, it’s time for the walls. This is where the airless sprayer truly shines, covering large areas quickly.Start at the top of the wall and work your way down. This technique helps manage any potential drips that may occur.To achieve even coverage:– Use a consistent speed as you move the sprayer horizontally across the wall. – Maintain the same distance from the surface as you did with the ceiling. – Check for missed spots and do a quick pass over those areas.Have you ever noticed how the light changes in a room based on wall color? That’s the magic of paint. By ensuring even coverage, you not only enhance the room’s ambiance but also save time on touch-ups later.By following these sequences, you’ll enjoy a smoother, faster painting process and a stunning finish. Are you ready to transform your space?Masking And Covering
Masking and covering are key steps for a clean paint job. Proper preparation helps avoid paint on unwanted areas. This ensures a smooth finish and saves time during cleanup. Let’s explore how to protect surfaces effectively.
Protecting Non-painted Surfaces
Cover all non-painted surfaces before you start spraying. Use drop cloths to protect floors. Secure them with painter’s tape for extra hold. This prevents paint from seeping underneath.
Don’t forget to cover furniture. Use plastic sheets or old sheets to shield them. Move smaller items out of the room if possible. For larger items, cover them well.
Mask off windows and doors using painter’s tape. This keeps the edges clean. Ensure the tape adheres well to avoid paint bleeding. Check for gaps and fix them as needed.
Masking Tips For Clean Edges
Good masking results in clean, sharp lines. Start by applying painter’s tape carefully along edges. Press the tape down firmly to avoid paint seeping under it.
For intricate areas, use smaller strips of tape. This allows for better control around corners and curves. Always pull the tape off while the paint is still wet for the best results.
Use a putty knife to press down the tape edges. This helps create a seal. It also makes removing the tape easier after painting.
Take your time with the masking process. Rushing can lead to mistakes. A little extra effort will make a big difference in the final look.
Spraying Techniques For A Flawless Finish
Achieving a flawless finish when painting a room with an airless sprayer is easier than you think. Proper technique and preparation are key to a smooth application. Follow simple steps to ensure even coverage and a professional look without the fuss.
Painting a room with an airless sprayer can be a game-changer for achieving a professional finish. However, mastering the right spraying techniques is essential for a flawless outcome. By focusing on movement, distance, and overlapping strokes, you can elevate your painting project and avoid common pitfalls that lead to uneven coverage or drips. Let’s dive into these techniques.Movement And Distance
Your movement and the distance from the wall play a crucial role in spray painting. Start with a steady hand and maintain a consistent speed as you move the sprayer across the surface.Aim to keep the sprayer nozzle about 12 to 16 inches away from the wall. This distance ensures an even application without too much overspray.Adjust your movement based on the paint’s flow. If it feels too heavy, increase your distance slightly. Finding the right balance can take practice, but it’s essential for a smooth finish.Overlapping Strokes For Uniformity
To achieve a uniform look, overlapping your strokes is key. As you spray, overlap each pass by about 30% to 50%. This method helps blend the paint seamlessly, reducing visible lines or streaks.Consider this: when I painted my living room, I learned the hard way that skipping this step resulted in noticeable stripes. The second time, I focused on my overlap, and the difference was impressive.Remember to maintain the same speed and distance during each stroke. A consistent approach will enhance the uniformity of your finish, leaving you with walls that look professionally done.Using these spraying techniques will not only improve the quality of your paint job but also boost your confidence as a DIYer. Are you ready to give your walls a fresh coat?Troubleshooting Common Spraying Issues
Common spraying issues can arise when painting a room with an airless sprayer. Problems like uneven coverage, paint drips, or clogging can hinder your project. Understanding how to troubleshoot these issues ensures a smoother painting experience and better results.
Troubleshooting Common Spraying IssuesEven with the best equipment and preparation, issues can arise when painting a room with an airless sprayer. Knowing how to troubleshoot these problems will help you achieve a smooth, professional finish. Here, we’ll tackle common spraying issues and provide practical solutions to keep your project on track.Dealing With Clogs And Spits
Clogs are one of the most frustrating problems you can encounter. They can occur due to dried paint in the nozzle or an inadequate filter.To prevent this, always strain your paint before filling the sprayer. If you experience a clog, try the following steps:– Clear the nozzle: Remove the tip and clean it with water or solvent, depending on your paint type. – Check the filter: Remove and clean or replace the filter if it’s dirty. – Adjust pressure: Sometimes, lowering the pressure can help the paint flow more smoothly.If you find your sprayer is still spitting paint, it might be a sign of an air leak. Inspect hoses and connections to ensure a tight seal.Avoiding Runs And Sags
No one wants to deal with unsightly runs and sags in their freshly painted walls. These can happen if you apply too much paint in one area or spray too close to the surface.To avoid this:– Maintain distance: Keep the sprayer nozzle 12 to 18 inches away from the surface. – Use even strokes: Move the sprayer at a steady pace and keep your hand moving to distribute paint evenly. – Apply multiple thin coats: It’s better to build up color gradually rather than trying to cover everything in one go.After my first attempt, I learned the hard way about runs. I was too eager and sprayed too much in one spot. Now, I always remember that patience pays off with a sprayer.Are you ready to troubleshoot your way to a flawless finish? Your walls deserve it!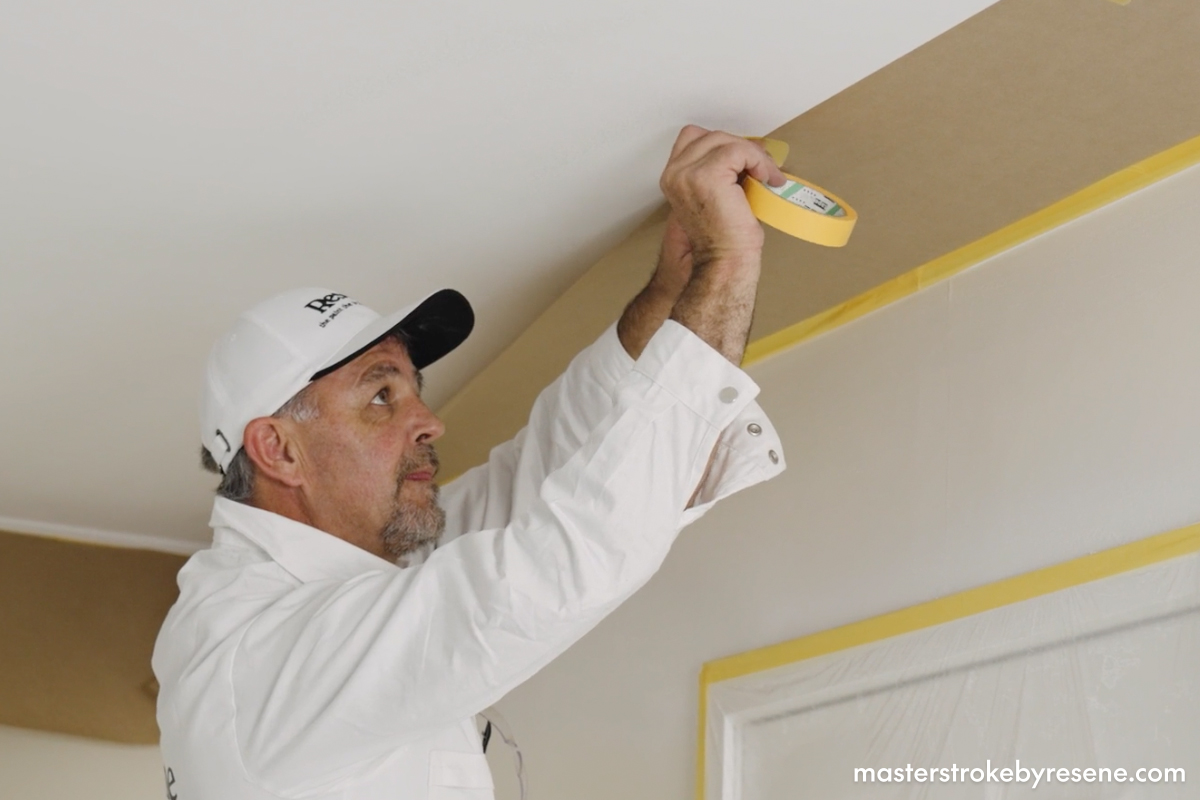
Credit: www.masterstrokebyresene.com
Clean-up And Maintenance
Cleaning and maintaining your airless sprayer is crucial. Proper care ensures it works well for future projects. A clean sprayer prevents paint clogs and damage. Let’s explore how to properly clean your equipment and maintain it for longevity.
Proper Cleaning Of Equipment
Cleaning your airless sprayer right after use is essential. Start by removing the paint container. Pour any leftover paint back into the original can. Run clean water or solvent through the sprayer. This helps remove paint from the system.
Use a brush to clean the filters. Check for any paint build-up. Rinse the sprayer parts thoroughly. Pay close attention to the nozzle and pump. A clogged sprayer can lead to uneven spray patterns.
Maintaining Your Airless Sprayer For Longevity
Regular maintenance extends the life of your airless sprayer. Store it in a cool, dry place. Avoid extreme temperatures which can cause damage. Inspect the sprayer before each use. Look for any signs of wear and tear.
Replace worn-out parts promptly. This includes filters, hoses, and nozzles. Following the manufacturer’s guidelines is crucial. Keep the manual handy for reference. Proper care keeps your sprayer in top shape.
Finishing Touches And Detail Work
Finishing touches and detail work make a big difference in painting a room with an airless sprayer. Carefully cover edges and corners for a clean look. Use a brush or roller for small areas to ensure even coverage and a polished finish.
Attention to detail enhances the overall result.
When you’ve finished spraying your room with an airless sprayer, you might think the hard work is done. However, the finishing touches and detail work are crucial for achieving a polished look. This stage involves refining edges, inspecting your work, and making any necessary touch-ups to ensure the room looks flawless. Let’s dive into some practical techniques to perfect your project.Brush And Roller Techniques For Edges
Using an airless sprayer can leave you with smooth walls, but the edges often need a little extra attention. A brush and roller can help you achieve clean lines where the walls meet the ceiling or trim.– Cutting In: Start by using a high-quality angled brush to “cut in” along the edges. Dip the brush in paint and remove excess to avoid drips.– Roller Technique: After brushing, use a roller for a seamless finish. Choose a small roller for tight spots. This technique helps blend the sprayed areas with the edges.– Consistent Motion: Maintain a steady hand and use even strokes to avoid overlapping marks. You’ll be amazed at how much this simple technique can elevate the overall appearance.Remember, taking your time with this process pays off. Have you ever noticed how a well-defined edge can make a room feel more sophisticated?Inspecting And Touching Up
Once you’ve completed the detailing, it’s time to inspect your work. Walk around the room and look for any areas that need attention.– Lighting Check: Use natural light to help spot imperfections. Shadows can hide mistakes, so a good light source is essential.– Touch-Up Paint: Keep a small container of touch-up paint handy. If you see any spots that need a little extra love, a quick brush stroke can work wonders.– Final Inspection: After touch-ups, step back and view the room from different angles. This final check ensures that everything looks even and complete.Taking these extra steps might seem small, but they can dramatically improve your results. How satisfying is it to see a room that looks professionally done?With careful finishing touches and attention to detail, you can transform your space into a stunning reflection of your style. Don’t skip this important step—you’ll be glad you didn’t!
Credit: www.youtube.com
Frequently Asked Questions
In What Order Do You Paint A Room With A Sprayer?
To paint a room with a sprayer, follow this order: start with the walls, then spray the ceiling, followed by the woodwork. Finally, tape the woodwork and finish the walls with a brush and roller. This method ensures clean and professional results.
What Is The Number One Rule When Using Airless Spray Guns?
The number one rule when using airless spray guns is to always wear proper personal protective equipment (PPE). This includes a respirator, gloves, and eye protection. These precautions help prevent exposure to harmful materials during the spraying process. Prioritize safety to ensure a successful painting experience.
Do I Need To Thin Paint For An Airless Sprayer?
Most interior wall paints can be used without thinning in an airless sprayer. However, if the paint is too thick and doesn’t flow well, consider thinning it slightly with water or a compatible thinner. Always check the manufacturer’s recommendations for specific paint types.
Is An Airless Paint Sprayer Good For Interior Walls?
Yes, an airless paint sprayer is excellent for interior walls. It provides a smooth, even finish and covers large areas quickly. This tool is efficient for achieving professional results with minimal effort. Ensure proper technique for optimal coverage and avoid overspray.
Conclusion
Painting a room with an airless sprayer can be simple and efficient. Follow the steps outlined in this guide for the best results. Prepare your space and protect your belongings first. Choose the right paint and settings for your sprayer.
Practice your technique on cardboard if needed. Clean the equipment thoroughly after use. Enjoy the fresh look of your newly painted room. With patience and practice, you can achieve a professional finish. Your space will feel renewed and inviting. Start your painting project today and transform your home effortlessly.