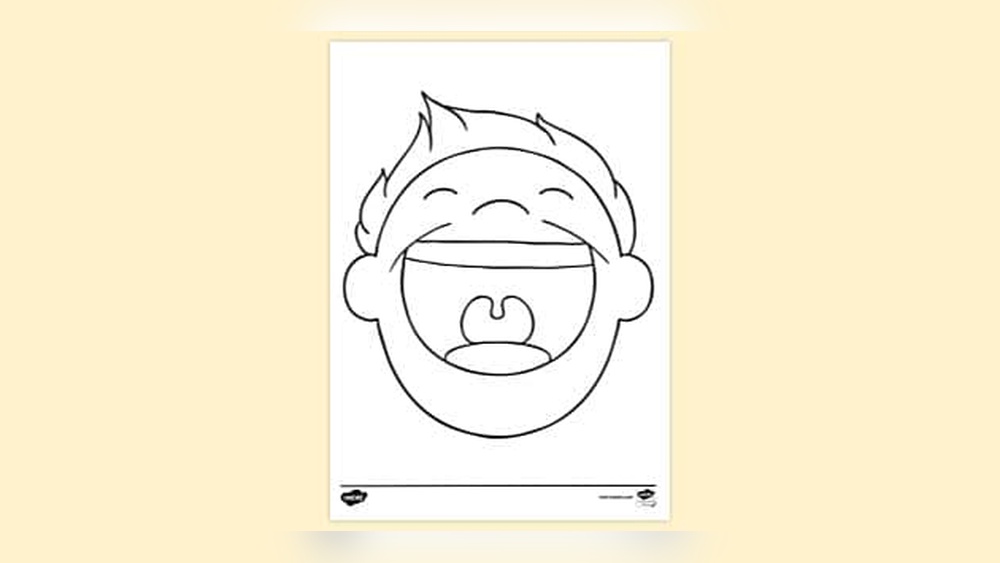
Are you struggling to bring your open mouth drawings to life with color? Coloring an open mouth can be tricky—you want it to look natural, expressive, and realistic without losing the details that make it stand out.
But with the right techniques, you can master shading, highlights, and tones that add depth and emotion to your artwork. In this guide, you’ll discover simple steps to color an open mouth effectively, whether you’re working with pencils, markers, or digital tools.
Keep reading, and you’ll learn how to transform your drawings into vivid, captivating pieces that draw everyone’s attention.
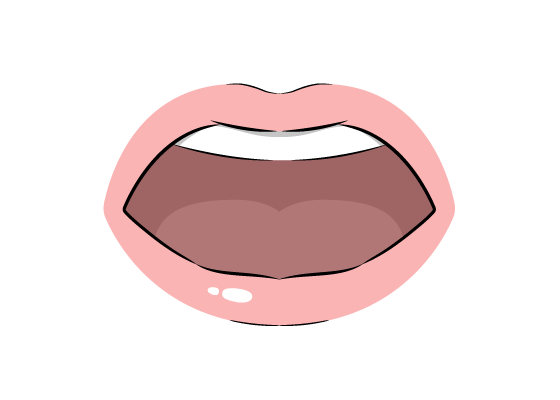
Credit: www.animeoutline.com
Mouth Anatomy Basics
Understanding the mouth’s structure helps in coloring it realistically. The mouth is not just lips; it includes several parts that work together. Knowing these parts makes shading and coloring easier and more accurate.
Each section has its own color and texture. This knowledge guides the choice of shades and highlights. Let’s explore the main components of an open mouth.
The Lips
Lips form the outer frame of the mouth. They have a soft texture and a natural pink or red color. Light hits the lips unevenly, creating highlights and shadows. The upper lip is usually darker than the lower lip.
The Teeth
Teeth appear inside the mouth when open. They are mostly white but have subtle shades of gray or yellow. Teeth reflect light, so adding small highlights can make them look real. Shadows between teeth add depth.
The Tongue
The tongue sits at the bottom of the mouth. It is moist and has a pink to red color. The surface is slightly rough and shows small bumps. Shadows and highlights on the tongue create a 3D effect.
The Oral Cavity
The space inside the mouth behind the tongue and teeth is the oral cavity. It is usually dark red or brown. This area has deep shadows because it is far from direct light. Adding dark shades here enhances realism.
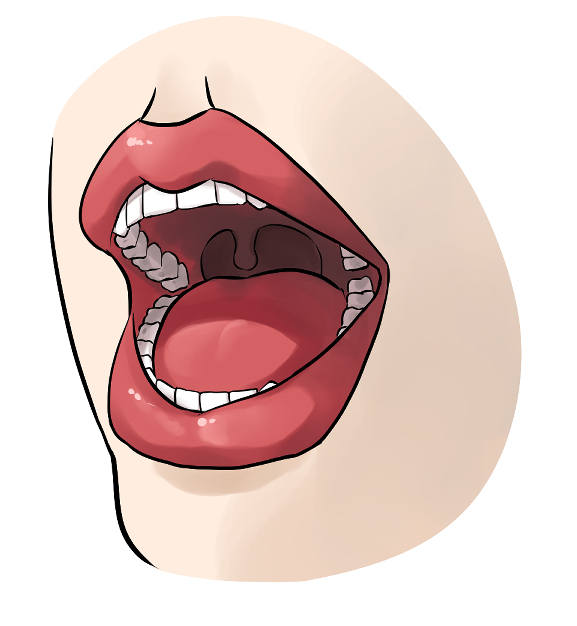
Credit: tips.clip-studio.com
Choosing The Right Colors
Choosing the right colors is key to coloring an open mouth realistically. The colors bring depth and life to your artwork. Selecting colors that match natural tones helps the mouth look believable and vibrant.
Focus on shades that reflect skin, lips, teeth, and the inside of the mouth. Each area needs different color choices to show texture and light effects. Careful color selection can make your drawing stand out with clear details.
Understanding Base Colors
Start by picking base colors for lips and the inside of the mouth. Lips usually have reds, pinks, or browns depending on skin tone. The mouth’s interior often uses darker reds and purples to show depth.
Choose colors that suit the character or person you are drawing. Keep base colors soft to allow easy blending later.
Highlighting And Shadows
Add highlights with lighter tones like soft pink or peach. This creates a sense of moisture and volume on the lips. Shadows use darker reds, browns, or purples to show depth and shape.
Place shadows under the upper lip, inside the mouth corners, and around teeth. Highlights go on the lips’ curved parts and tongue edges.
Coloring Teeth And Tongue
Teeth are not pure white. Use off-white shades with light grays or yellows to keep them natural. Avoid flat colors to add realism.
The tongue has pinks and reds but can have darker spots for texture. Blend these colors smoothly to show its moist surface.
Layering Skin Tones
Layering skin tones is key to coloring an open mouth realistically. It creates depth and natural color variation. Each layer adds subtle changes that build a lifelike effect.
Start with a base tone that matches the skin’s mid-color. This sets the foundation for all other shades. Use soft strokes to avoid harsh lines and keep the skin smooth.
Choosing The Right Base Color
Pick a skin tone that fits the character or subject. It should be neither too light nor too dark. The base color acts as the canvas for all other layers.
Adding Midtones And Shadows
Apply midtones to areas where the skin curves inward. Use a slightly darker shade to create shadows near the mouth corners. This makes the lips appear more three-dimensional.
Highlighting With Lighter Tones
Use lighter shades to highlight raised areas like the top of the lips and the middle of the lower lip. Highlights add shine and volume. Blend these tones softly for a natural look.
Blending Layers Smoothly
Blend each layer gently to avoid sharp color edges. Use a soft brush or blending tool for smooth transitions. Good blending makes the skin look soft and real.
Shading The Lips
Shading the lips gives depth and shape to an open mouth drawing. It helps the lips look soft and natural. Use gentle layers of color to create smooth shadows and highlights.
Start by deciding where the light hits the lips. Usually, the center of the lower lip catches the most light. The corners and edges often appear darker. This contrast makes the lips look full and three-dimensional.
Select colors that match natural lip tones. Use a base color close to the skin tone. Add darker shades for shadows and lighter shades for highlights. Avoid using pure black or white as they look unnatural.
Applying Shadows
Shade the corners of the lips and the folds where the lips meet. Use a small, soft brush or pencil for smooth blending. Layer the shadow colors lightly to keep the lips looking soft, not harsh.
Adding Highlights
Apply highlights on the center of the lower lip and the upper lip’s curve. Use a light color or a white pencil gently. Highlights show where light reflects off the moist surface of the lips.
Blending For A Natural Look
Blend the shades carefully to remove harsh lines. Use a blending tool or a clean brush in small circles. Smooth transitions between light and dark make lips look realistic and soft.
Rendering Teeth Realistically
Coloring an open mouth requires careful shading to show depth and texture. Use soft gradients for gums and tongue, and add subtle shadows between teeth. This technique makes the teeth look natural and the mouth appear three-dimensional.
Teeth inside an open mouth need careful attention for realism. They are not just flat white shapes. Teeth have curves, shadows, and slight color changes. Adding these details makes your artwork believable and lively.
Start by observing real teeth or good photo references. Notice the subtle shades of white, grey, and even light yellow. These colors create depth and form. Avoid pure white, which looks unnatural.
Shaping The Teeth Correctly
Teeth have distinct shapes and sizes. The front teeth are usually larger and more square. The back teeth are smaller and rounder. Draw these shapes lightly before coloring. This helps keep the teeth aligned and balanced.
Adding Shadows And Highlights
Teeth reflect light differently on each surface. Add soft shadows where teeth overlap or meet the gums. Use gentle highlights on the curved surfaces to show shine. This contrast gives teeth a three-dimensional look.
Using Color Variations
Teeth are rarely one solid color. Use light greys, soft yellows, or even hints of blue in shadows. These tones show natural tooth texture. Blend colors smoothly for a realistic effect.
Detailing The Gums And Mouth Interior
Teeth sit inside the mouth and touch the gums. Paint the gum line softly with pink or red shades. Add slight shadows under the teeth to ground them. This connection makes the teeth look part of the mouth, not floating.
Detailing The Tongue
Detailing the tongue is essential when coloring an open mouth. The tongue adds life and realism to your drawing. It gives depth and texture inside the mouth.
Focus on the shape and surface of the tongue. Notice its curves and the way it sits in the mouth. Use soft colors and gentle shading to bring it to life.
Understanding Tongue Anatomy
The tongue is not flat but has a rounded, slightly bumpy surface. It has a center line called the median sulcus. The tip is softer and lighter in color.
Observe the subtle color changes from the base to the tip. The base is darker and more shadowed. The tip and edges are lighter and smoother.
Start with a base pink or light red for the tongue. Use darker reds or purples for shadows. Add soft highlights with pale pink or white to show moisture.
Mix colors gently to avoid harsh lines. This technique creates a natural, moist look. Avoid bright or unnatural colors that distract from realism.
Adding Texture And Detail
The tongue surface has tiny bumps called papillae. Use small, soft strokes or dots to mimic this texture. Keep the texture subtle to avoid a rough look.
Shadows under the tongue show depth. Use darker tones to paint these areas carefully. Highlights on the wet surface make it look fresh and alive.
Highlighting Moisture And Gloss
Highlighting moisture and gloss is key for coloring an open mouth realistically. It brings life and depth to lips. Moisture adds a natural wet look that makes lips appear soft and fresh. Gloss creates shiny spots where light hits the lips. These highlights help show the texture and shape clearly.
Using highlights correctly can make the mouth look three-dimensional. It gives an impression of volume and moisture. This technique also enhances the open mouth’s expressiveness. Paying attention to gloss and moisture improves the overall artwork quality.
Understanding Light Reflection On Lips
Lips reflect light differently depending on their moisture. Wet areas reflect more light and look shiny. Dry areas scatter light and appear matte. To highlight moisture, paint small bright spots on the lips where light hits directly. These spots should be soft and blend with surrounding colors.
Choosing Colors For Moisture And Gloss
Select lighter shades for glossy highlights. White or pale pink works well for moisture. Use these colors sparingly to avoid overdoing the shine. Combine them with the base lip color smoothly. This balance keeps the look natural and believable.
Techniques For Painting Glossy Highlights
Apply highlights with a small brush or digital tool. Start with a low opacity to build shine gradually. Use soft edges to blend highlights into the lips. Add tiny dots or thin lines to mimic wet spots. Layer these highlights for a realistic glossy effect.
Enhancing Depth With Shadow And Light
Contrast between shadows and highlights creates depth. Darken areas inside the mouth to push them back visually. Bright highlights on the lips pull them forward. This contrast shapes the open mouth clearly. It also shows the lips’ curved surface well.
Capturing Shadows Inside The Mouth
Shadows inside an open mouth add depth and realism to your drawing. Focus on shading areas like the tongue, teeth gaps, and the back of the mouth. Use darker tones carefully to show natural light and shadow contrast.
Understanding The Dark Areas Inside The Mouth
The inside of an open mouth is full of shadows. These shadows create depth and realism. Dark areas appear near the throat, between the teeth, and under the tongue. Capturing these dark zones is important to avoid a flat look.
Use a darker color with low opacity for these parts. Blend softly to keep shadows natural. Strong, harsh lines can ruin the effect.
Using Gradients To Show Depth
Shadows inside the mouth change gradually. Use gradient shading to show this. Start with a mid-tone color and slowly add darker shades near the back. This technique gives the mouth a round, deep feeling.
Keep colors smooth and avoid sudden changes. This helps the mouth look three-dimensional and realistic.
Adding Shadows Around The Tongue And Teeth
The tongue casts shadows on the mouth floor. Teeth also create small shadow areas where they meet gums or lips. Paint these shadows carefully to show the correct shape and position.
Use softer shades near the tongue edges and sharper shadows close to teeth gaps. This balance adds realism and clarity.
Using References Effectively
Using references is key to coloring an open mouth well. References help you see real shapes, colors, and light. They show how lips, teeth, and the inside of the mouth look in different conditions.
Good references guide your choices and make your coloring look real and believable. They help you understand how shadows fall and how colors change inside the mouth. This makes your art more detailed and accurate.
Choose Clear And High-quality Images
Select references that show the open mouth clearly. Avoid blurry or dark pictures. Bright, sharp images reveal the details you need. Look for photos with good lighting and angles that match your drawing.
Study Light And Shadow Patterns
Watch how light hits the lips and teeth. Notice where shadows form inside the mouth. This helps you add depth and volume. Use this knowledge to create smooth color transitions and realistic shading.
Observe Color Variations
Colors inside the mouth vary a lot. Lips can have reds, pinks, and even blues. The tongue and gums show different shades of pink and red. Teeth may have white, yellow, or grey tones. Use your reference to pick the right colors.
Focus On Anatomy Details
Look closely at the shapes of lips, teeth, and tongue. Notice how the mouth opens and stretches. Study the curves and lines formed by muscles. This helps you draw the mouth naturally and expressively.
Use Multiple References
One image may not show all details you need. Collect several references from different angles and lighting. Combine what you see to create a complete picture. This approach improves your accuracy and creativity.
Common Mistakes To Avoid
Coloring an open mouth can be tricky. Many artists face common errors that affect the final look. Avoiding these mistakes helps create realistic and vibrant results.
Understanding what to avoid saves time and improves your skills. Below are frequent mistakes made during the coloring process.
Ignoring Light And Shadow
Open mouths have many shadows and highlights. Ignoring these makes the mouth look flat and unnatural. Use soft shading to show depth and form clearly.
Overusing Bright Colors
Using too much bright red or pink can make the mouth look cartoonish. Choose subtle tones and blend them smoothly for a natural effect.
Skipping Teeth Details
Teeth are not just white blocks. They have shadows and slight color variations. Adding these small details gives realism and dimension.
Forgetting The Tongue Texture
The tongue has a soft, moist texture. Coloring it with flat colors loses this effect. Use gentle color transitions and highlights to mimic moisture.
Neglecting Lip Contours
Lip edges have subtle color changes and curves. Ignoring these contours results in a stiff look. Define edges carefully with soft lines and shading.

Credit: www.vexels.com
Frequently Asked Questions
How To Color A Mouth?
Color a mouth by shading lips’ corners, top and bottom edges darker than gums. Blend smoothly for natural highlights and shadows.
How To Color Lips With Alcohol Markers?
Start with a light base color on lips using alcohol markers. Blend darker shades inward to define creases. Add highlights on the center for a natural shine. Layer colors smoothly to avoid streaks. Finish by softening edges for a realistic, juicy look.
How To Draw A Juicy Mouth?
Start with soft outlines of lips, add darker shades inside for depth, blend edges smoothly. Highlight the cupid’s bow and add subtle shadows below lips for a juicy effect.
How To Draw Cute Kissy Lips?
Start with a small heart shape for the upper lips. Draw a curved line below for the lower lip. Add soft shading and a tiny highlight to create a cute, kissy look. Keep lines smooth and rounded for softness.
What Colors Should I Use To Color An Open Mouth?
Use reds, pinks, and light peach for lips; white and light pink for teeth; dark reds for the tongue.
How To Shade The Inside Of An Open Mouth?
Shade darker near the back and lighter near the front for depth and realism.
What Tools Work Best For Coloring Open Mouths?
Colored pencils, markers, and digital brushes offer good control and blending options.
How To Color Teeth Realistically In An Open Mouth?
Use off-white shades with light gray shadows for natural-looking teeth, avoiding pure white.
How To Add Highlights To Lips In An Open Mouth?
Add small white or light pink spots where light naturally hits for a glossy look.
How To Color The Tongue Inside An Open Mouth?
Use deep reds and pinks with subtle shading to show texture and volume.
Conclusion
Coloring an open mouth takes patience and careful shading. Start with basic colors and add shadows for depth. Focus on lips, teeth, and tongue details to make it look natural. Use smooth color changes to avoid harsh lines. Practice often to improve your skill and confidence.
This simple guide helps you bring your drawings to life. Keep experimenting and enjoy the creative process.