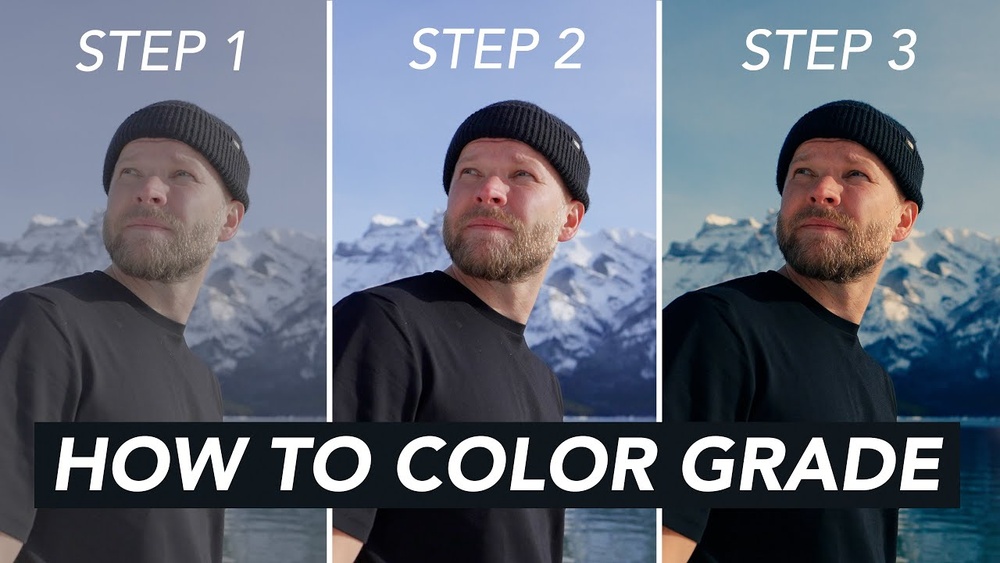
Are your videos or photos missing that wow factor? Color grading can change everything.
It’s the secret step that transforms ordinary footage into something cinematic, emotional, and unforgettable. But how do you get started without feeling overwhelmed? In this guide, you’ll discover simple, clear steps to color grade like a pro—even if you’re a beginner.
By the end, you’ll know how to make your images pop, set the right mood, and tell a stronger story through color. Ready to unlock the true potential of your visuals? Let’s dive in.

Credit: www.youtube.com
Basics Of Color Grading
Color grading changes the look and mood of your video or photo. It adjusts colors to create a certain style. Understanding the basics helps you improve your work quickly.
With simple steps, you can make your images look natural or dramatic. This section explains the core ideas behind color grading. It is easy to learn with some practice.
What Is Color Grading?
Color grading means changing the colors in your footage or photo. It enhances the image by adjusting brightness, contrast, and color tones. This process sets the mood and style of your work.
It is different from color correction, which fixes color problems. Grading adds creative effects to make your images stand out.
Primary Color Controls
Primary controls adjust the basic look of your image. These include exposure, contrast, and white balance. Changing these affects the entire image evenly.
Exposure controls how light or dark the image is. Contrast changes the difference between light and dark areas. White balance sets the color temperature, making the image warmer or cooler.
Secondary Color Adjustments
Secondary adjustments target specific colors or areas. You can change only the reds, blues, or skin tones. This helps in refining the look without affecting the whole image.
Tools like masks or color wheels are used to isolate these areas. This step adds depth and focus to your grading.
Using Luts (look-up Tables)
LUTs are preset color styles you can apply quickly. They give a consistent look in one click. LUTs save time and help beginners learn color grading.
You can use LUTs as a base and then fine-tune the colors. Many free and paid LUTs are available online.
Credit: smart.dhgate.com
Essential Tools And Software
Color grading shapes the mood and style of your videos and photos. The right tools and software make this process smooth and effective. This section covers essential options for beginners and pros alike. Understanding these basics helps you pick what fits your needs best.
Hardware Tools For Color Grading
Good hardware improves color grading accuracy. A high-quality monitor shows true colors without distortion. Calibrating your screen ensures consistent results across devices. A color grading control panel speeds up workflow. It offers knobs and wheels for precise adjustments. Using a powerful computer or laptop avoids lag during editing.
Popular Software For Color Grading
Many software options offer unique features for color grading. DaVinci Resolve is widely used for its advanced tools and free version. Adobe Premiere Pro integrates well with other Adobe apps and suits video editors. Final Cut Pro offers smooth performance on Mac systems. Lightroom and Photoshop are great for photo color grading. Choose software that matches your project type and skill level.
Plugins And Presets To Enhance Grading
Plugins add extra effects and simplify grading tasks. They help create specific looks or correct colors faster. Presets provide ready-made color settings to apply instantly. Using presets can save time and inspire creativity. Many plugins work with popular software like Premiere and DaVinci. Explore different options to find what fits your style.
Setting Up Your Workspace
Setting up your workspace is the first step in color grading. It creates the right environment for accurate color work. A well-organized space helps you focus on details and improves your workflow.
Proper setup reduces mistakes caused by poor lighting or clutter. It also ensures your screen shows colors correctly. This leads to better and consistent results.
Choose The Right Monitor
Pick a monitor with good color accuracy. Look for screens that support wide color gamuts like Adobe RGB or DCI-P3. Calibrate your monitor regularly using hardware calibration tools. This keeps colors true and consistent.
Control Your Lighting
Use dim, neutral lighting to avoid color distortion. Avoid bright lights or sunlight that cause glare on your screen. Soft, even light helps you see colors clearly and reduces eye strain.
Organize Your Tools
Keep your software and hardware tools handy. Arrange your keyboard, mouse, and control panels for easy access. A tidy desk helps you work faster and stay focused.
Set Up Your Software
Configure your color grading software before starting. Use the correct color space and resolution settings. Save your workspace layout for quick access next time. This saves time and keeps your process smooth.
Primary Color Correction
Primary color correction is the first step in color grading. It adjusts the overall look of your video or image. The goal is to fix any color or exposure issues before applying creative effects.
This step creates a balanced base for further color work. It ensures natural skin tones and accurate colors. Proper primary correction improves the final visual quality.
Understanding Exposure And Contrast
Start by checking the exposure. Adjust brightness to avoid dark or washed-out areas. Set the contrast to give depth and detail. Good exposure and contrast make the image clear and vivid.
Balancing White And Black Points
Set the white point to the brightest part of the image. Set the black point to the darkest area. This creates a full tonal range, making the image look natural. Proper balance prevents dull or harsh visuals.
Correcting Color Temperature And Tint
Adjust the color temperature to fix warm or cool tones. Use tint to correct green or magenta hues. This step helps achieve natural colors and realistic skin tones. Balanced temperature and tint improve the overall mood.
Neutralizing Color Casts
Look for unwanted color casts in shadows, midtones, or highlights. Use color wheels or sliders to neutralize these casts. Removing color casts keeps the image clean and true to life.
Using Scopes For Precision
Use video scopes like waveform, vectorscope, and histogram. These tools help monitor color and exposure accurately. Scopes guide you to make precise adjustments in primary correction.
Using Curves And Contrast
Using curves and contrast is a key step in color grading. It helps shape the mood and style of your video or photo. Curves allow precise control over brightness and color tones. Contrast makes your image more dynamic by adjusting the difference between light and dark areas.
This section explains how to use these tools effectively. You will learn to improve your footage with simple adjustments. The goal is to create a balanced and appealing look.
What Are Curves In Color Grading?
Curves are graphical tools that control brightness and color. They show a diagonal line from shadows to highlights. Moving points on this line changes the image tones. You can brighten or darken specific areas easily.
Each color channel—red, green, and blue—has its own curve. Adjusting these curves changes color balance. It can make colors warmer or cooler. This allows fine-tuning of the overall look.
How To Adjust Contrast Using Curves
Contrast controls the difference between dark and light parts. Using curves, create an “S” shape on the line. Pull down the shadow area to darken it. Push up the highlight area to brighten it.
This simple adjustment increases contrast. It makes images more vivid and eye-catching. Avoid extreme curves to keep natural tones. Small changes often give the best results.
Tips For Using Curves And Contrast
Start with small adjustments and check the image often. Use the histogram to avoid clipping shadows or highlights. Keep skin tones natural by adjusting color curves carefully.
Combine curves with other tools like exposure and saturation. This helps balance the entire image. Practice regularly to understand how curves affect your footage. The more you work with them, the easier it becomes.
Credit: www.studiobinder.com
Creating Mood With Color Wheels
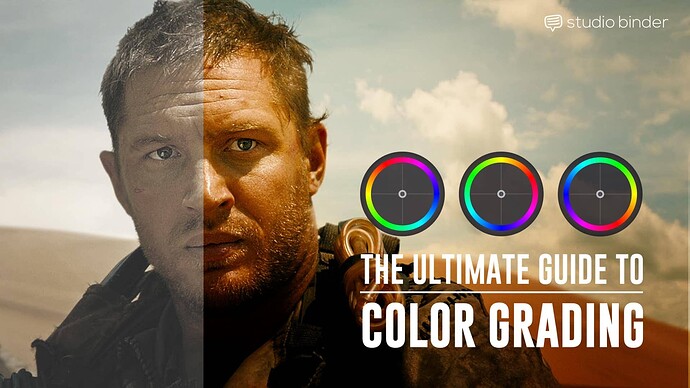
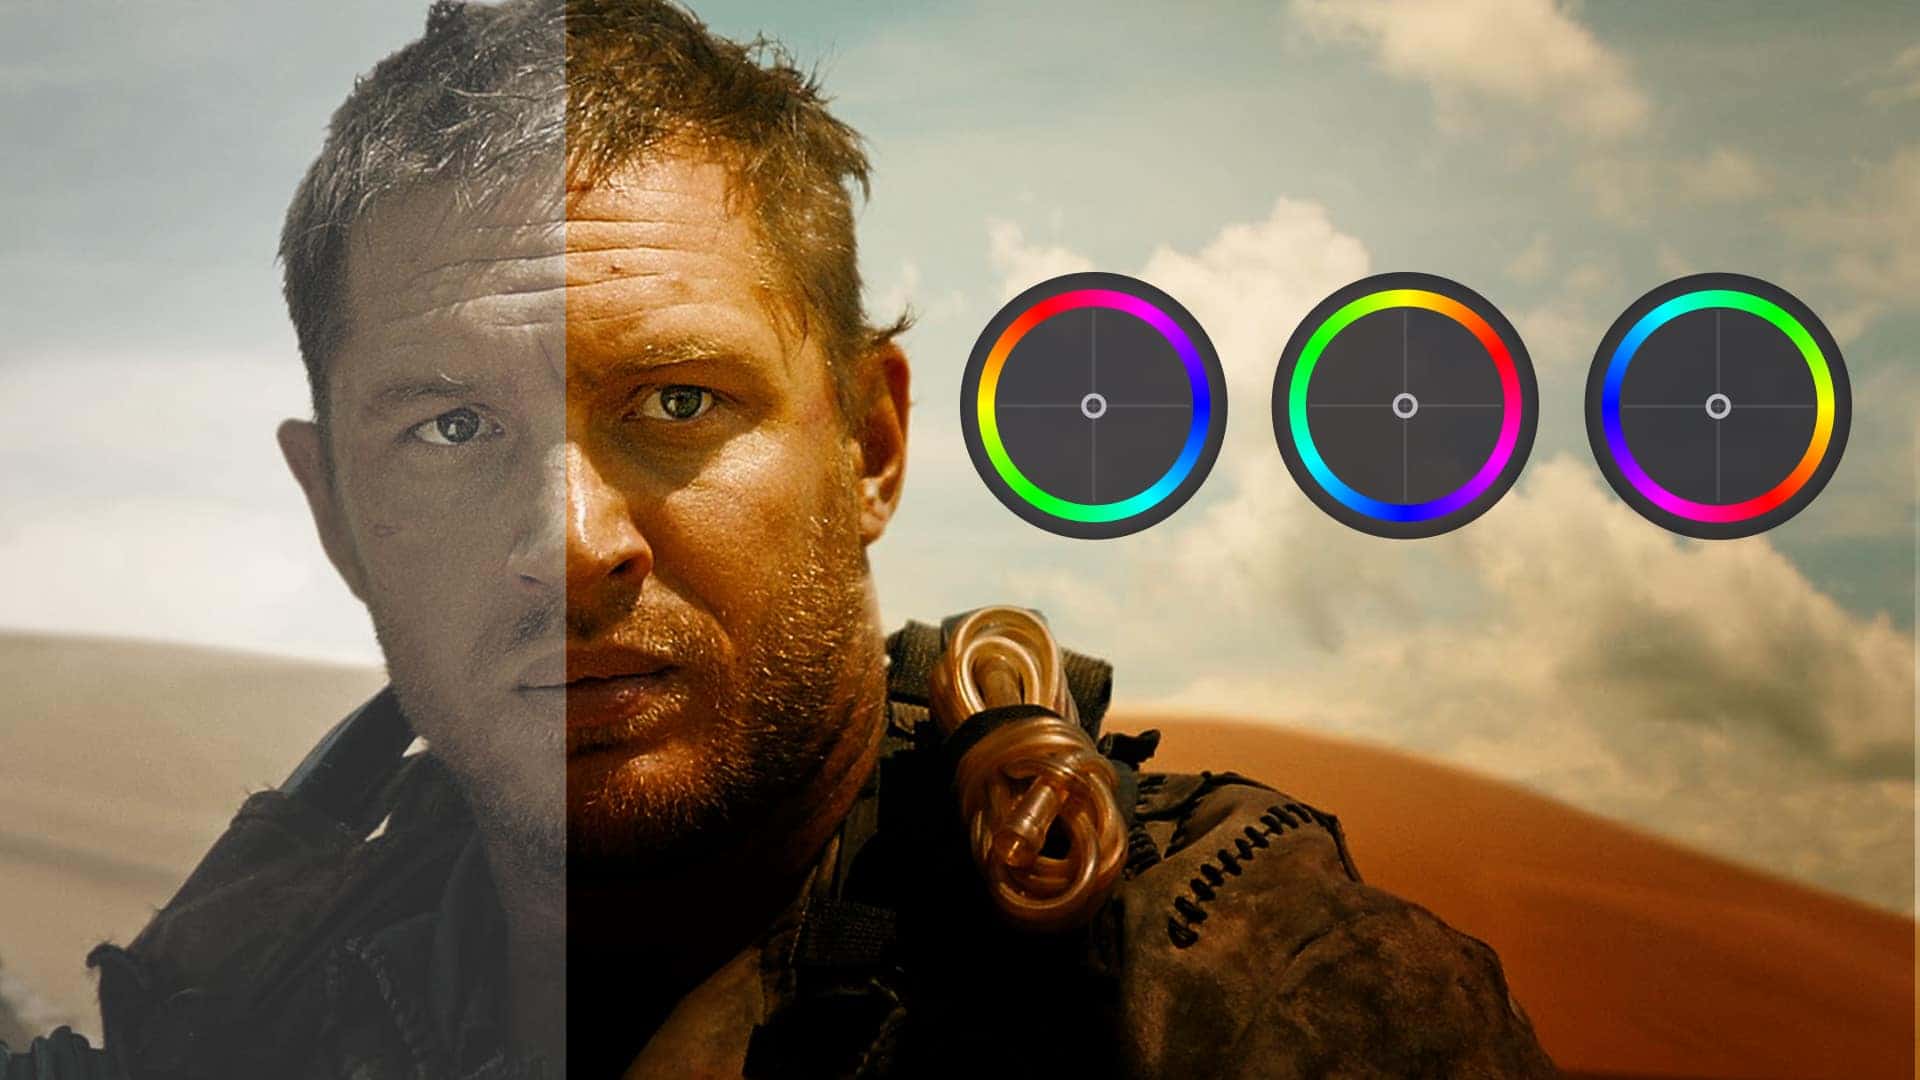
Color wheels play a key role in setting the mood in color grading. They help control the tone and feeling of your video or photo. Using color wheels, you can adjust shadows, midtones, and highlights separately. This control allows you to create distinct emotional atmospheres.
Choosing the right color balance changes how viewers feel. Warm tones like reds and oranges create energy and excitement. Cool tones such as blues and greens bring calmness and sadness. Color wheels give you the power to blend these moods smoothly.
Understanding The Three Color Wheels
Most color grading software offers three color wheels. These wheels control shadows, midtones, and highlights. Shadows affect the darkest parts of an image. Midtones cover the middle range of brightness. Highlights influence the brightest areas. Adjusting each wheel changes the color balance in that range.
Using Color Wheels To Set Emotional Tone
Shift colors to evoke feelings. For example, push shadows towards blue for a cold, distant mood. Add orange to midtones for warmth and friendliness. Bright highlights with a slight tint can enhance the overall tone. Small changes can make a big emotional impact.
Balancing Colors For Natural Looks
Keep the colors balanced for realism. Avoid over-saturating one area unless for style. Use the wheels to gently tweak hues. This keeps skin tones natural and scenes believable. Balanced color grading enhances mood without distracting viewers.
Applying Luts And Presets
Applying LUTs and presets simplifies color grading. These tools help create consistent, professional looks fast. They adjust colors, contrast, and brightness with one click. Using LUTs and presets saves time and improves workflow. Beginners find them especially useful to start color grading easily.
What Are Luts And Presets?
LUTs (Look-Up Tables) change the color values of your video or photo. They apply a specific style or mood quickly. Presets are pre-made settings in editing software. They adjust color, tone, and effects all at once. Both give your footage a unique, polished look.
How To Apply Luts And Presets
First, open your editing software and import your footage. Find the LUT or preset panel in the color grading section. Load the LUT or preset you want to use. Click to apply it directly to your clip. Adjust the strength to control the effect’s intensity.
Tips For Using Luts And Presets Effectively
Choose LUTs that match your footage style and lighting. Avoid overusing presets for a natural look. Combine LUTs with manual adjustments for better results. Always check your image on different screens. This ensures your colors look good everywhere.
Advanced Grading Techniques
Advanced grading techniques enhance your videos beyond basic color correction. These methods add depth, mood, and style. They help create a professional and cinematic look. Explore different tools and tricks to refine your color grading skills.
Using Curves For Precise Color Control
Curves allow you to adjust brightness and contrast with accuracy. You can tweak shadows, midtones, and highlights separately. This control helps balance colors and create a custom look. Experiment with RGB channels for unique color effects.
Secondary Color Correction
Secondary correction targets specific colors or areas in your footage. Use masks or qualifiers to isolate colors. Change hues, saturation, or brightness without affecting the whole image. This technique can fix skin tones or enhance key elements.
Applying Film Emulation Presets
Film emulation presets mimic the look of old film stocks. They add grain, color shifts, and contrast typical of film cameras. These presets bring nostalgia and character to digital footage. Adjust strength to keep the effect subtle or bold.
Working With Luts (look-up Tables)
LUTs offer quick color grading solutions by applying preset color styles. Use them as a starting point or final touch. Customize LUTs to fit your video’s mood and lighting. Combine LUTs with other grading tools for better results.
Using Power Windows For Local Adjustments
Power windows let you isolate areas for targeted color changes. Draw shapes to highlight or darken specific parts of the frame. This technique enhances focus or creates dramatic effects. Use softness and feathering to blend changes naturally.
Common Mistakes To Avoid
Color grading transforms your video or photo into a visual story. It sets the mood and style. Avoiding common mistakes helps achieve a clean, professional look. Mistakes can make your work look amateur or unnatural. Focus on simple steps and steady progress.
Incorrect White Balance
White balance controls the color temperature of your image. Wrong white balance creates unwanted color casts. It may make skin tones look sickly or unnatural. Always set white balance before starting your color grade. Use a neutral reference point like a gray card.
Overdoing Saturation
Too much saturation can make colors look fake. It may cause color clipping and loss of detail. Keep saturation levels balanced for a natural look. Check your image on different screens to ensure consistent colors.
Ignoring Exposure Issues
Color grading cannot fix bad exposure completely. Avoid grading footage that is too dark or too bright. Correct exposure first during the editing process. Proper exposure retains detail in shadows and highlights.
Not Using Scopes
Scopes help analyze color and brightness objectively. Skipping scopes leads to uneven colors and brightness. Use waveform, vectorscope, and histogram tools often. They guide you to maintain balance and avoid errors.
Applying One-size-fits-all Presets
Presets can be a good start but rarely fit all footage. Blindly using presets may ruin your unique look. Customize each grade to match the scene and mood. Adjust settings for skin tones, background, and lighting.
Tips For Consistent Results
Achieving consistent results in color grading requires a clear approach and steady techniques. Consistency helps maintain the mood and style across your entire video or photo series. Small changes can make a big difference. Follow these tips to keep your color grading steady and professional.
Set A Standard Look
Create a base look that you like. Use this as your starting point for all projects. Save your settings or presets. This approach saves time and keeps your colors uniform.
Use Reference Images
Choose a few reference images or clips. Compare your work to these often. They help guide your color choices and keep your grading consistent. Always check color balance, contrast, and brightness against your references.
Work In A Controlled Environment
Color grading in a room with neutral lighting is best. Avoid bright or colored lights that can alter your perception. Use a good quality monitor calibrated for color accuracy. This ensures what you see is true and repeatable.
Adjust One Parameter At A Time
Make changes step-by-step. Focus on one color or tone before moving to the next. This method prevents over-editing and helps track what each adjustment does. It also makes it easier to repeat your steps later.
Keep Notes Of Your Settings
Write down your key settings and adjustments. Keep a log for each project. This helps you recreate looks for future work. Notes also help when you revisit old projects and want the same style.
Frequently Asked Questions
How To Color Correct For Beginners?
Start by balancing white and exposure for natural look. Adjust contrast and shadows next. Use color wheels to correct hues. Always work on a calibrated monitor. Practice with free tools like DaVinci Resolve for better results.
Is Color Grading A Difficult Skill?
Color grading requires understanding basic principles but is easy to learn with practice. Mastery takes time and creativity.
How To Color Grade Photos For Free?
Use free tools like DaVinci Resolve or Lightroom Mobile. Adjust curves, brightness, contrast, and white balance. Apply presets or auto color correction for quick results. Preview and save your edited photo.
Is Lightroom Or Photoshop Better For Color Grading?
Lightroom offers easy, fast color grading for beginners. Photoshop provides advanced tools for detailed, creative color control. Choose based on skill level and project needs.
What Is Color Grading In Video Editing?
Color grading adjusts colors to create a mood or style in videos or films.
How Does Color Grading Differ From Color Correction?
Color correction fixes color issues; grading adds artistic color style and mood.
What Tools Are Best For Color Grading Beginners?
DaVinci Resolve and Adobe Premiere Pro offer beginner-friendly color grading tools.
How Do You Start Color Grading A Video?
Begin with color correction, then adjust colors for mood and style.
What Are Common Color Grading Techniques?
Techniques include adjusting contrast, saturation, hue, and using LUTs (lookup tables).
Can Color Grading Improve Video Storytelling?
Yes, it enhances emotions and atmosphere, supporting the story visually.
Conclusion
Color grading changes the mood and feel of your videos. It helps tell your story better. Start simple and practice regularly to improve skills. Choose colors that match your video’s theme. Use tools like DaVinci Resolve or Lightroom for easy editing.
Remember, patience and creativity make your work stand out. Keep experimenting until you find your style. Enjoy the process and see your videos come alive.