
Want to change the color of an object in your photo but don’t know where to start? You’re in the right place.
Whether you want to brighten up an old picture, customize a product mockup, or just have fun experimenting with colors, Photoshop makes it simple. In this guide, you’ll learn easy, step-by-step methods to change colors quickly and precisely—no advanced skills required.
By the end, you’ll be able to transform any part of your image to match your vision perfectly. Ready to give your photos a fresh new look? Let’s dive in!
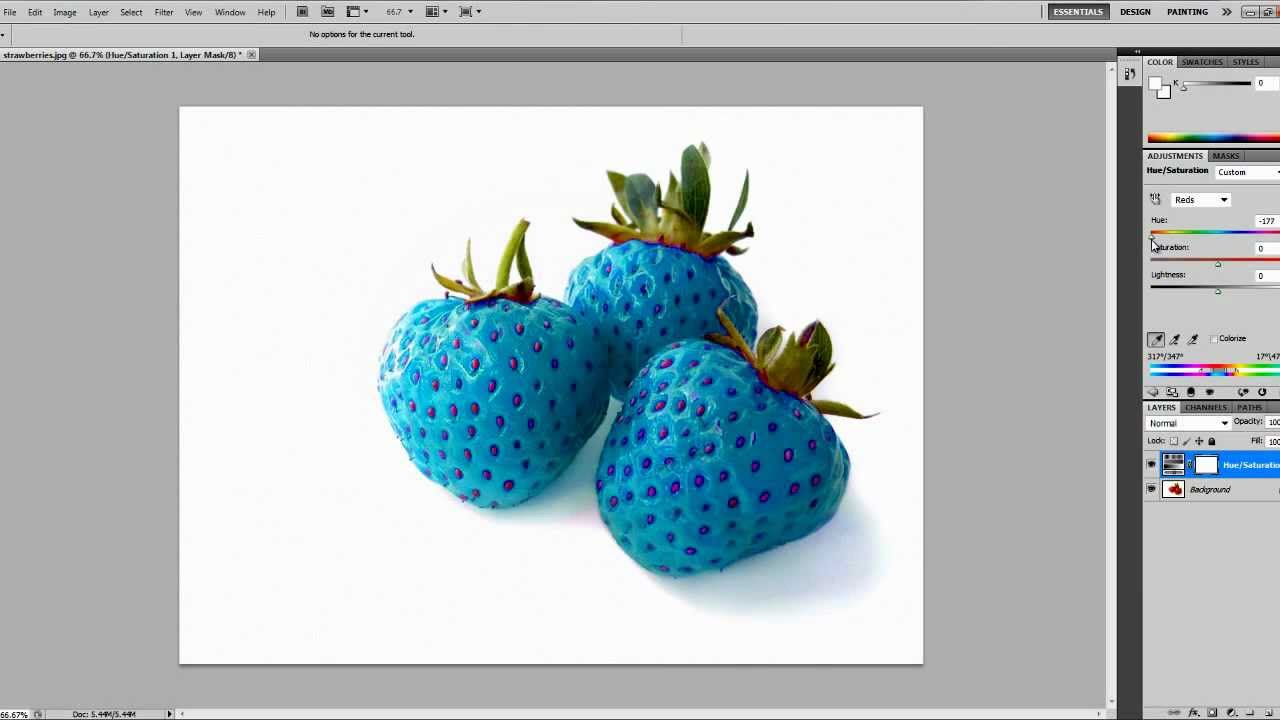
Credit: www.youtube.com
Select The Object
Selecting the object is the first key step to change its color in Photoshop. Without a proper selection, the color change will affect unwanted areas. Photoshop offers several tools to help you select objects precisely. Choosing the right tool depends on the object’s shape and background.
A clean selection saves time and makes your work look professional. Spend time refining the edges to avoid rough or blurry outlines.
Using The Quick Selection Tool
The Quick Selection Tool is fast and easy to use. Click and drag over the object to select it. Photoshop detects edges and fills in the selection automatically. Use the plus and minus options to add or remove parts of the selection. This tool works best on objects with clear edges.
Using The Magic Wand Tool
The Magic Wand Tool selects areas based on color similarity. Click on the object area to select pixels of the same color. Adjust the tolerance level to select more or fewer colors. This tool is useful for objects with uniform color and simple backgrounds.
Using The Pen Tool For Precise Selection
The Pen Tool offers the most control for selecting complex shapes. Draw paths around the object by placing anchor points. Close the path to create a selection. Convert the path to a selection by right-clicking and choosing “Make Selection.” This method takes longer but gives clean, sharp edges.
Refining The Selection Edges
After selecting the object, refine the edges to improve accuracy. Click “Select and Mask” to open the refinement workspace. Use tools like Smooth, Feather, and Contrast to perfect the edges. This step removes unwanted halos and makes the color change blend naturally.
Use Selection Tools
Selection tools in Photoshop help isolate the part you want to change. They make editing easier and more precise. Choosing the right tool saves time and improves results. Below are some common selection tools and how to use them.
Use The Quick Selection Tool
The Quick Selection Tool lets you paint over the area to select. It finds edges automatically. Click and drag over the object. Adjust the brush size for better control. Add to or subtract from the selection as needed.
Use The Magic Wand Tool
The Magic Wand Tool selects pixels with similar colors. Click on the color you want to change. Adjust the tolerance to increase or decrease the range. This tool works well for solid colors and simple backgrounds.
Use The Lasso Tool
The Lasso Tool allows freehand drawing of the selection. Draw around the object carefully. Use the Polygonal Lasso for straight edges. The Magnetic Lasso snaps to edges automatically. This tool is useful for complex shapes.
Refine Your Selection
After selecting, refine edges to make the selection smooth. Use the Select and Mask feature. Adjust the smoothness, feather, and contrast. This step helps blend the new color naturally with the image.
Create Adjustment Layer
Creating an adjustment layer is a simple way to change colors in Photoshop. Adjustment layers let you alter colors without changing the original image. This keeps your work flexible and easy to edit later.
Using an adjustment layer also helps you apply color changes precisely. You can control which parts of the image are affected. It is a non-destructive method, meaning your original photo stays safe.
Create A New Adjustment Layer
Open your Photoshop project. Go to the Layers panel. Click the ‘Create new fill or adjustment layer’ button at the bottom. Choose ‘Hue/Saturation’ from the list. This adds a new adjustment layer above your image layer.
Adjust The Hue And Saturation
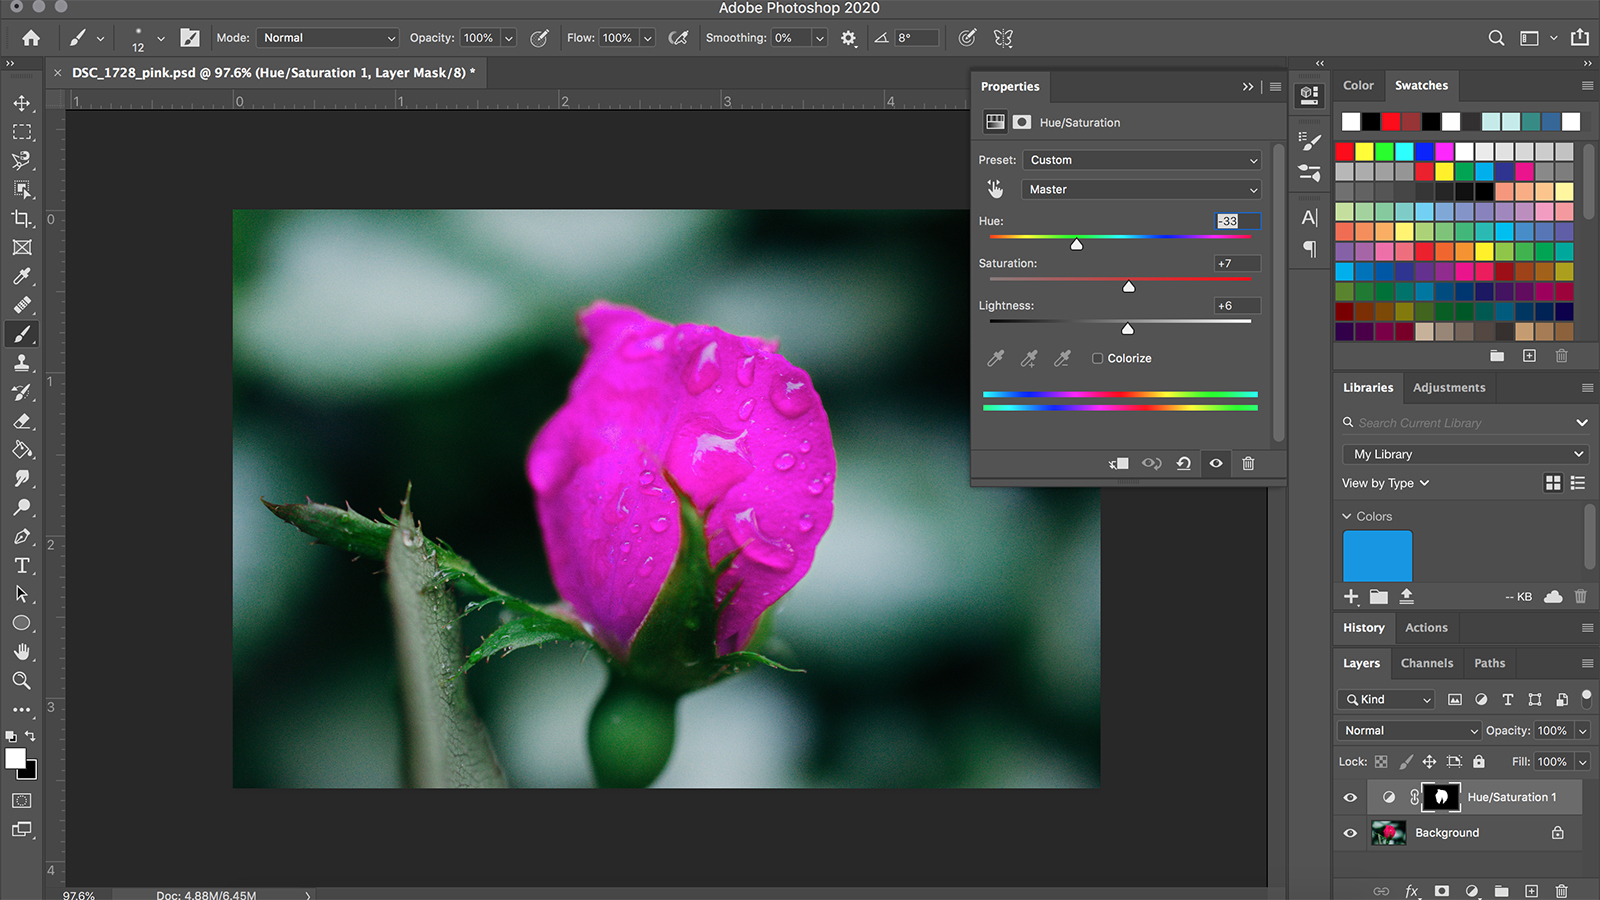
In the Properties panel, move the Hue slider left or right. This changes the colors in your image. Use the Saturation slider to increase or decrease color intensity. Keep an eye on the image to get the desired effect.
Use The Layer Mask To Limit The Change
By default, the adjustment affects the whole image. Use the layer mask to control this. Paint with black on the mask to hide the color change. Paint with white to show the effect. This lets you change colors only where you want.
Credit: www.digitaltrends.com
Apply Hue/saturation
The Hue/Saturation tool in Photoshop lets you change colors easily. It adjusts the hue, saturation, and lightness of your selected area or entire image. This method works well for simple color changes without affecting details.
Using Hue/Saturation gives you control to make subtle or bold color shifts. You can target specific color ranges or adjust all colors at once. This flexibility makes it a favorite for color correction and creative effects.
Open The Hue/saturation Adjustment
Start by selecting the object or area you want to change. Go to the top menu and click Layer > New Adjustment Layer > Hue/Saturation. This opens a new layer with sliders to edit colors.
Adjust The Hue Slider
Move the Hue slider left or right to shift colors. This changes the overall color tone of your selected part. Watch the image carefully to find the perfect color match.
Use The Saturation And Lightness Sliders
Increase Saturation to make colors brighter and more vivid. Decrease it for a muted or faded look. Adjust Lightness to make colors lighter or darker as needed.
Target Specific Colors
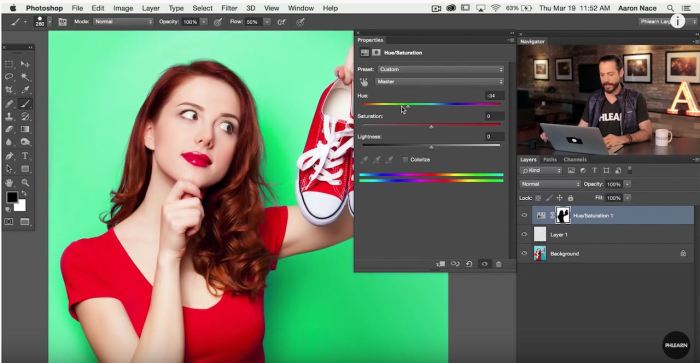
Click the dropdown menu that says Master to select a color range. This lets you change only reds, blues, or other colors without affecting the whole image. It helps keep other colors natural.
Refine The Effect With The Mask
Use the layer mask to apply the color change only where you want. Paint with black on the mask to hide the effect. Use white to show it. This gives you precise control over the color change.
Adjust Color Range
Adjusting the color range in Photoshop helps you target specific colors in an image. This method allows precise color changes without affecting the entire picture. It is useful for editing objects or backgrounds with similar colors.
You can select a range of colors to modify, making the process faster and cleaner. Photoshop provides tools to control the hue, saturation, and brightness within that range.
How To Access The Color Range Tool
Go to the top menu and click on Select. Then choose Color Range. A new window will open, showing a preview of your image.
Here, you can pick the color you want to change by clicking on it in the preview. Use the eyedropper tool to select the exact shade.
Adjusting The Fuzziness Slider
The fuzziness slider controls how broad the color selection is. Moving it right increases the range of similar colors selected. Moving it left narrows the selection to colors closer to the sample.
Try different levels to get the best selection before applying changes. A good selection avoids unwanted areas being altered.
Refining The Color Selection
You can add or subtract colors using the eyedropper tools with plus or minus signs. This helps fine-tune the selection for better results. Zoom in to see details clearly.
Once satisfied, click OK. The selected color range will become active for editing.
Credit: phlearn.com
Use Replace Color Dialog
The Replace Color dialog in Photoshop offers a quick way to change colors. It lets you pick a color and swap it with another. This tool works best for simple color changes in images.
Using the Replace Color dialog helps keep the original image details. It changes only the selected color range. This method is easy and does not require complex selections.
Open The Replace Color Dialog
Go to the top menu and click Image. Choose Adjustments, then click Replace Color. A small window will pop up. This is where you change the colors.
Select The Color To Replace
Click the eyedropper tool in the dialog. Click on the color in your image you want to change. Adjust the Fuzziness slider to include more or less of that color. Watch the preview to see changes in real time.
Choose The New Color
Click the Color swatch in the Replace Color window. Pick the new color you want to apply. The preview will show how the image looks with the new color. Adjust until you are happy with the result.
Fine-tune The Color Change
Use the Hue, Saturation, and Lightness sliders to adjust the new color. This helps match the new color to your image better. Small changes can make the color look natural and smooth.
Apply The Color Replacement
Once satisfied with the settings, click OK. Photoshop will apply the color change to your image. You can always undo or try again if needed.
Try Color Replacement Tool
The Color Replacement Tool in Photoshop lets you change colors easily. It paints over the original color with a new one. This tool keeps the texture and shading intact. It works like a brush but changes color instead of adding paint.
Using this tool saves time. It is perfect for small areas or objects with complex edges. The tool adapts to the tones and hues nearby. This means your new color looks natural and smooth.
How To Select The Color Replacement Tool
Open Photoshop and your image. Find the Color Replacement Tool in the toolbar. It is under the Brush Tool group. Click and hold the Brush Tool to see it. Select the Color Replacement Tool from the list.
Set The Foreground Color
Choose the new color you want to apply. Click the foreground color box at the bottom of the toolbar. Pick a color from the color picker window. Click OK to confirm your choice.
Adjust Tool Settings
Look at the top options bar to change the tool settings. Set the brush size to fit your object. Choose a hardness level for smooth or sharp edges. Select the sampling method, such as Continuous or Once. Adjust the Limits to Contiguous or Discontiguous for color range.
Start Painting To Replace Color
Move the cursor over the area you want to change. Click and drag to paint with the new color. The tool will replace the original color only. Release the mouse to stop painting. Repeat as needed for full coverage.
Mask The Adjustment
Masking the adjustment is a key step to change color precisely in Photoshop. It controls which parts of the image get affected by your edits. Masking lets you apply color changes only where you want, leaving the rest untouched.
This technique gives you control and flexibility. It helps to avoid unwanted color shifts on other parts of your photo. Photoshop uses a special layer mask to hide or reveal the adjustment.
Understanding The Layer Mask
A layer mask is a black and white image attached to the adjustment layer. White areas show where the color change applies. Black areas hide the effect completely. Shades of gray create partial transparency.
This mask works like a stencil. You can paint on it to control visibility of your color adjustment. It is non-destructive, so you can change it anytime.
Painting On The Mask
Select the mask thumbnail on the adjustment layer. Use the Brush Tool with black or white color. Paint black to hide the color change in that area.
Paint white to reveal the effect again. Adjust the brush size and hardness to suit details. Use gray for soft transitions. This method refines where the new color appears.
Using Selection For Masking
Create a selection of the object before adding the adjustment layer. Photoshop automatically applies the mask based on your selection. This saves time and ensures accuracy.
Modify the mask later by painting if you want to include or exclude areas. Selection plus mask painting gives you precise control over color change.
Fine-tune Color Settings
Fine-tuning color settings in Photoshop helps achieve the perfect look. After changing the color, adjustments improve brightness, contrast, and tone. These tweaks make the new color blend naturally with the image. Photoshop offers simple tools for precise control.
Using The Hue/saturation Adjustment
The Hue/Saturation tool shifts colors easily. Drag the hue slider left or right to change color tones. Adjust saturation to increase or decrease color intensity. Lightness controls the brightness of the selected color. Use the preview to see changes live.
Adjusting Color Balance
Color Balance changes the mix of red, green, and blue. Move sliders to add warmth or coolness to the color. Adjust shadows, midtones, and highlights separately for detailed control. This tool refines the color for a natural look.
Applying Selective Color Correction
Selective Color lets you change specific color ranges. Choose a color like reds or blues to edit. Adjust cyan, magenta, yellow, and black sliders for that color range. This method fixes color problems without affecting the whole image.
Using Curves For Precise Control
Curves provide detailed color and brightness adjustments. Move points on the curve to lighten or darken areas. Adjust each color channel individually to fine-tune the color. Curves work well to add depth and contrast.
Save And Export
Saving and exporting your work in Photoshop is the final step after changing colors. This process keeps your edits safe and ready for sharing or printing. Proper saving ensures you can return to your project later without losing quality.
Exporting prepares your image for different uses. You can choose file types and settings that suit your needs. Photoshop offers many export options to keep your colors crisp and vibrant.
Saving Your Photoshop Project
Save your file as a PSD to keep all layers intact. This format allows you to edit colors again later. Click “File” then “Save As” and choose PSD from the list. Name your file and pick a location you will remember.
Exporting For Web Or Print
Use “Export As” or “Save for Web” for online images. These options reduce file size without losing color quality. Select JPEG or PNG formats for best results. Adjust the quality slider to balance size and clarity.
Choosing The Right File Format
JPEG works well for photos with many colors. PNG supports transparency and sharp edges. TIFF is best for high-quality prints and large files. Pick the format that matches your final use.
Setting Export Options
Check the color profile to keep colors accurate. Use sRGB for web images to ensure consistent colors. Set the resolution to 72 dpi for screens or 300 dpi for print. Confirm your settings before exporting.
Frequently Asked Questions
How Do I Change The Color Of An Object In Photoshop?
Select the object using a selection tool. Open Hue/Saturation adjustment layer. Adjust the Hue slider to change color. Use masking for precise edits.
How To Replace A Specific Color In Photoshop?
Open Image > Adjustments > Replace Color. Use the eyedropper to select the color. Adjust Hue, Saturation, and Lightness sliders to replace it. Alternatively, use a Hue/Saturation adjustment layer or the Color Replacement Tool for more control.
What Is Ctrl +h In Photoshop?
Ctrl + H in Photoshop toggles the visibility of guides, grids, and selection edges. It hides or shows them quickly.
How Do I Selectively Change A Color In Photoshop?
Select the area with a selection tool. Open Hue/Saturation adjustment layer. Use the eyedropper to pick the color. Adjust hue slider to change the color. Mask unwanted areas for precision.
How Do I Change The Color Of An Object In Photoshop?
Select the object using a selection tool, then add a Hue/Saturation adjustment layer to change its color.
What Photoshop Tool Is Best For Selecting Objects To Recolor?
The Quick Selection Tool and the Pen Tool are great for precise object selection.
Can I Change Color Without Affecting The Background?
Yes, use layer masks to isolate the object and protect the background from color changes.
How To Adjust Color Shades Smoothly In Photoshop?
Use the Hue/Saturation sliders to fine-tune color shades with smooth transitions.
Is It Possible To Change Specific Colors Only?
Yes, the Selective Color adjustment lets you target and modify specific colors in your image.
How To Change Color Of Complex Objects With Multiple Colors?
Use layer masks and multiple adjustment layers to change colors on different parts separately.
Conclusion
Changing colors in Photoshop is simple and fun. Follow the steps carefully to get the best result. Practice helps you improve your skills quickly. Experiment with different tools to find what works for you. This guide gives you a clear path to change colors easily.
Keep exploring Photoshop to create amazing images. Your creativity is the limit.